30 | WPC | WPC cool www.stiebel-eltron.com
INSTALLATION
Installation
!
Material losses
Carry out all water connection and installation work in
accordance with regulations.
!
Material losses
The "DHW outlet" connection is pre-fitted with a plastic
union nut and a soft rubber gasket.
The torque of the plastic union nut depends on the gasket
used.
15Nm = pre-fitted soft rubber gasket.
25Nm = alternative hard gasket.
Keep to the permissible torque.
!
Material losses
Operate the appliance only with pressure-tested taps.
11.9.1 Permissible materials
Cold water line
Galvanised steel, stainless steel, copper and plastic are approved
materials.
DHW line
Stainless steel, copper and plastic pipework are approved ma-
terials.
!
Material losses
The maximum permissible pressure must not be exceed-
ed (see chapter "Specification/ Data table").
Install a type-tested safety valve in the cold water supply
line. For this bear in mind that, depending on the static pres-
sure, you may also need a pressure reducing valve.
The safety valve discharge aperture must remain open to the
atmosphere.
Install the safety valve discharge pipe with a constant fall to
the discharge outlet.
Size the discharge outlet so that water can drain off unim-
peded when the safety valve is fully opened.
Flush the pipes thoroughly.
1
26�03�01�1758
1 Drain (DHW cylinder)
Fill the DHW cylinder via the drain.
Open all downstream draw-off valves until the appliance is
full and the pipework is free of air.
Carry out a tightness check.
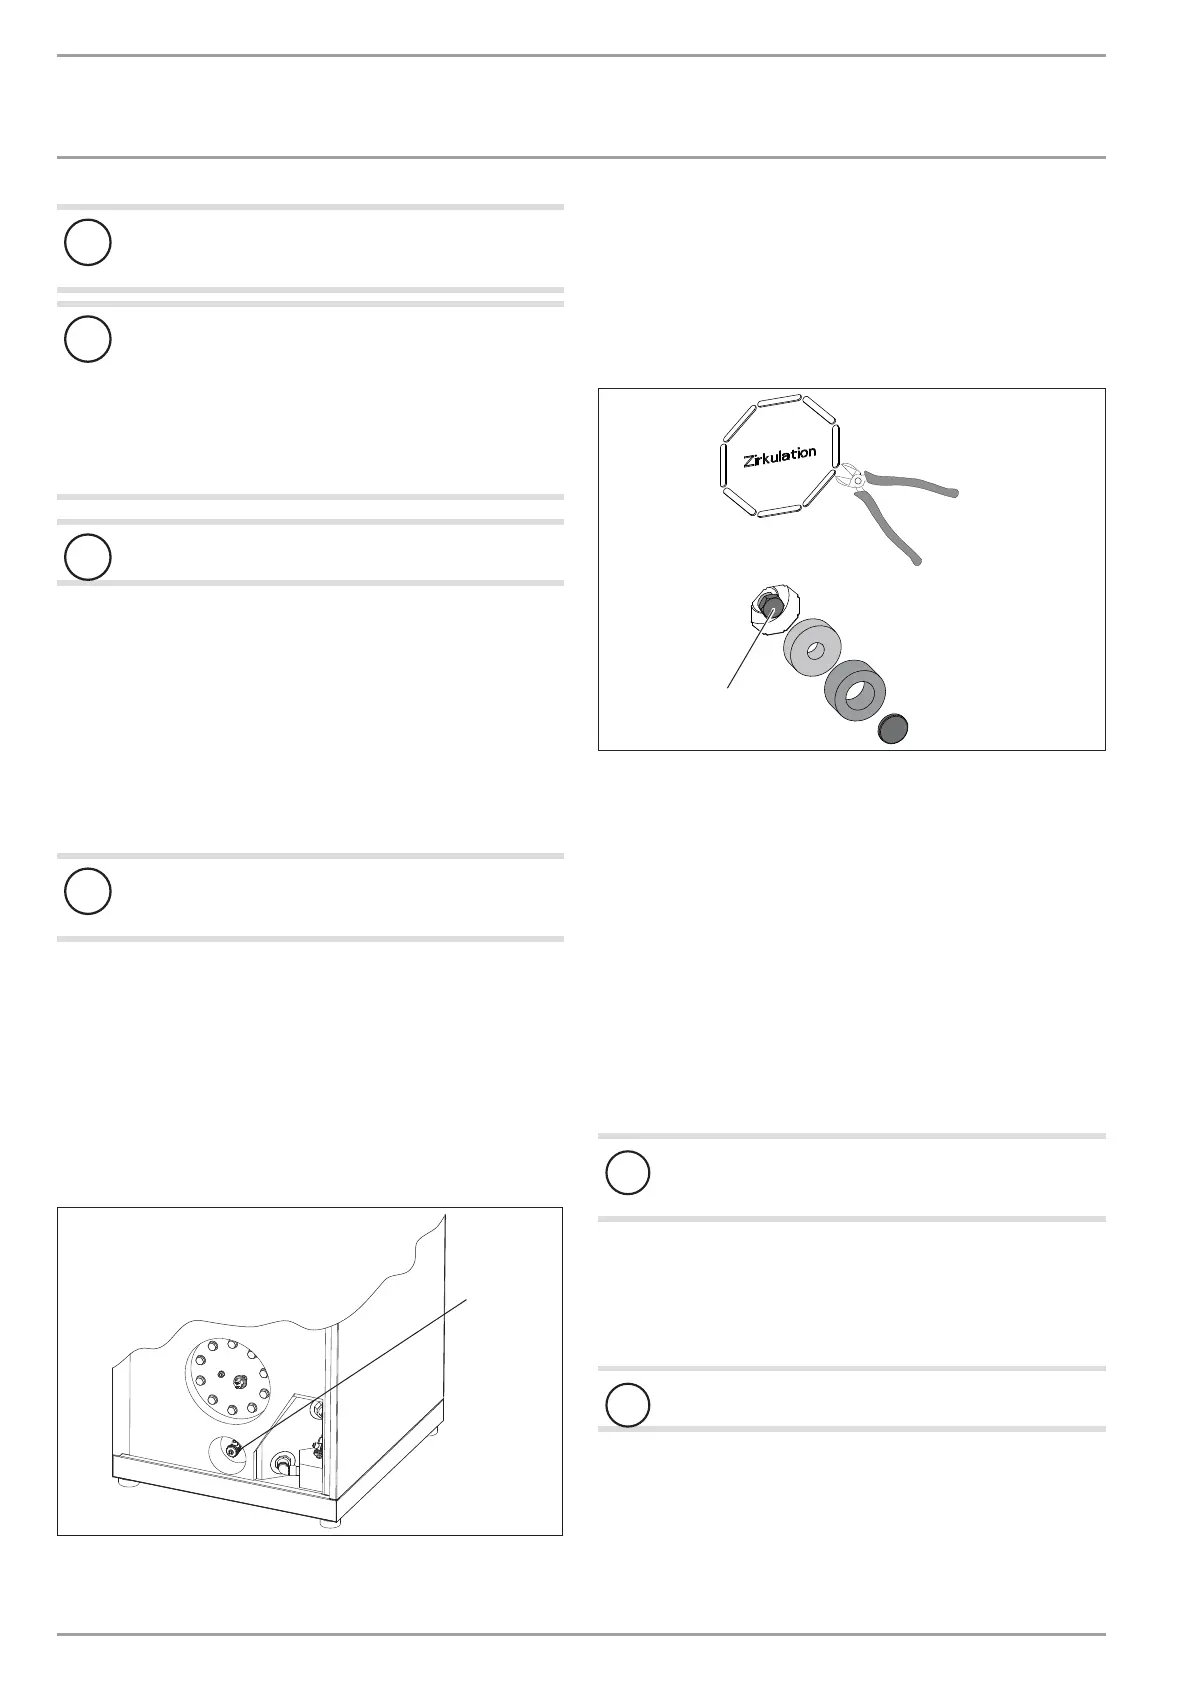
11.10 DHW circulation connection
The DHW circulation connector is located at the back of the appli-
ance (see chapter “Specification/ Dimensions and connections”)
D0000039219
1
1 Cap
Detach the panel.
Remove the foam parts.
Unscrew the cap.
Re-insert the foam parts.
Connect the DHW circulation line.
11.11 Operation with buffer cylinder
Install the TF6 return sensor supplied.
Connect the return sensor to the control panel.
At the heat pump manager, set parameter BUFFER MODE to
ON.
11.12 Fitting the push-fit connectors
!
Material losses
Tighten the screw cap of the push-fit connector by hand.
Never use a tool.
The push-fit connectors are equipped with a retainer with stain-
less steel serrations and an O-ring for sealing. In addition, they
are equipped with the "twist and lock" function. Simply turning
the screw cap by hand will secure the pipe in the connector and
push the O-ring against the pipe to seal it.
!
Material losses
Support sleeves are required when using plastic pipes.
Making the connection
The connector must be in its relaxed position before the pipe is
inserted. In this position, there is a small gap between the screw
cap and connector body.
 Loading...