0458-724-8601-A
16
English
12 Charging the Battery
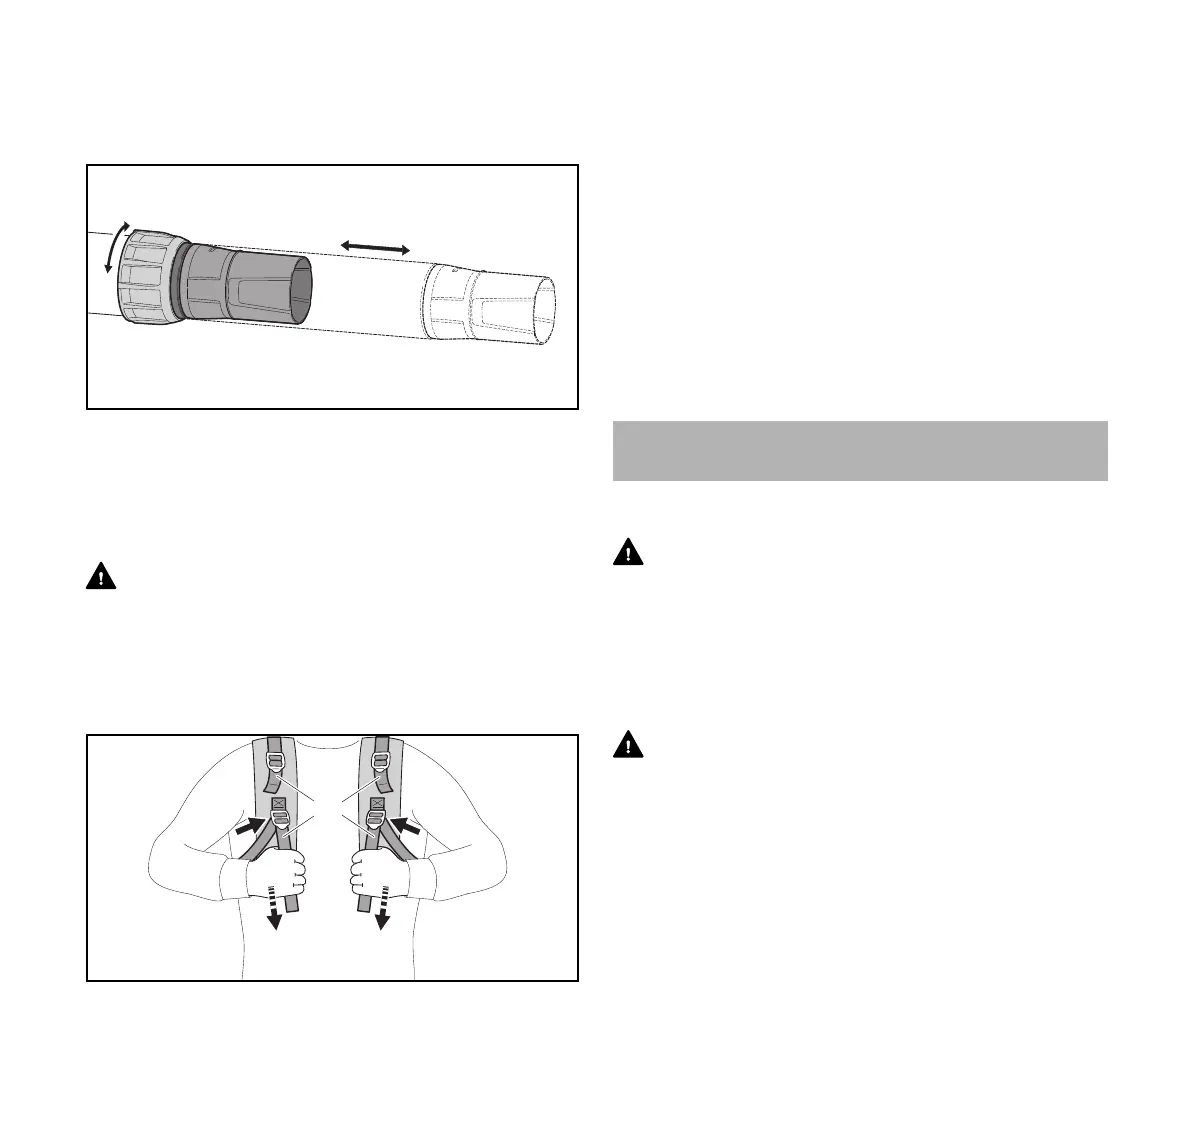
11.2 Adjusting the Blower Tube
To adjust the blower tube:
► Loosen the union nut (1).
► Pull the blower tube (2) out to the required length.
► Tighten the union nut.
11.3 Putting on the Harness
WARNING
The operator must be able to remove the blower quickly in
the event of an emergency. In an emergency, open and
remove the chest strap quickly before dropping the blower to
the ground.
To ensure a proper fit:
► Put the blower on your back.
► Adjust the harness straps (1) so that the backplate fits
snugly and securely against your back.
► Always wear the blower harness over both shoulders.
► To remove the harness, loosen the harness straps by
lifting the sliding adjusters.
To help reduce the risk of injury in the event of an
emergency, practice quickly opening the shoulder straps
and removing the blower.
NOTICE
To avoid damage, ease the blower to the ground when
practicing. Do not allow the blower to drop to the ground and
do not throw it.
12.1 Setting up the Charger
WARNING
Read and follow the safety precautions on the battery and
charger and all warnings and instructions that accompany
those products. To reduce the risk of short circuit, which
could lead to electric shock, fire and explosion, make sure
the charger and its components are dry and not damaged;
operate the charger indoors at an appropriate ambient
temperature.
WARNING
A typical household electric circuit is between 15 and 20
amps. A single STIHL AL 500 charger draws approximately
4.8 amps. A single AL 300 charger draws approximately
4.4 amps. To reduce the risk of fire from overloading an
electrical circuit:
► Ensure the electrical system is rated to withstand the
expected electrical draw before charging your battery.
► Charge multiple batteries one at a time or on separate
circuits, unless you know your circuit can handle the total
expected draw from multiple chargers.
1
0000-GXX-B943-A0
12 Charging the Battery
 Loading...