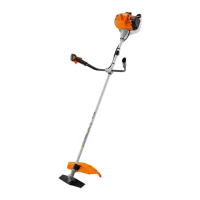
► Warm up the engine by opening and closing
the throttle for about 1 minute.
NOTICE
■ If the trimmer is again used at a low altitude,
the engine may overheat.
► Carry out the standard setting.
► Rotate the high speed screw H clockwise
until the engine delivers optimum power.
11.2 Holding and Controlling the
Trimmer
► Connect the carrying ring (2) to the carabi‐
ner (1).
► Hold the trimmer firmly with your right hand on
the control handle – wrap your thumb around
the handle.
► Hold the trimmer firmly with your the left hand
on the left handle – wrap your thumb around
the handle.
11.3 Mowing
The cutting height is determined by the distance
of the cutting attachment from the ground.
Mowing with a grass cutting blade
► Mow with the left part of the metal cutting
attachment.
► Move forward slowly in a controlled manner.
12 After Finishing Work
12.1 After Finishing Work
► Shut off the engine.
► Allow trimmer to cool down.
► If the trimmer is wet: Allow the trimmer to dry.
► Clean the trimmer.
► Clean the air filter.
► Clean the deflector.
► Clean the cutting attachment.
► If a metal cutting attachment is mounted: Fit
the matching transport guard.
13 Transporting
13.1 Transporting the Trimmer
► Shut off the engine.
► If a metal cutting attachment is mounted: Fit
the matching transport guard.
Carrying the trimmer
► Carry the trimmer properly balanced by the
drive tube with the cutting attachment behind
you.
Transporting the trimmer in a vehicle
► Secure the trimmer to prevent turnover and
movement.
14 Storing
14.1 Storing the Brushcutter
► Shut off the engine.
► If a metal cutting attachment is mounted: Fit
the appropriate transport guard.
► Ensure that the following conditions are met
when storing the brushcutter:
–
The brushcutter is out of the reach of chil‐
dren.
–
The brushcutter is clean and dry.
12 After Finishing Work English
0458-733-0121-C 15

 Loading...