18 MS 171, MS 181, MS 211
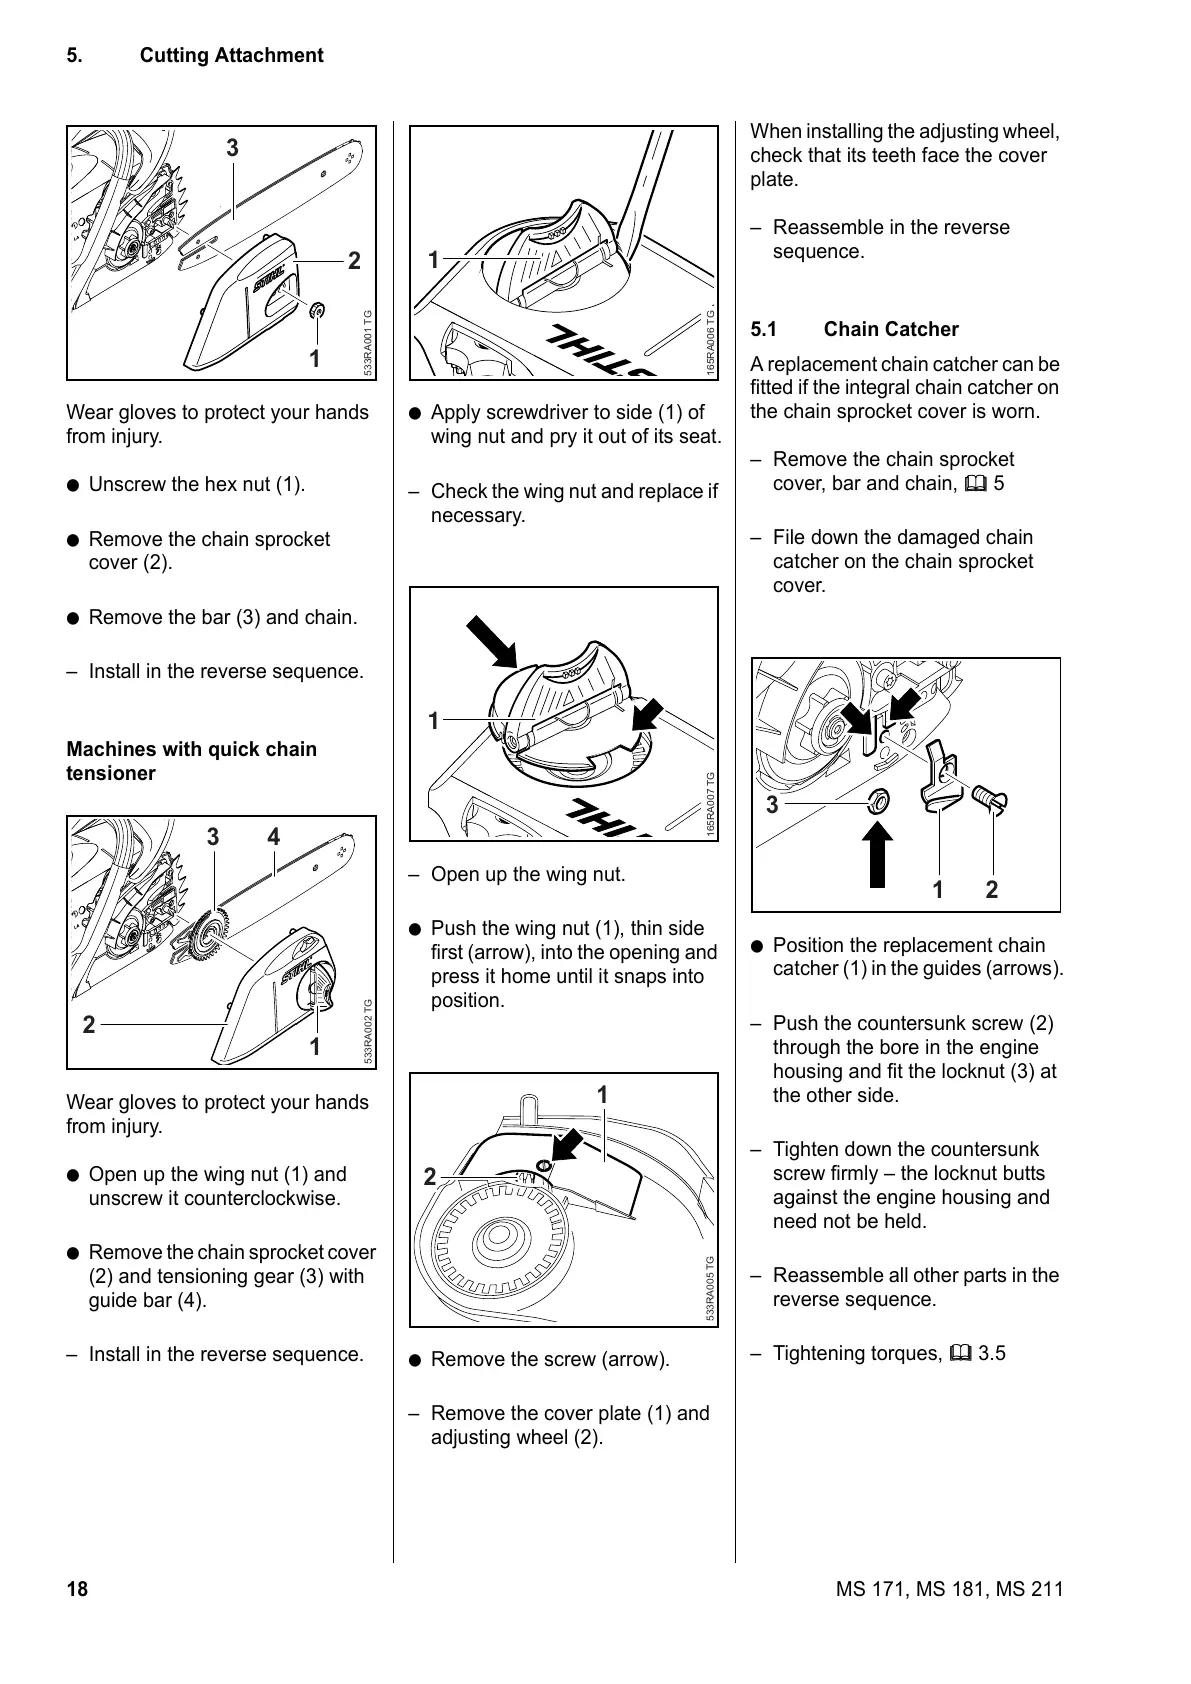
5. Cutting Attachment
Wear gloves to protect your hands
from injury.
: Unscrew the hex nut (1).
: Remove the chain sprocket
cover (2).
: Remove the bar (3) and chain.
– Install in the reverse sequence.
Machines with quick chain
tensioner
Wear gloves to protect your hands
from injury.
: Open up the wing nut (1) and
unscrew it counterclockwise.
: Remove the chain sprocket cover
(2) and tensioning gear (3) with
guide bar (4).
– Install in the reverse sequence.
2
3
1
533RA001 TG
2
4
1
533RA002 TG
3
: Apply screwdriver to side (1) of
wing nut and pry it out of its seat.
– Check the wing nut and replace if
necessary.
– Open up the wing nut.
: Push the wing nut (1), thin side
first (arrow), into the opening and
press it home until it snaps into
position.
: Remove the screw (arrow).
– Remove the cover plate (1) and
adjusting wheel (2).
1
165RA006 TG
1
165RA007 TG
2
1
533RA005 TG
When installing the adjusting wheel,
check that its teeth face the cover
plate.
– Reassemble in the reverse
sequence.
5.1 Chain Catcher
A replacement chain catcher can be
fitted if the integral chain catcher on
the chain sprocket cover is worn.
– Remove the chain sprocket
cover, bar and chain, b 5
– File down the damaged chain
catcher on the chain sprocket
cover.
: Position the replacement chain
catcher (1) in the guides (arrows).
– Push the countersunk screw (2)
through the bore in the engine
housing and fit the locknut (3) at
the other side.
– Tighten down the countersunk
screw firmly – the locknut butts
against the engine housing and
need not be held.
– Reassemble all other parts in the
reverse sequence.
– Tightening torques, b 3.5
533RA006 TG
3
1 2
 Loading...