45MS 171, MS 181, MS 211
9.6 Short Circuit Wire
9.6.1 Testing
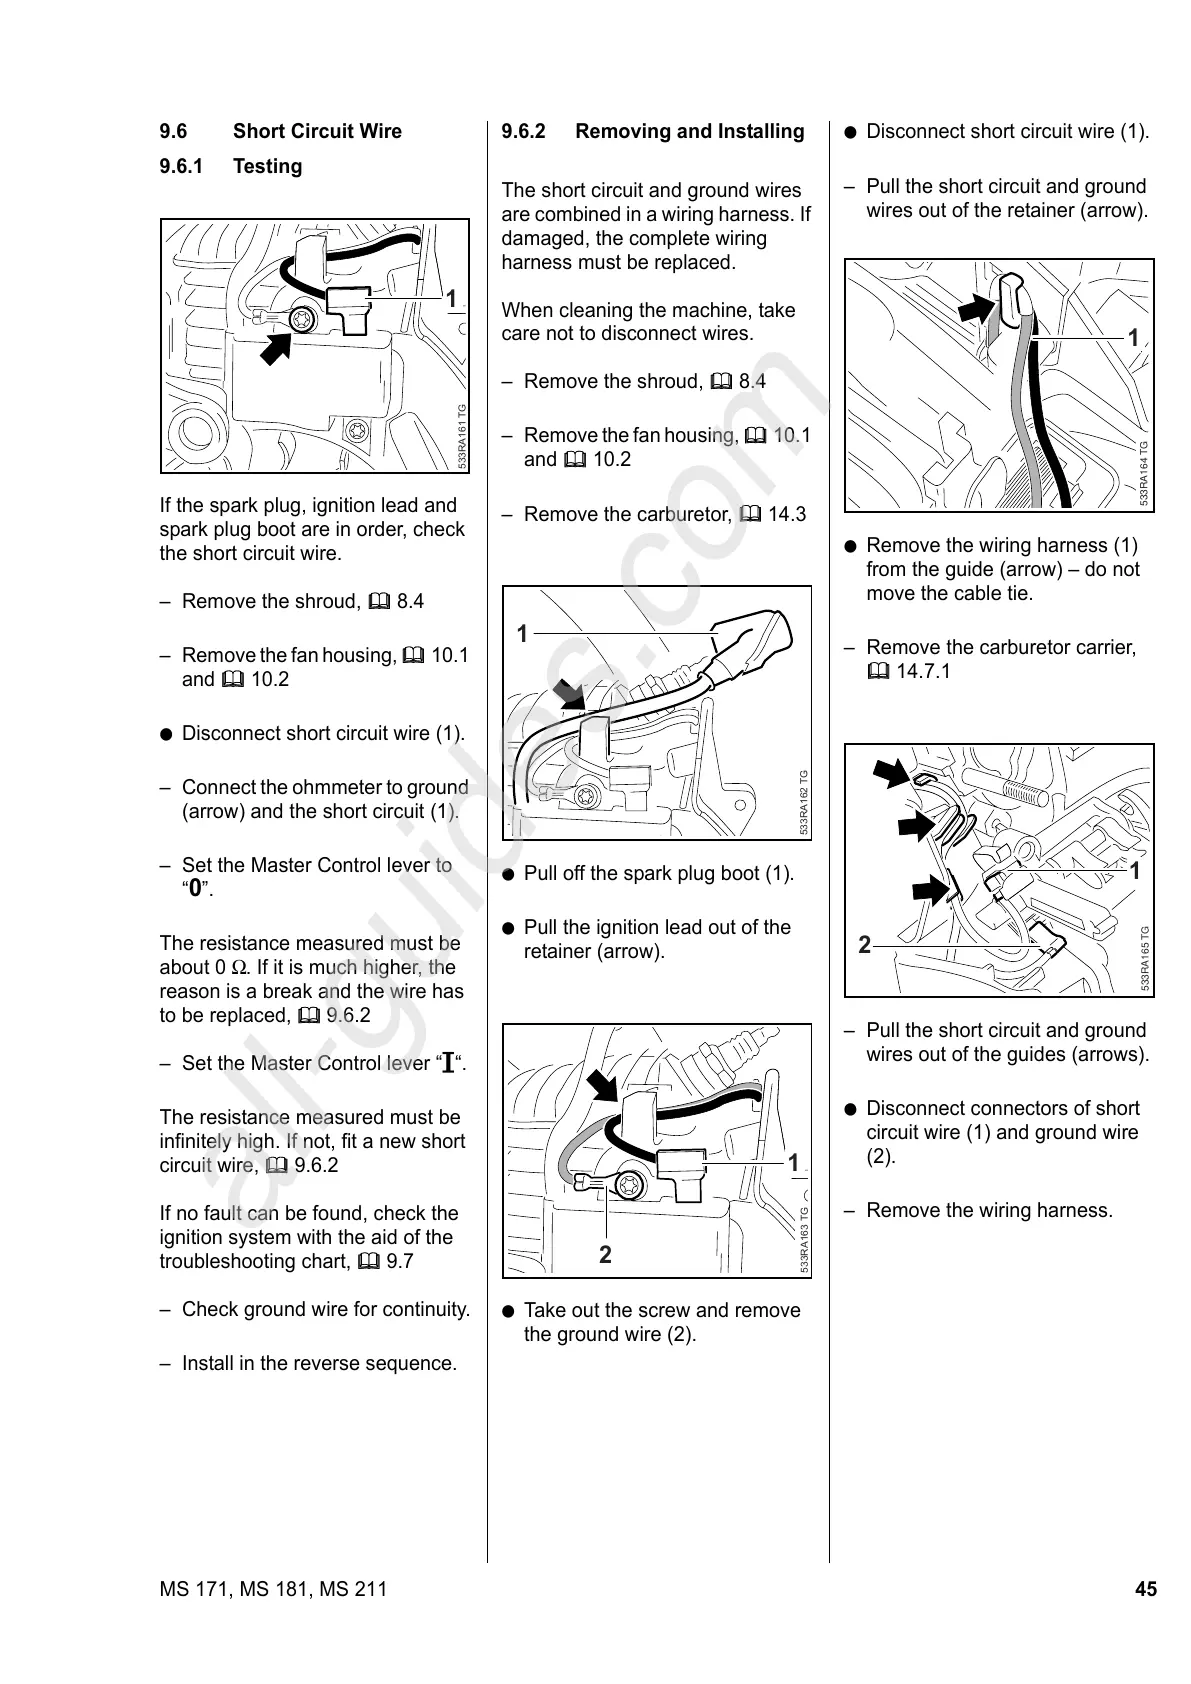
If the spark plug, ignition lead and
spark plug boot are in order, check
the short circuit wire.
– Remove the shroud, b 8.4
– Remove the fan housing, b 10.1
and b 10.2
: Disconnect short circuit wire (1).
– Connect the ohmmeter to ground
(arrow) and the short circuit (1).
– Set the Master Control lever to
“
0”.
The resistance measured must be
about 0 Ω. If it is much higher, the
reason is a break and the wire has
to be replaced, b 9.6.2
– Set the Master Control lever “#“.
The resistance measured must be
infinitely high. If not, fit a new short
circuit wire, b 9.6.2
If no fault can be found, check the
ignition system with the aid of the
troubleshooting chart, b 9.7
– Check ground wire for continuity.
– Install in the reverse sequence.
533RA161 TG
1
9.6.2 Removing and Installing
The short circuit and ground wires
are combined in a wiring harness. If
damaged, the complete wiring
harness must be replaced.
When cleaning the machine, take
care not to disconnect wires.
– Remove the shroud, b 8.4
– Remove the fan housing, b 10.1
and b 10.2
– Remove the carburetor, b 14.3
: Pull off the spark plug boot (1).
: Pull the ignition lead out of the
retainer (arrow).
: Take out the screw and remove
the ground wire (2).
533RA162 TG
1
533RA163 TG
1
2
: Disconnect short circuit wire (1).
– Pull the short circuit and ground
wires out of the retainer (arrow).
: Remove the wiring harness (1)
from the guide (arrow) – do not
move the cable tie.
– Remove the carburetor carrier,
b 14.7.1
– Pull the short circuit and ground
wires out of the guides (arrows).
: Disconnect connectors of short
circuit wire (1) and ground wire
(2).
– Remove the wiring harness.
533RA164 TG
1
533RA165 TG
1
2