75MS 171, MS 181, MS 211
: Carefully separate the metering
diaphragm (1) and gasket (2).
The diaphragm material is
subjected to continuous alternating
stresses and eventually shows
signs of fatigue, i.e. the diaphragm
distorts and swells and has to be
replaced.
– Check the metering diaphragm
for signs of damage and wear.
Install a new gasket.
– Note installed positions of
metering diaphragm (2) and
gasket (1).
: Position the gasket (1) and
metering diaphragm (2) so that
the tabs (arrows) with holes point
towards the adjusting screws.
1
533RA302 TG
2
2
533RA303 TG
1
– Position the end cover (1) so that
the lever (arrow) is opposite the
adjusting screws.
: Fit the end cover (1) carefully –
the holes must be in alignment.
: Insert the screws but do not
tighten yet.
– Check position of diaphragm and
gasket.
The edge of the end cover must be
in line with the edge of the
carburetor body (arrows).
533RA304 TG
1
533RA235 TG
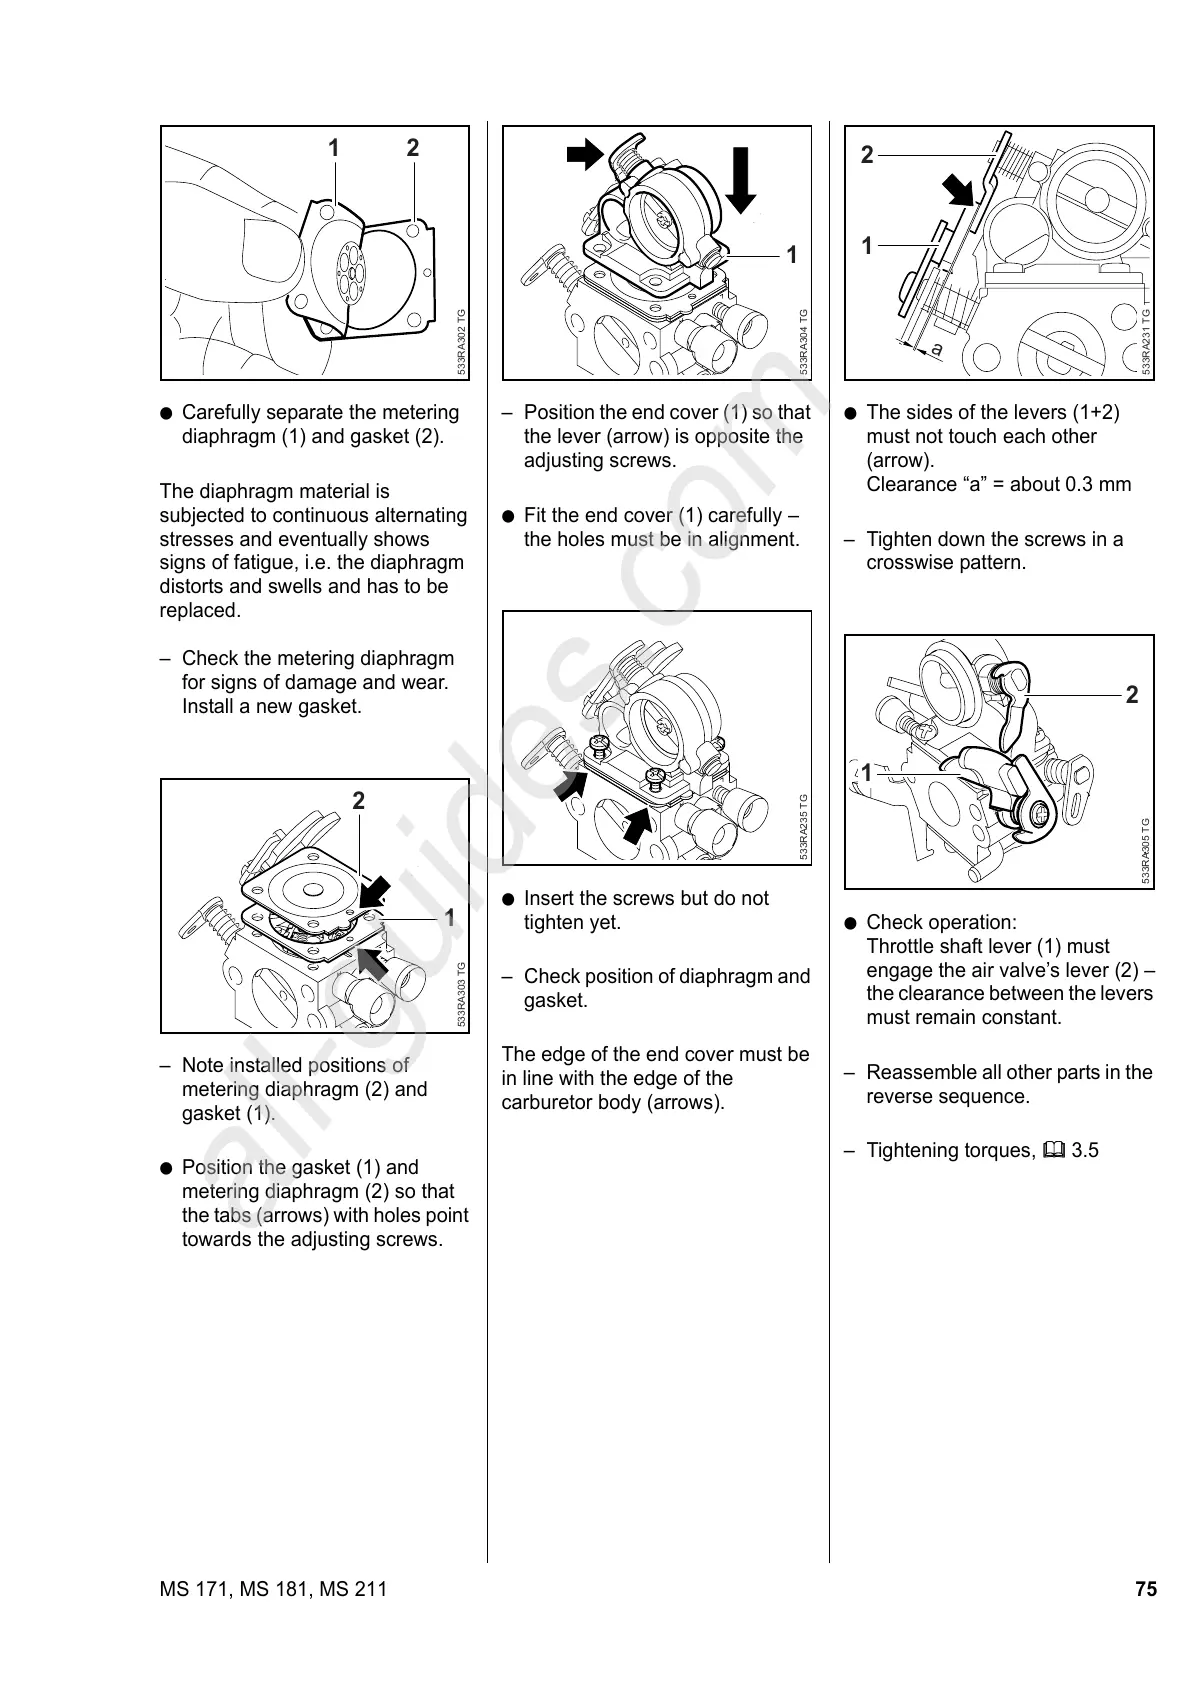
: The sides of the levers (1+2)
must not touch each other
(arrow).
Clearance “a” = about 0.3 mm
– Tighten down the screws in a
crosswise pattern.
: Check operation:
Throttle shaft lever (1) must
engage the air valve’s lever (2) –
the clearance between the levers
must remain constant.
– Reassemble all other parts in the
reverse sequence.
– Tightening torques, b 3.5
533RA231 TG
a
2
1
2
1
533RA305 TG