41MS 231, MS 231 C, MS 251, MS 251 C
: Apply a bead of sealant to the
engine pan so that it is about 2 –
3 mm high (a).
Make sure the sealant does not
project into the crankcase.
: Apply sealant to the groove in the
sealing face, b 14
Do not coat oil seals with sealant.
: Position the engine pan (1) so
that the tab (2) lines up with the
shoulder (3) on the cylinder.
a
938RA098 TG
2310RA111 TG2310RA112 TG
1
3
2
: Place the engine pan (1) on the
cylinder's sealing face.
– Press the engine pan carefully
into position so that the sealant is
evenly distributed.
Take care not to damage the
crankshaft stubs.
– Install the engine, b 6.5
6.7 Bearings / Crankshaft
– Remove the engine, b 6.5
– Remove the crankshaft and pull
off the oil seals, b 6.6
– Remove the piston, b 6.8
: Pull out the needle cage (1),
check it and replace if necessary.
2710RA113 TG
1
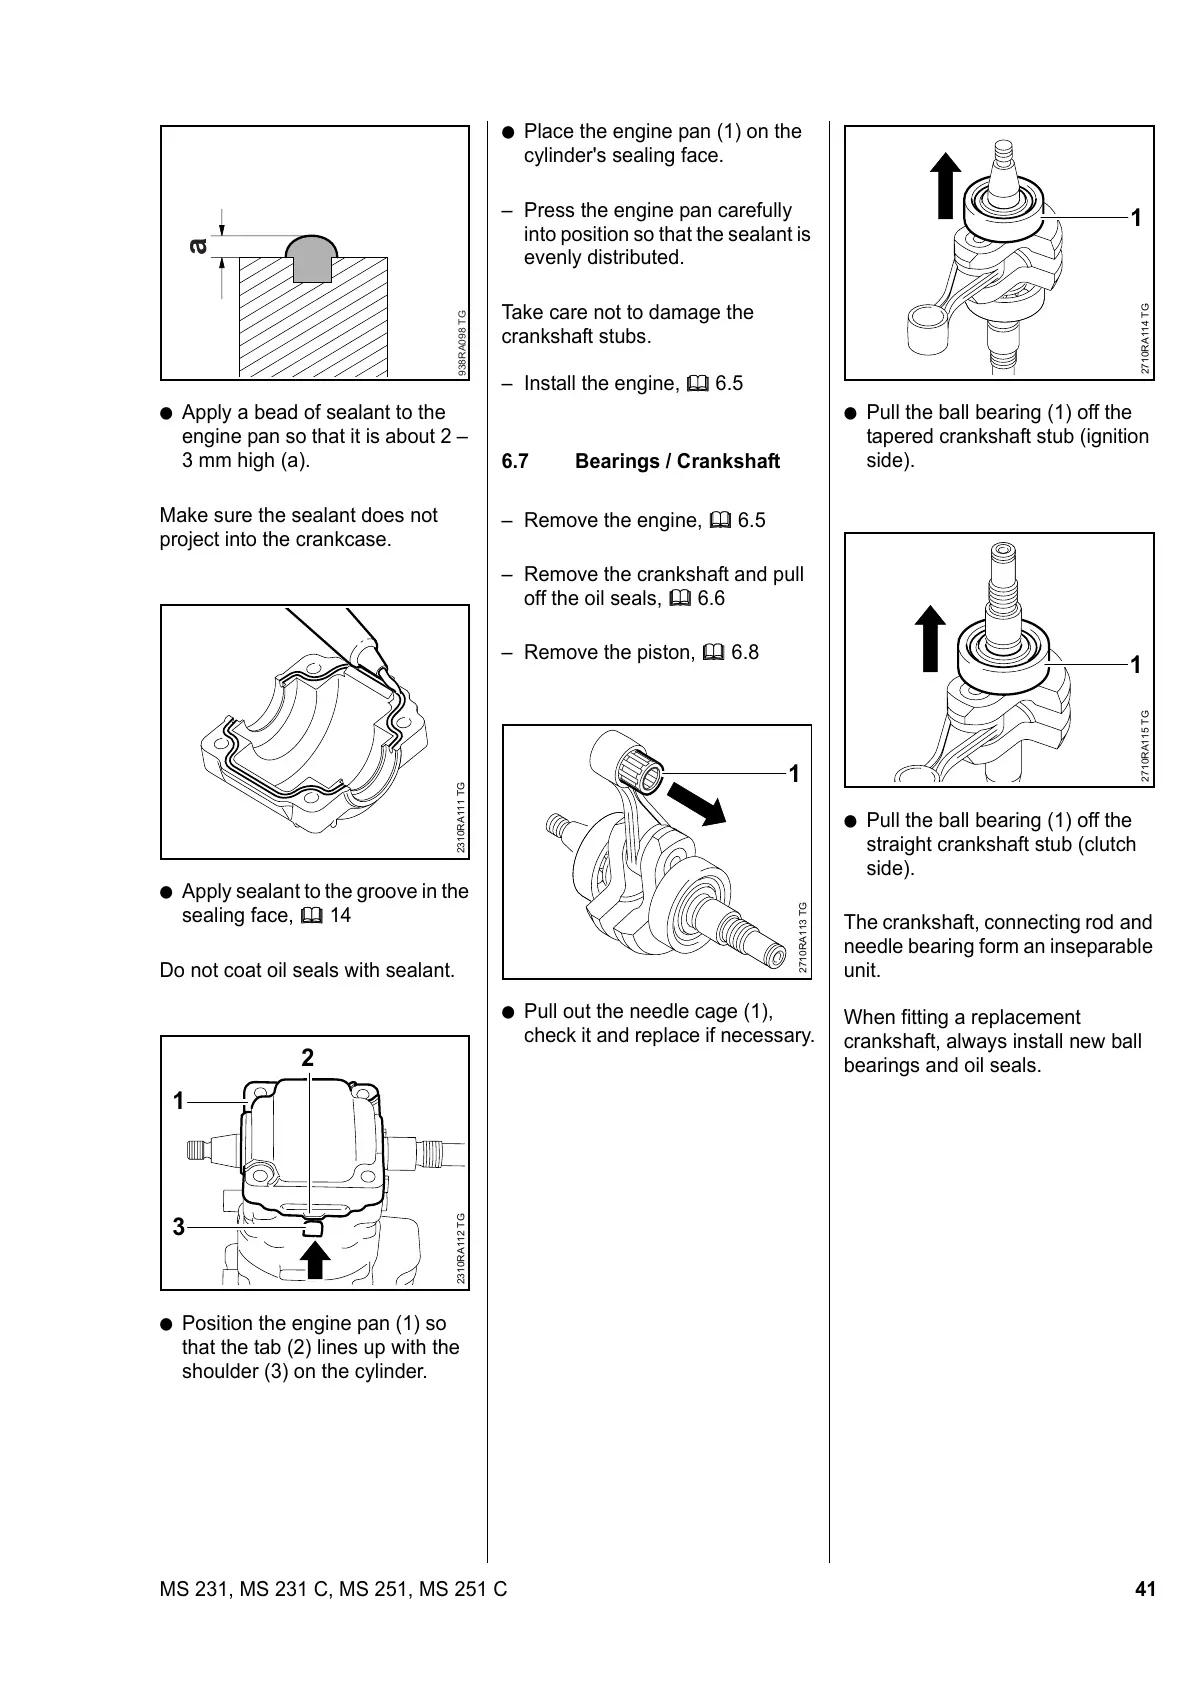
: Pull the ball bearing (1) off the
tapered crankshaft stub (ignition
side).
: Pull the ball bearing (1) off the
straight crankshaft stub (clutch
side).
The crankshaft, connecting rod and
needle bearing form an inseparable
unit.
When fitting a replacement
crankshaft, always install new ball
bearings and oil seals.
2710RA114 TG
1
2710RA115 TG
1

 Loading...