V 11/17
55
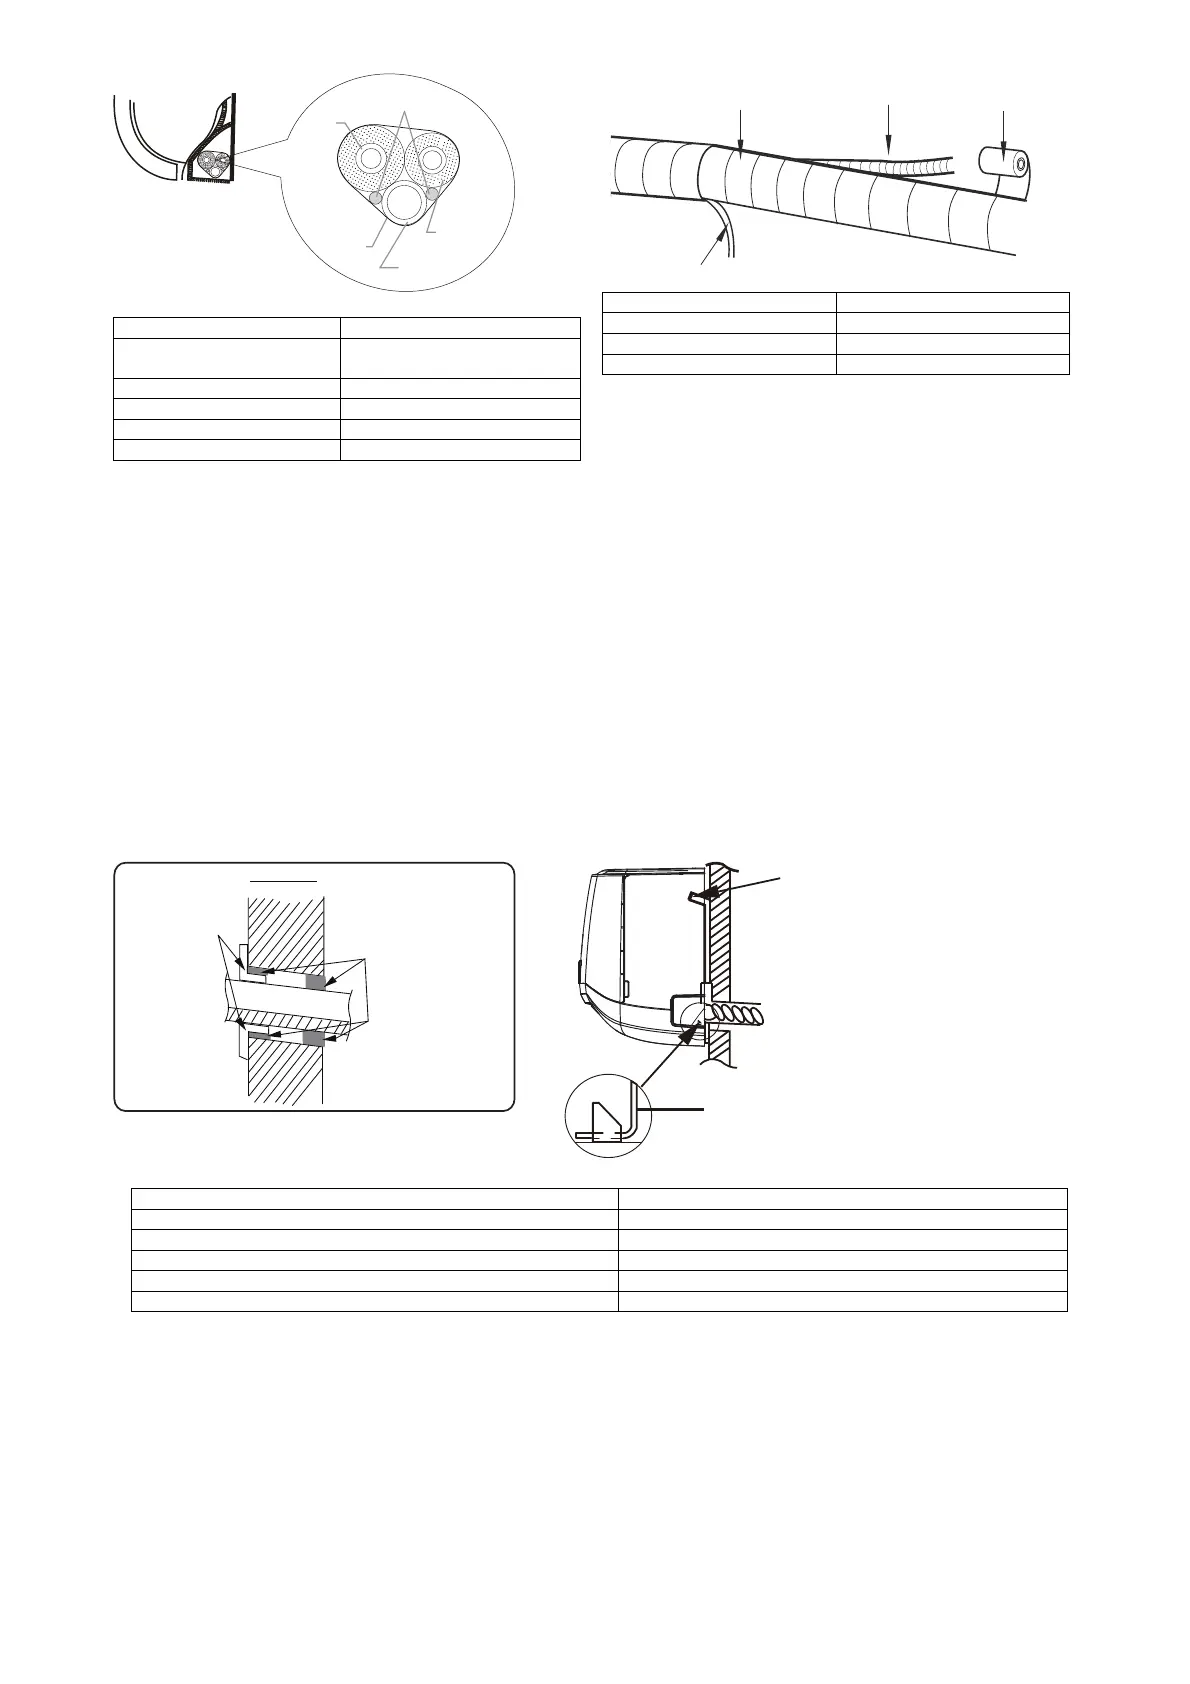
unitàinterna indoorunit
cavodialimentazioneinterno
edesterno
indoorandoutdoorpowercable
tubogas gaspipe
fascetta bindingtape
tubodiscarico drainpipe
tubodelliquido liquidpipe
tubodicollegamento connectingpipe
tubodiscarico drainpipe
fascetta bindingtape
cavodialimentazioneinterno Indoorpowercable
3. Bind them evenly.
4. The liquid pipe and gas pipe must be bound
separately at the end.
2. Reserve a section of the drain pipe and
power cable for installation when binding. When
you have bound up to a certain point, separate
the indoor power cable and then the drain pipe.
N.B.:
The power cable and signal control cable must
not be rolled or coiled.
The drain pipe must be bound at the bottom.
Step nine: hang the indoor unit
1. Insert the bound pipes into the wall pipe and route them through the hole in the wall.
2. Hang the indoor unit on the wall-installation plate.
3. Fill the gap between the pipes and the hole in the wall with sealant.
4. Secure the wall pipe.
5. Check that the indoor unit is securely installed and flush against the wall.
interno indoors
esterno outdoors
tuboaparete wallpipe
gommadisigillatura rubbersealant
ganciosuperiore upperhook
gancioinferioredeltelaiodimontaggioaparete lowerhookofwall‐installationframe
N.B.:
• Avoid bending the drain pipe too much in order to prevent clogging.
unità
interna
tubo
gas
cavo di alimentazione
interno ed esterno
tubo del
liquido
tubo di
scarico
fascetta
tubo di scarico
tubo di collegamento
cavo di alimentazione interno
fascetta
interno
esterno
tubo a
parete
gomma di
sigillatura
gancio superiore
gancio inferiore del telaio
di montaggio a parete


 To Next Page