V 11/17
56
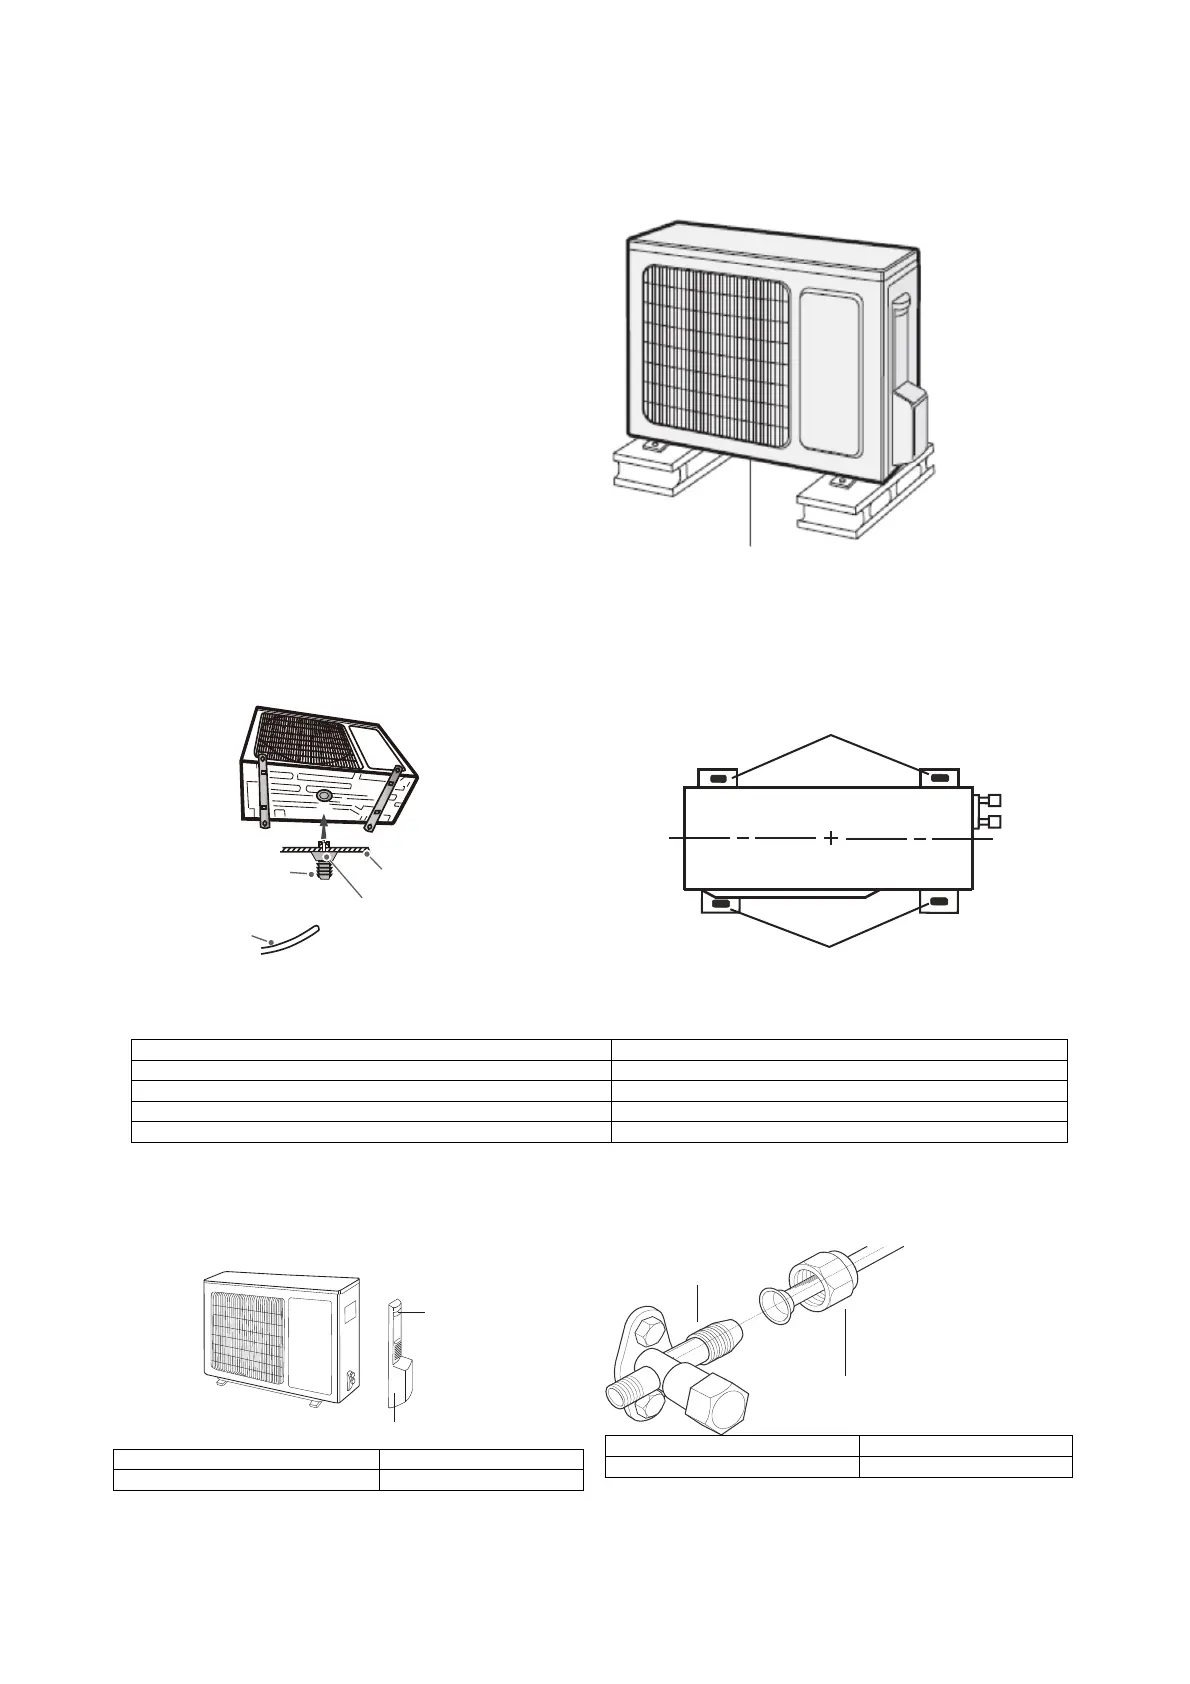
Outdoor unit installation
Step one: secure the outdoor unit support
1. Choose a location for the unit according to the structure of the house.
2. Use expansion screws to secure the outdoor unit support in the chosen position.
N.B.:
• Take the appropriate safety measures when
installing the outdoor unit.
• Make sure that the bracket can support at
least four times the weight of the unit.
• The outdoor unit must be connected at least
3 cm above the ground in order to install the
drain joint.
• Units with a cooling capacity of 2300 W –
5000 W require 6 expansion screws; units with
a cooling capacity of 6000 W – 8000 W require
8 expansion screws; units with a cooling
capacity of 10000 W – 16000 W require 10
expansion screws.
at least 3 cm above the ground
Step two: install the drain joint
1. Connect the outdoor drain joint into the hole
on the chassis, as shown below.
2. Connect the drain hose into the drain hole.
Step three: secure the outdoor unit
1. Position the outdoor unit on the support.
2. Secure the foot holes of the outdoor unit with
bolts.
forodiscarico drainhole
tubodiscarico drainpipe
chassis chassis
giuntodiscaricoesterno outdoordrainjoint
Foripiedini footholes
Step four: connect the indoor and outdoor pipes
1. Remove the screw on the right-hand handle
of the outdoor unit and remove the handle.
vite screw
impugnatura handle
3. Pre-tighten the union nut by hand.
Giunto tubo pipejoint
dadoraccordo unionnut
2. Remove the screw cap of the valve and
position the pipe joint in the bellmouth of the
pipe.
4. Tighten the union nut with the wrench
according to the following table.
chassis
giunto di
scarico esterno
tubo di scarico
foro di
scarico
fori piedini
fori piedini
impugnatura
vite
dado raccordo
giunto tubo
 Loading...