2
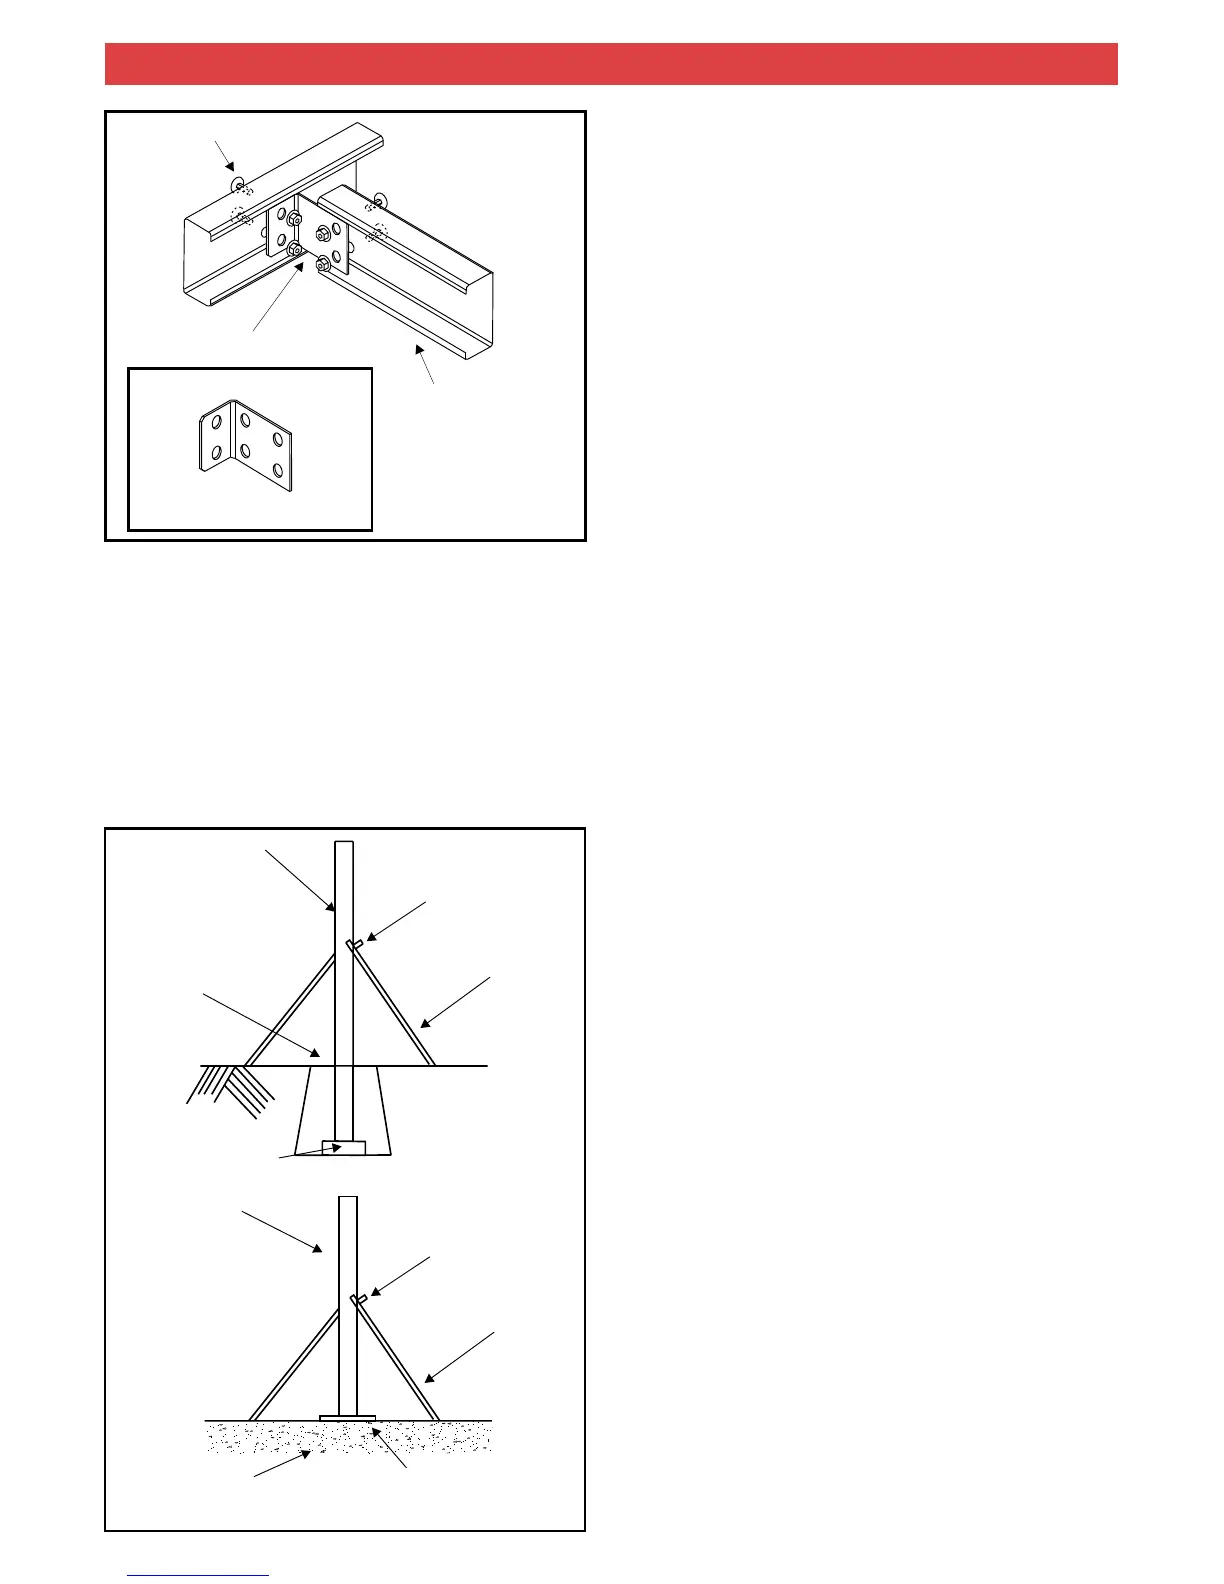
BRACES
BRICK
POST
PRE-DUG HOLE
CLAMP
4A
POST
CLAMP
BRACES
CONCRETE
FOOTING
PLATE
4B
Note:
Note:
The type of carport will determine whether or not
intermediate beams and purlins are present. Figure 1
indicates how to identify intermediate beams and purlins.
Before predrilling any holes it is recommended a
smaller pilot hole be drilled to make the job easier.
Stand the posts in the appropriate footing locations and
brace in position with clamps and struts (Figure 4).
3.2 POSTS
Note:
Note:
Note:
Note:
For in concrete carports, posts need to be cut to allow
for a 1° fall towards the gutter and downpipe end.
For on concrete carports, two different post heights
will have been supplied to allow for a slight fall toward one
end of the unit at which the gutter and downpipe will be
located. Ensure that the two posts at each end of the unit
are the same height and that the gutter and downpipe will
be located in the correct location.
Bolt holes should have been pre-drilled at the ends of the
perimeter beams.
Lift the perimeter beams into place and support on
adjustable construction props. Bolt these beams to the
posts using the M12 bolts and washers supplied (Figure 2).
The side beams should sit on the inside face of the
posts while the front and rear beams should sit on the
outside face of the posts.
If intermediate beams and purlins are required, bolt holes
should have been pre-drilled at each end to match those
already present in the supplied angle brackets. Attach an
angle bracket to each end of the intermediate beams and
purlins using the M10 bolts and washers supplied (Figure
3). If General Purpose brackets have been supplied, use
M12 bolts and washers.
The supplied drawing will indicate the location of all internal
beams. Lift into position and support on adjustable
construction props
Drill 11mm holes (14mm for General Purpose Bracket) at
the appropriate locations in the adjoining beams to match
the hole locations in the angle brackets. Bolt together using
the M10 bolts and washers supplied (Figure 3) or M12 bolts
and washers for General Purpose Bracket (Figure 3).
Now that the basic framework has beam erected, check all
dimensions are correct and the diagonals for squareness.
Check that the columns are in line and plumb and that the
falls are correct for roof and gutter.
Concrete the footings and leave overnight to cure.
The concrete should be finished slightly raised
towards the column, ensuring water runs away from the
column (Figure 5).
3.3 PERIMETER BEAMS
3.4 INTERMEDIATE BEAMS AND PURLINS
4.0 FOOTINGS
4.1 IN GROUND FOOTING
3
INTERMEDIATE BEAM
ANGLE BRACKET
M10 BOLTS & WASHERS
GENERAL PURPOSE BRACKET MAY BE
USED WITH M12 BOLTS & WASHERS
ALTERNATIVELY,