©Copyright 2021 Strava Solutions, LLC All rights reserved
PAGE: 11
UV Ballast Replacement:
If the UV bulb has been replaced and the UV system is still not working, the
next step is to replace the UV ballast.
A UV Ballast Assembly Kit is needed to perform this operation.
UV Ballast Assembly Kit: REF 200.301
Kit consists of UV ballast, bulb harness and two wire ties.
Step 1: Dismantle the splint bath
• Unplug splint bath from wall
• Find a soft surface to put splint bath on
• Tape glass lid closed
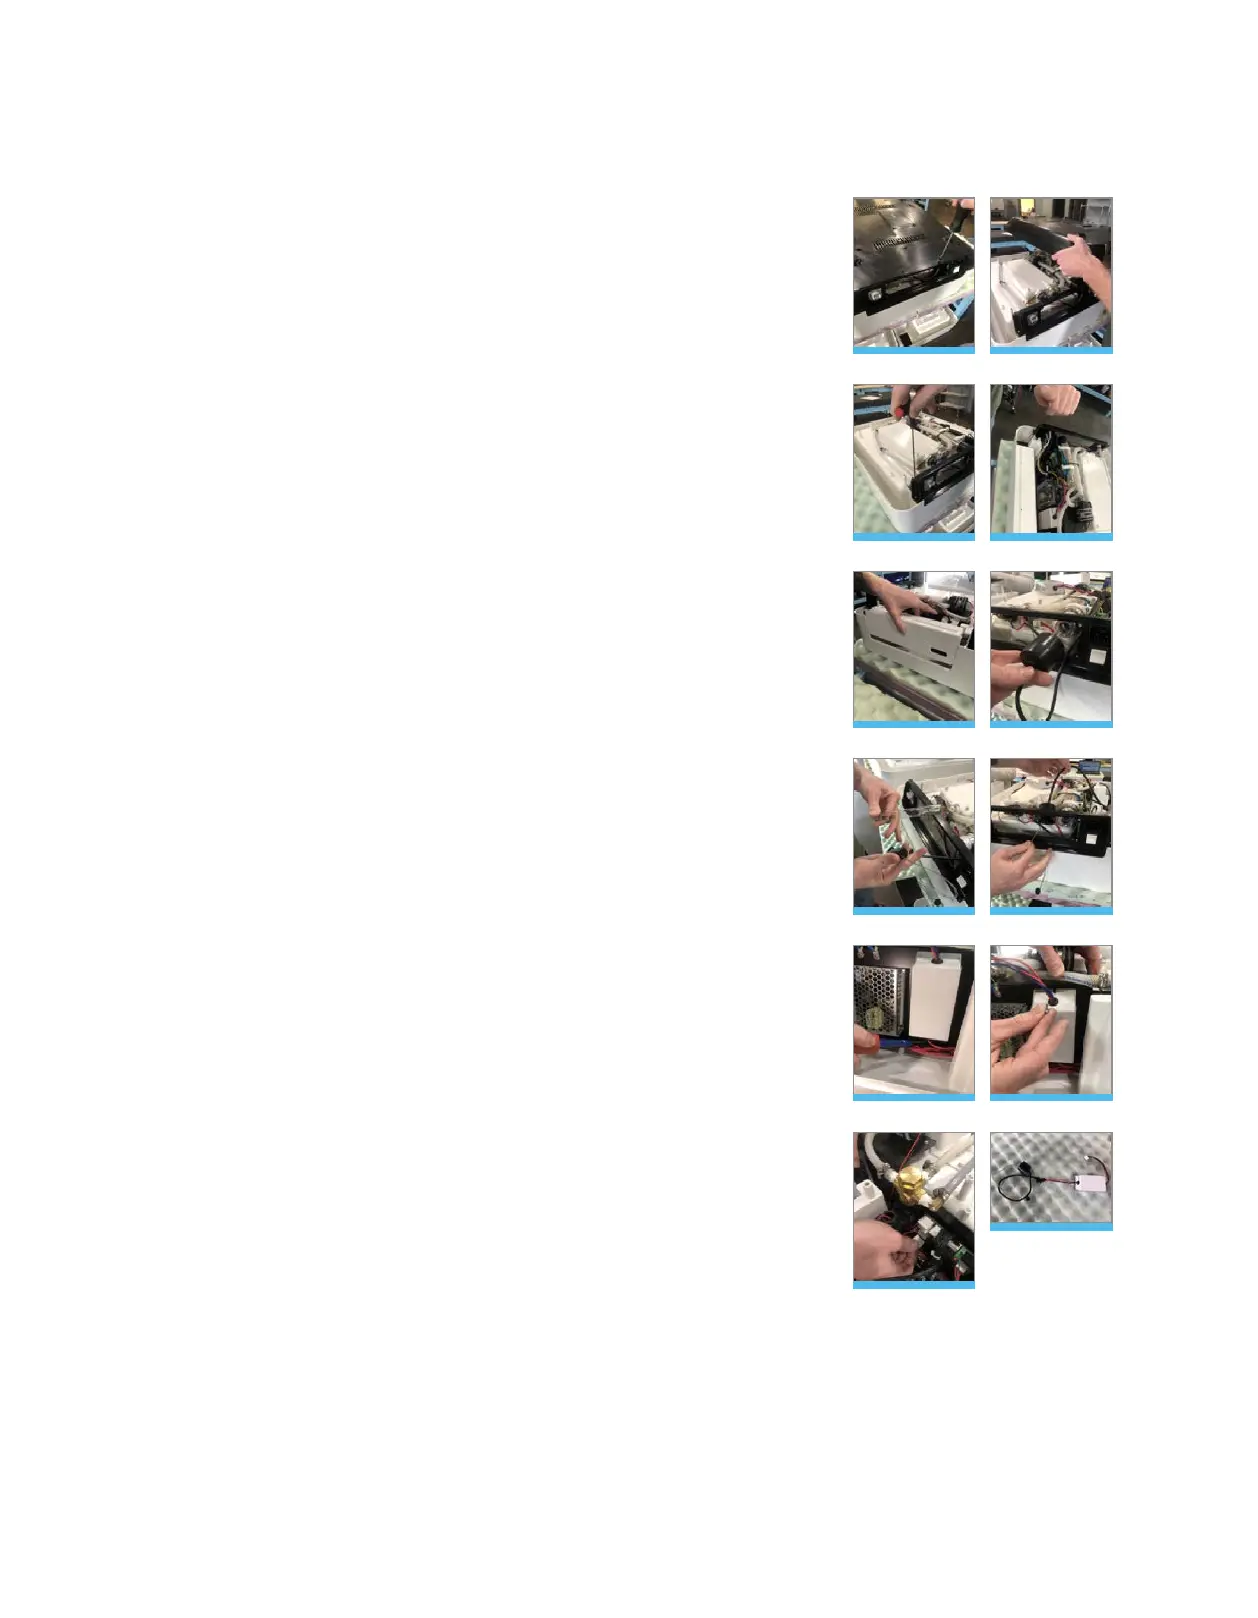
• Turn splint pan upside down and gently lay unit on its face, ensuring
that glass lid stay intact. Figure 12
• Use a 3/32” allen head or #2 Phillips screwdriver, remove all (13)
screws from black base pan and place to the side. Figure 13
• Once base pan is removed, use a 3/32” allen wrench to remove the
two screws off of the back panel. Figure 14
• Remove the two screws from the scissor draw with a 3/32” allen
wrench. Figure 15
• Lift the scissor drawer out of chassis, providing access to the
internal control panel. Figure 16
Step 2: Remove the old UV ballast
• Pull out the existing UV bulb from the UV housing and unplug it from
the harness. Set aside. Harness will hang freely. Figure 17 & 18
• Remove the two wire ties at the front and back of the UV housing.
• Feed the UV harness back through back panel. Figure 19
• Loosen the bottom ballast screw with a #1 Phillips screwdriver with
two turns ONLY. Completely remove the top ballast screw to release
the ballast. Figure 20 & 21
• Rest ballast on top of the control panel.
• Follow the wire harness from the ballast to the bottom of the control
panel. Cut the wire tie there, freeing the ballast harness.
• Trace the ballast wire harness to the #3 terminal (from top) on the
PCB control board. Figure 22
• Firmly grasp all wires on #3 terminal with fingers and pull straight out.
• Ballast assembly is now free from the unit (ballast + harness.)
Figure 23
Figure 12
Figure 18
Figure 14
Figure 20
Figure 16
Figure 22
Figure 13
Figure 19
Figure 15
Figure 21
Figure 17
Figure 23



 To Next Page