Theme 22 Issue 2.1 09/07/01 Page 7 of 12
Placing the coals
Refer to Figs. 8
1. Place 7 large coals on the rear shelf to make row 1.
2. Place 7 large coals across the front of the fire to form row 4.
3. Place the remaining 5 large coals above and behind row 4 to make row 3.
4. Take the 2 small coals and place one at each end of row 3.
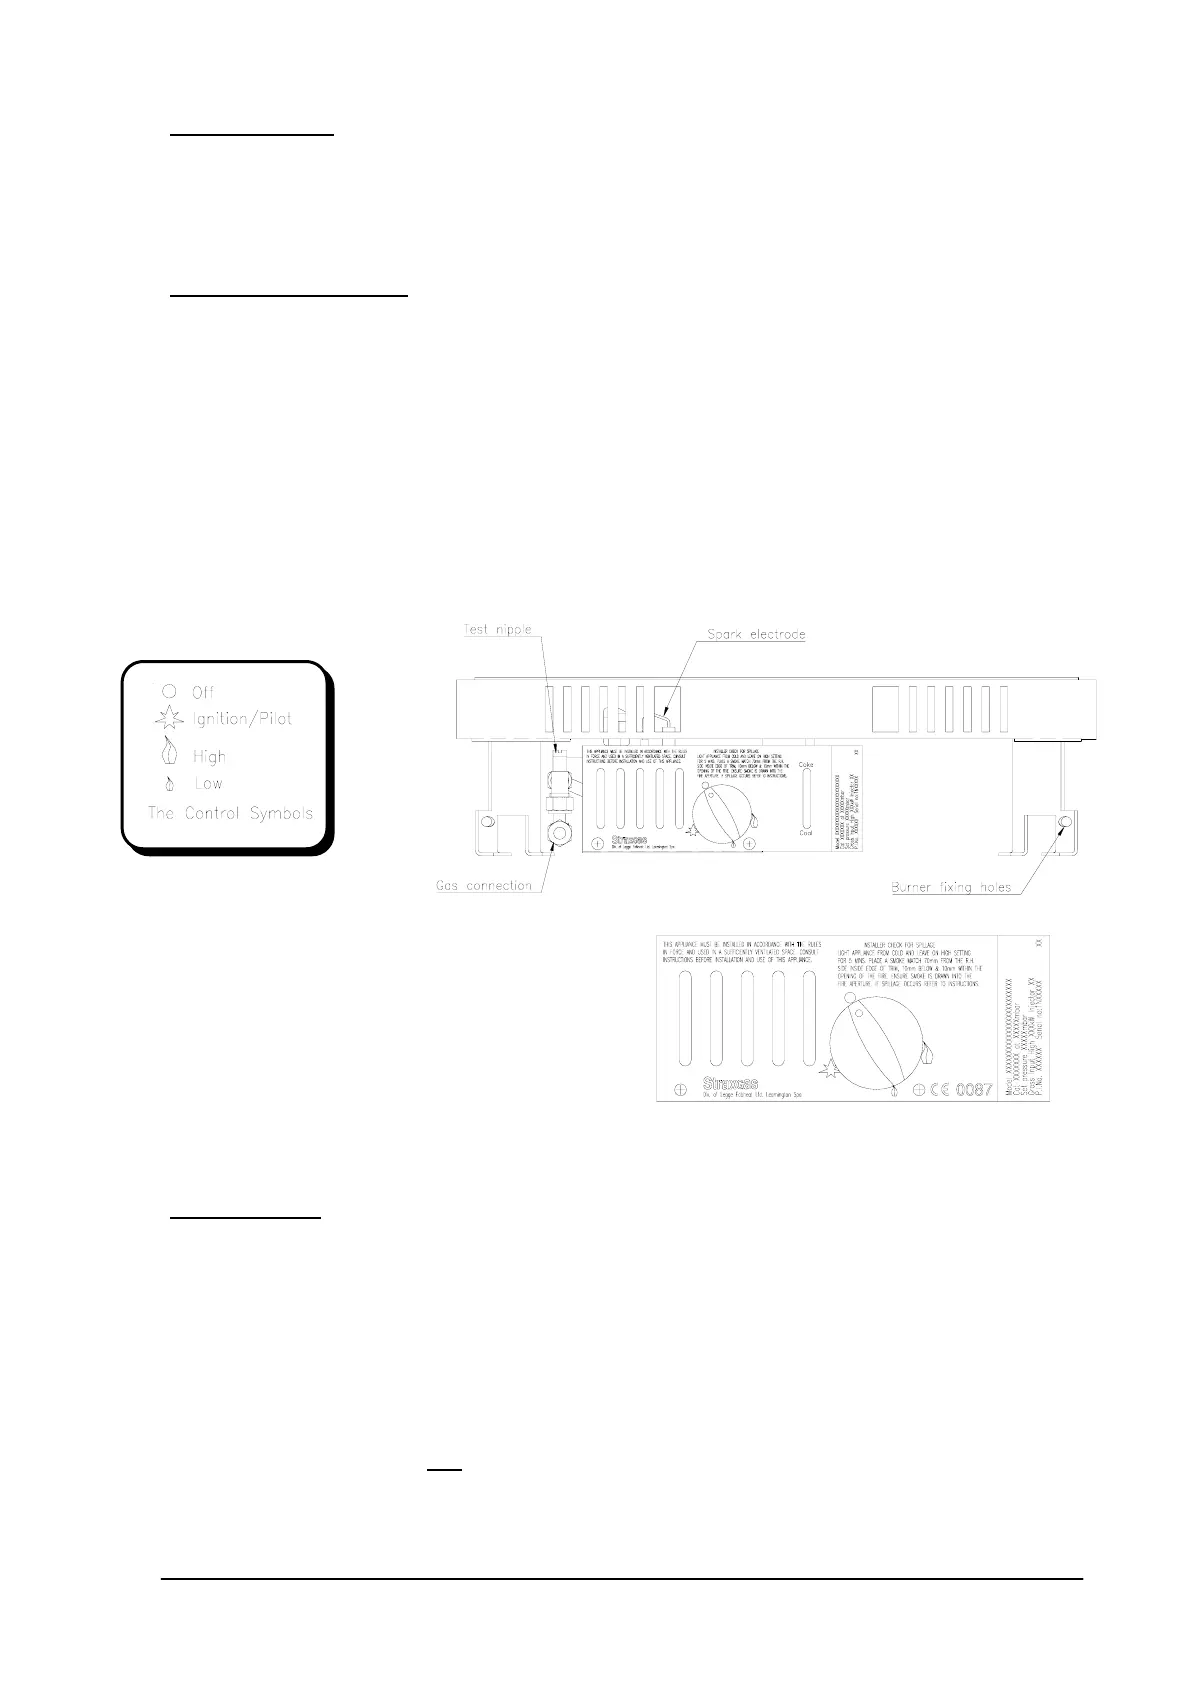
Leak test & pressure test
1. Turn on the main gas supply and check for gas soundness.
2. Remove pressure test screw, and fit pressure gauge to pressure test point.
3. Light the fire (see next section).
4. Turn control knob anti-clockwise to High position.
5. When the control knob is in the High position, you should have a gas pressure of
18.0mbar ± 1.0mbar when using natural gas and 36.0mbar for propane.
6. Extinguish the fire by turning the control knob clockwise to the Off position.
7. Remove the pressure gauge and replace the pressure test screw. Check again for gas
soundness.
8. Fit the front fret by hooking the support lugs at each end over the slotted front plate on
the burner (if using a Straxgas fret), or place an alternative front fret in front of the
burner.
Note: If a fret from another manufacturer is being used, it must comply with the minimum free
area requirements of Fig. 1.
Lighting the fire
The appliance Data Badge is positioned in front of the burner behind the fret and carries the
control knob positions (Fig. 9 or 10 depending on gas type). The full lighting procedure is as
follows:
1. Push control knob in as far as possible on gas control.
2. Turn knob anti-clockwise until a click is heard. The knob will stop at the ignition position
and a spark should be seen at the tip of the ignition probe. At the same time the pilot
flame should light. KEEP THE KNOB PRESSED IN FOR 10 SECONDS. If the pilot
should fail to light, turn the control knob clockwise to the 'off' position, wait 3 minutes
and repeat the procedure.
3. When the pilot flame is alight the control knob should be allowed to spring out slightly.
Turn the knob fully anti-clockwise to the high position. The pilot flame should then ignite
the main fire.
Fig. 9 The data badge plate & test nipple
Fig.10 Data badge plate - propane version