5
Assemble Display Bracket
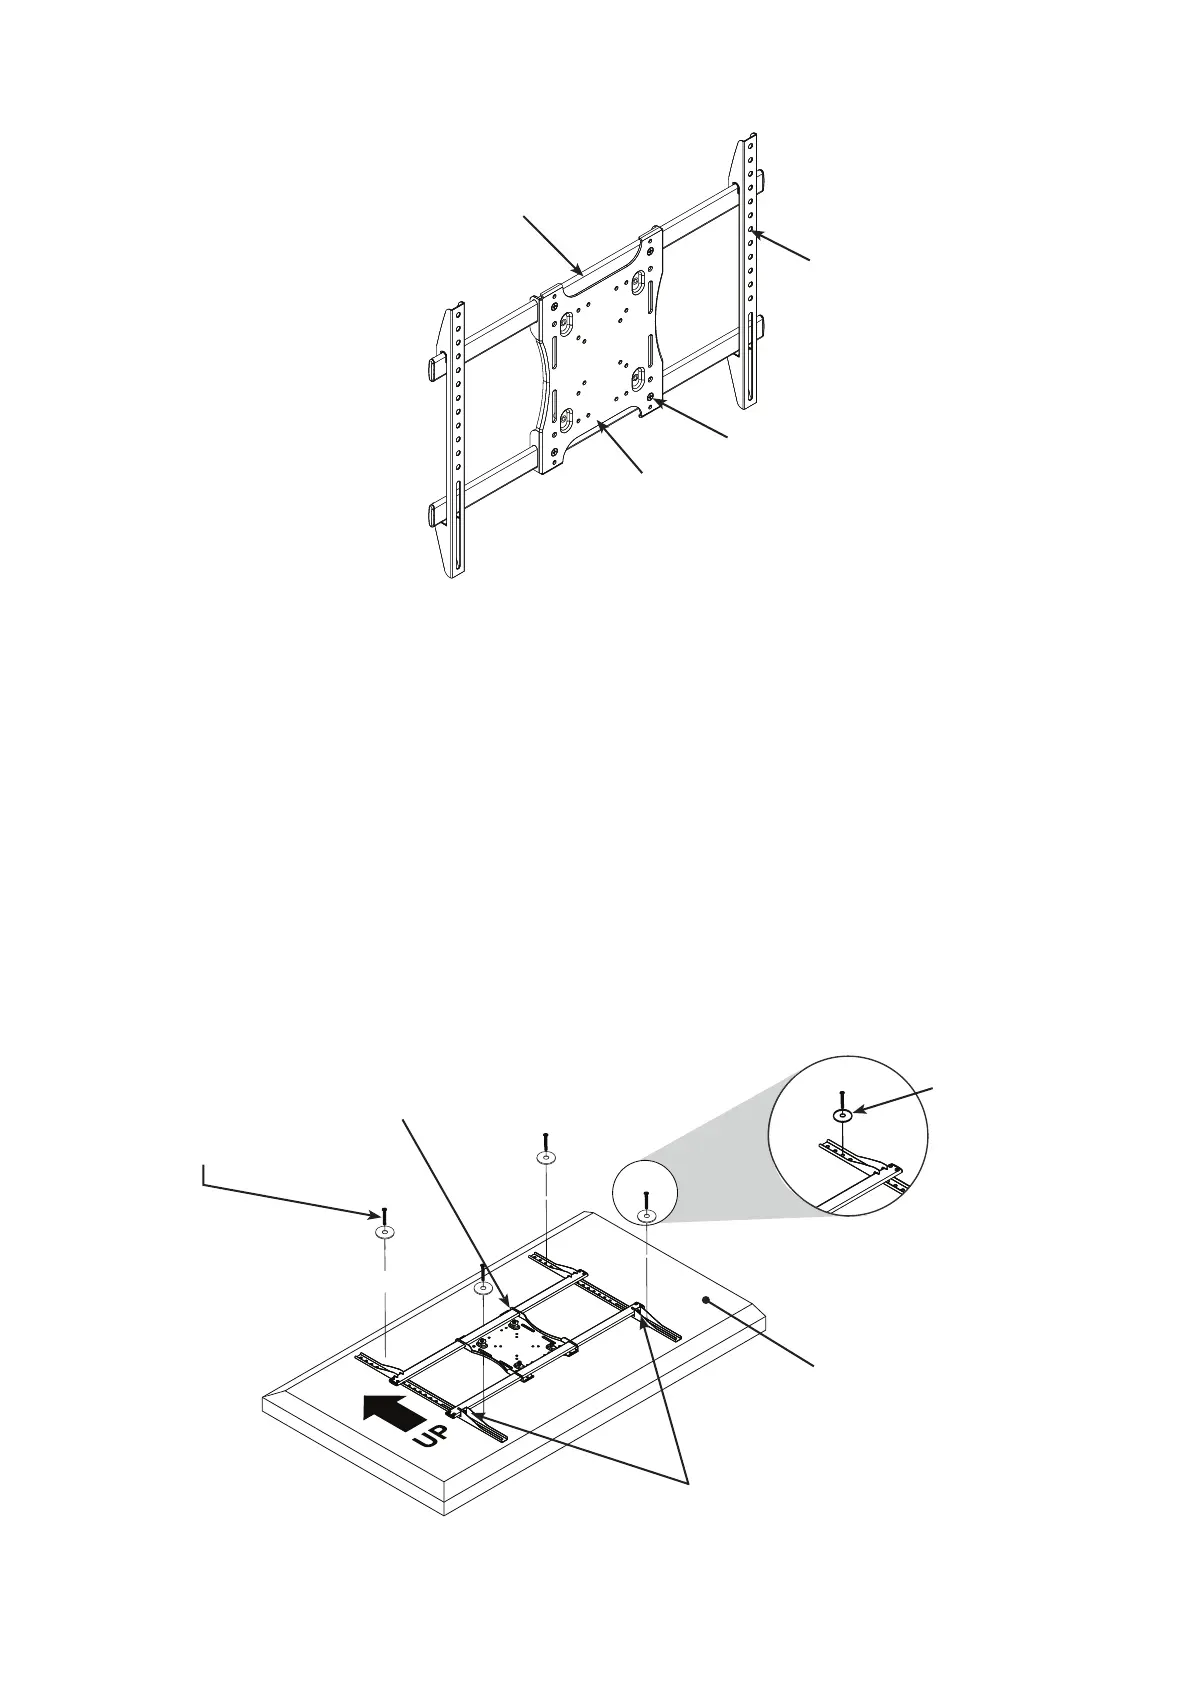
1. Slide the xed TV brackets onto each end of the Horizontal Mounting Bars (Figure 2).
Figure 2
Mount Display Bracket to Display Panel
1. Place the assembled Display Bracket on the back of the display with one Adapter Bracket aligned with a set of vertical
mounting holes (Figure 3).
2. Slide the other Adapter Bracket in or out until it aligns with the second set of vertical mounting holes.
NOTE: The Adapter Plate should be horizontally centered on the back of the at panel display.
NOTE: There are eight positions for exibility. Move the Adapter Brackets to desired location. Adapter Brackets can be
ipped around (if required).
3. Attach the Adapter Brackets using four mounting bolts (D - H) and four washers (L or M).
NOTE: Bolt size will depend on thread pattern and hole depth of the at panel being installed.
4. Once aligned, tighten all screws down with a Phillips Head Screw Driver.
Figure 3
Fixed TV Bracket
Horizontal Mounting Bars
Adapter
Plate
Bolts (pre-installed)
Display Bracket Assembly
Display Back
(L or M)
Bolts (D – H)
(size depends on display)
Lock screw to bottom of arms.
 Loading...