7
ADJUSTMENTS
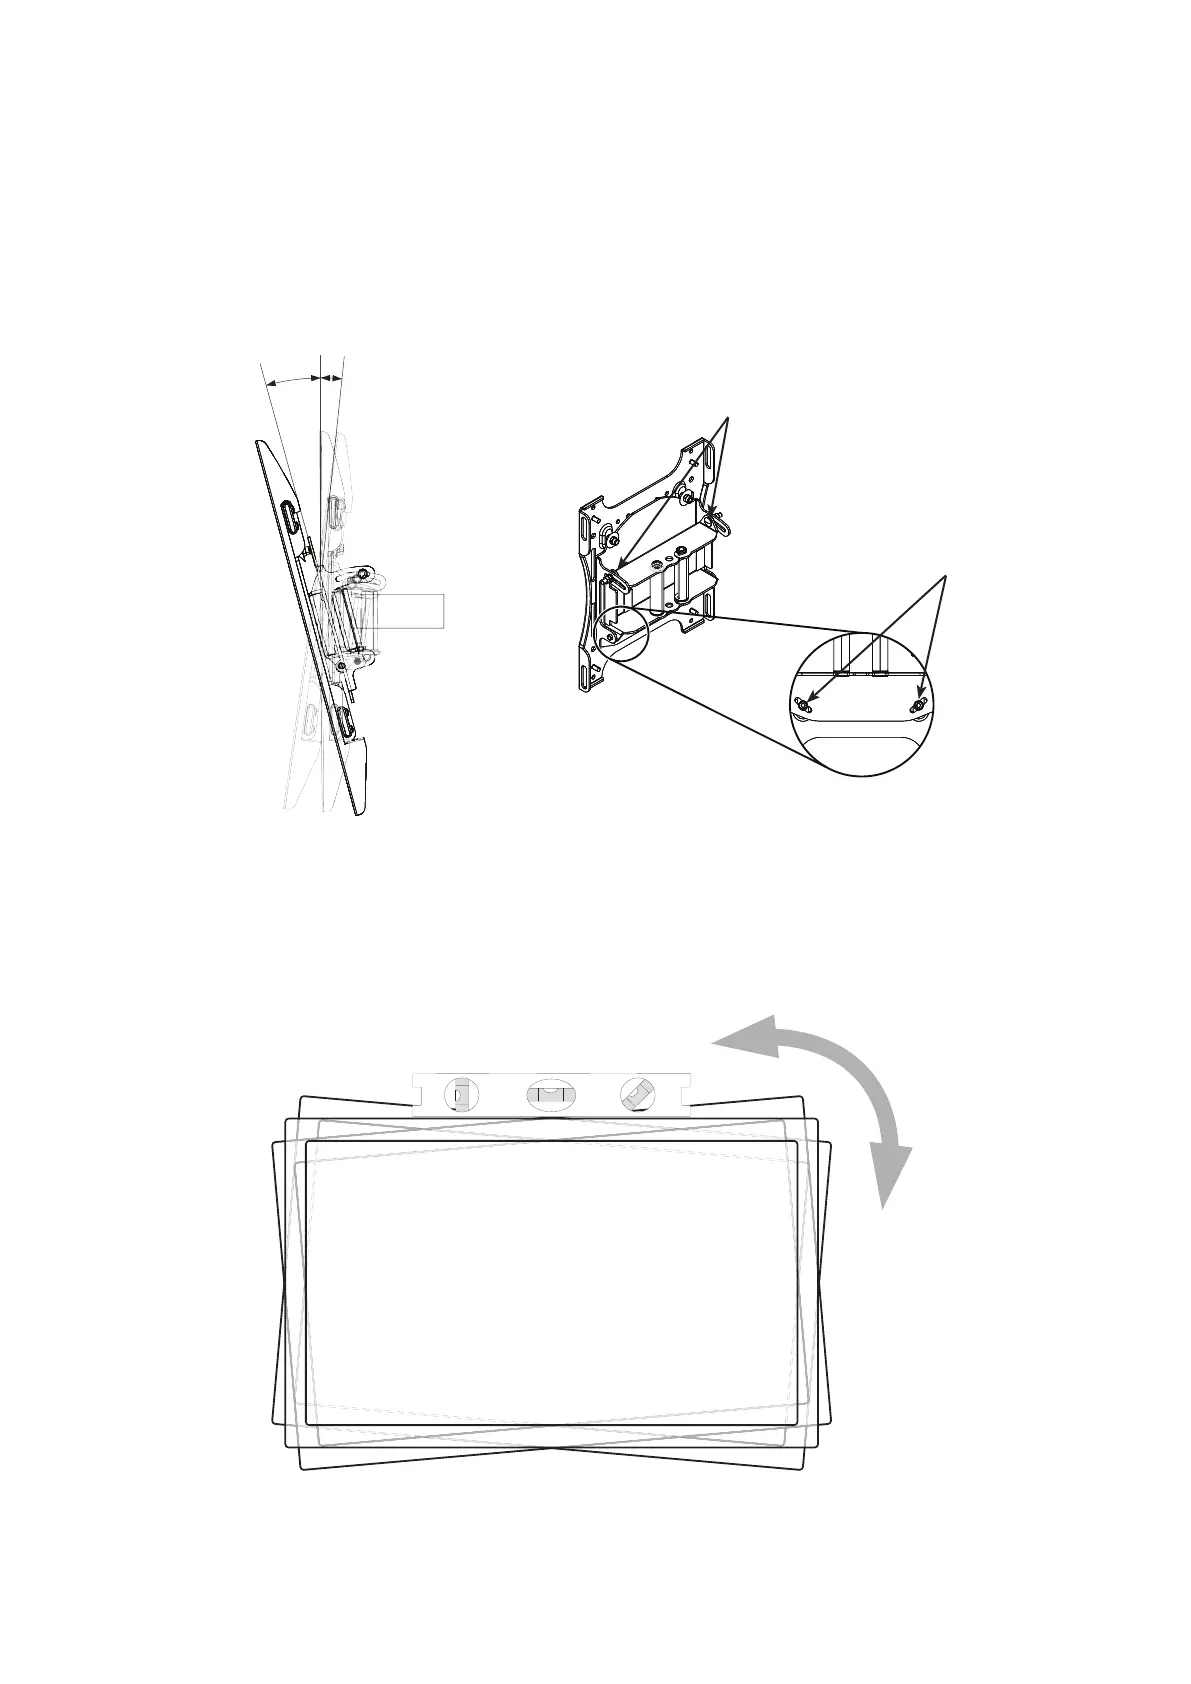
Tilt Adjustment
1. Using the provided socket wrench (N), loosen tilt lock bolts each side of mount head (only enough to allow controlled
adjustment) (Figure 6).
2. Adjust tilt.
3. Tighten locking Tilt Levers.
NOTE: Once the tilt levers are locked, the position of the levers can be adjusted without loosening or tightening the unit
by pulling the levers outward and then repositioning them to a vertical, less obtrusive position.
Figure 6
Horizontal Adjustment
1. To adjust the horizontal angle of the display, rst slightly loosen the bottom two hex nuts with provided socket wrench
(N) on back side of the Mount Head. Then rmly hold opposite corners of the display and gently turn it into the desired
position. When level, re-tighten hex nuts to lock in position (Figure 7).
Figure 7
+/- 5°
15° 5°
Tilt Lock Bolts(1 on each
side)
Hex Nuts
 Loading...