6
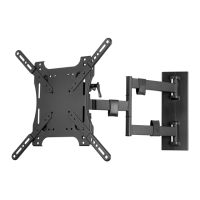
Attach Screen to Arm Assembly
1. Remove pre-installed hex nuts and nylon washers from bottom bolts on adapter plate using the provided socket wrench
(N).
2. Lift the display and hook the two pre-installed bolts in grooves on top of the Mounting Head (Figure 4).
3. Insert bottom two bolts (where hex nuts were previously installed) in bottom two holes of the Mounting Head.
4. Re-install hex nuts and nylon washers securing mount head to arms.
ATTENTION: This procedure requires two persons. Ensure that the arm is set to its maximum negative tilt prior to
attaching the display.
Figure 4
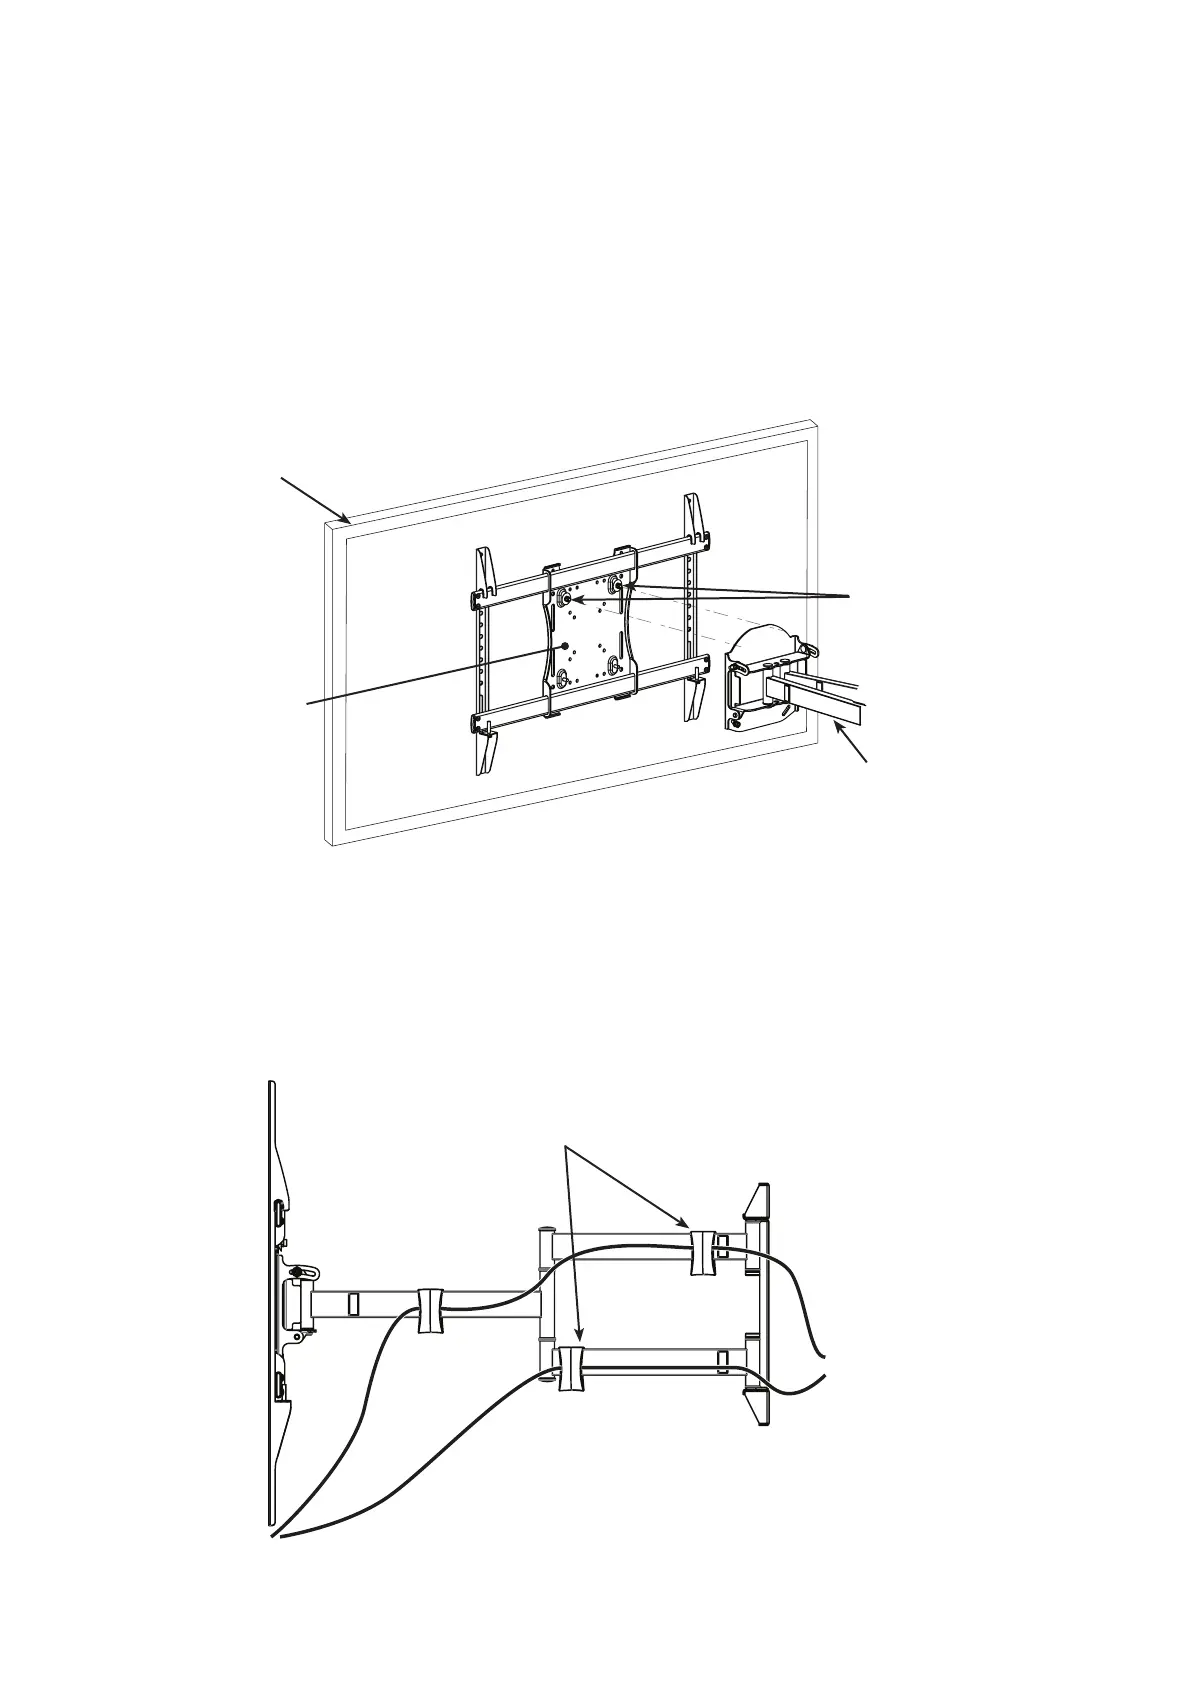
Cable Cover Attachment
1. Route electrical and data cables along the Arm Assembly and secure in place using the provided Cable Covers (Figure 5).
NOTE: Ensure enough slack is provided to allow for vertical and horizontal movement before attaching the Cable
Covers.
Figure 5
Adapter Plate
Display Panel
Pre-installed Bolts
Mount Head
Arm Assembly
Cable Covers
 Loading...