3
operation
!
MAINTENANCE
1. When not in use, store the jack in a dry locaon with saddle in lowest posion.
2. Periodically check the piston rod for signs of rust or corrosion. Clean exposed areas with a clean oiled cloth.
Warning: Never use sandpaper or abrasive material on these surfaces!
3. A coang of light lubricang oil to pivot points, axles and hinges will help to prevent rust and assure that castors, foot pedal and pump
assemblies move freely. Periodically lubricate the pivot points, axles and hinges with a light lubricang oil as needed.
4. With jack in its lowest posion, remove the air vent screw (25) to check the hydraulic oil level. If it is not adequate, add high quality
hydraulic jack oil as necessary. Insert and ghten the air vent screw. Then purge away air from hydraulic system as described in purging.
Warning: DO NOT use brake uid or any other improper uid and avoid mixing dierent types of oil when adding hydraulic oil.
5. To ensure best performance and longer equipment life, replace the complete hydraulic oil at least once a year. With jack in its lowest
posion, remove the air vent screw (25), lay the jack on its side and drain the oil into a suitable container. Ensure that no dirt gets into
the system. Set the jack in its level upright posion, ll with approved hydraulic jack oil. Then replace the air vent screw (25) and purge
away air from hydraulic system as described in purging air.
Note: Dispose of hydraulic oil in accordance with local regulaons.
6. When equipment eciency drops, purge away air from hydraulic system.
7. It is recommended that an annual inspecon be done by qualied technicians.
WARNING!
Ensure that you read, understand and apply the safety instrucons and warnings before use. Failure to heed these instrucons may result in property
damage and/or personal injury.
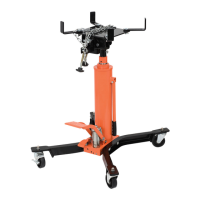
1. Roll the transmission jack into posion and pump the foot pedal (35) unl saddle reaches desired height.
NOTE: Follow vehicle manufacturer’s recommended procedures for removing the load as outlined in vehicle service manual or repair guide.
2. Carefully center load on the saddle. Ensure the load's center of gravity is centered on the saddle and the setup is stable and secure.
NOTE: Before lowering load check to ensure all tools and personnel are clear and it is safe to lower the load.
3. SLOWLY and CAREFULLY operate the release pedal 32 to lower the load to its lowest possible posion.
4. If necessary, CAREFULLY and SLOWLY move the jack.
5. Transfer load immediately to appropriate support device for service or repair.
 Loading...