EN-18
Caution When attaching or removing the coupler, grip only the rear
adapter, as twisting other parts of the coupler may result in
mechanical damage.
Caution Do not overtighten the coupler, as this may damage the front
window of the camera.
Note For direct-coupled C-mount scopes (scopes that require no
coupler), thread the endoscope directly into the camera head
until it forms a tight seal.
Caution Do not overtighten a direct-coupled C-mount scope, as this
may damage the front window of the camera.
2. Attach an endoscope to the coupler.
• Remove the red dust cap if it is present.
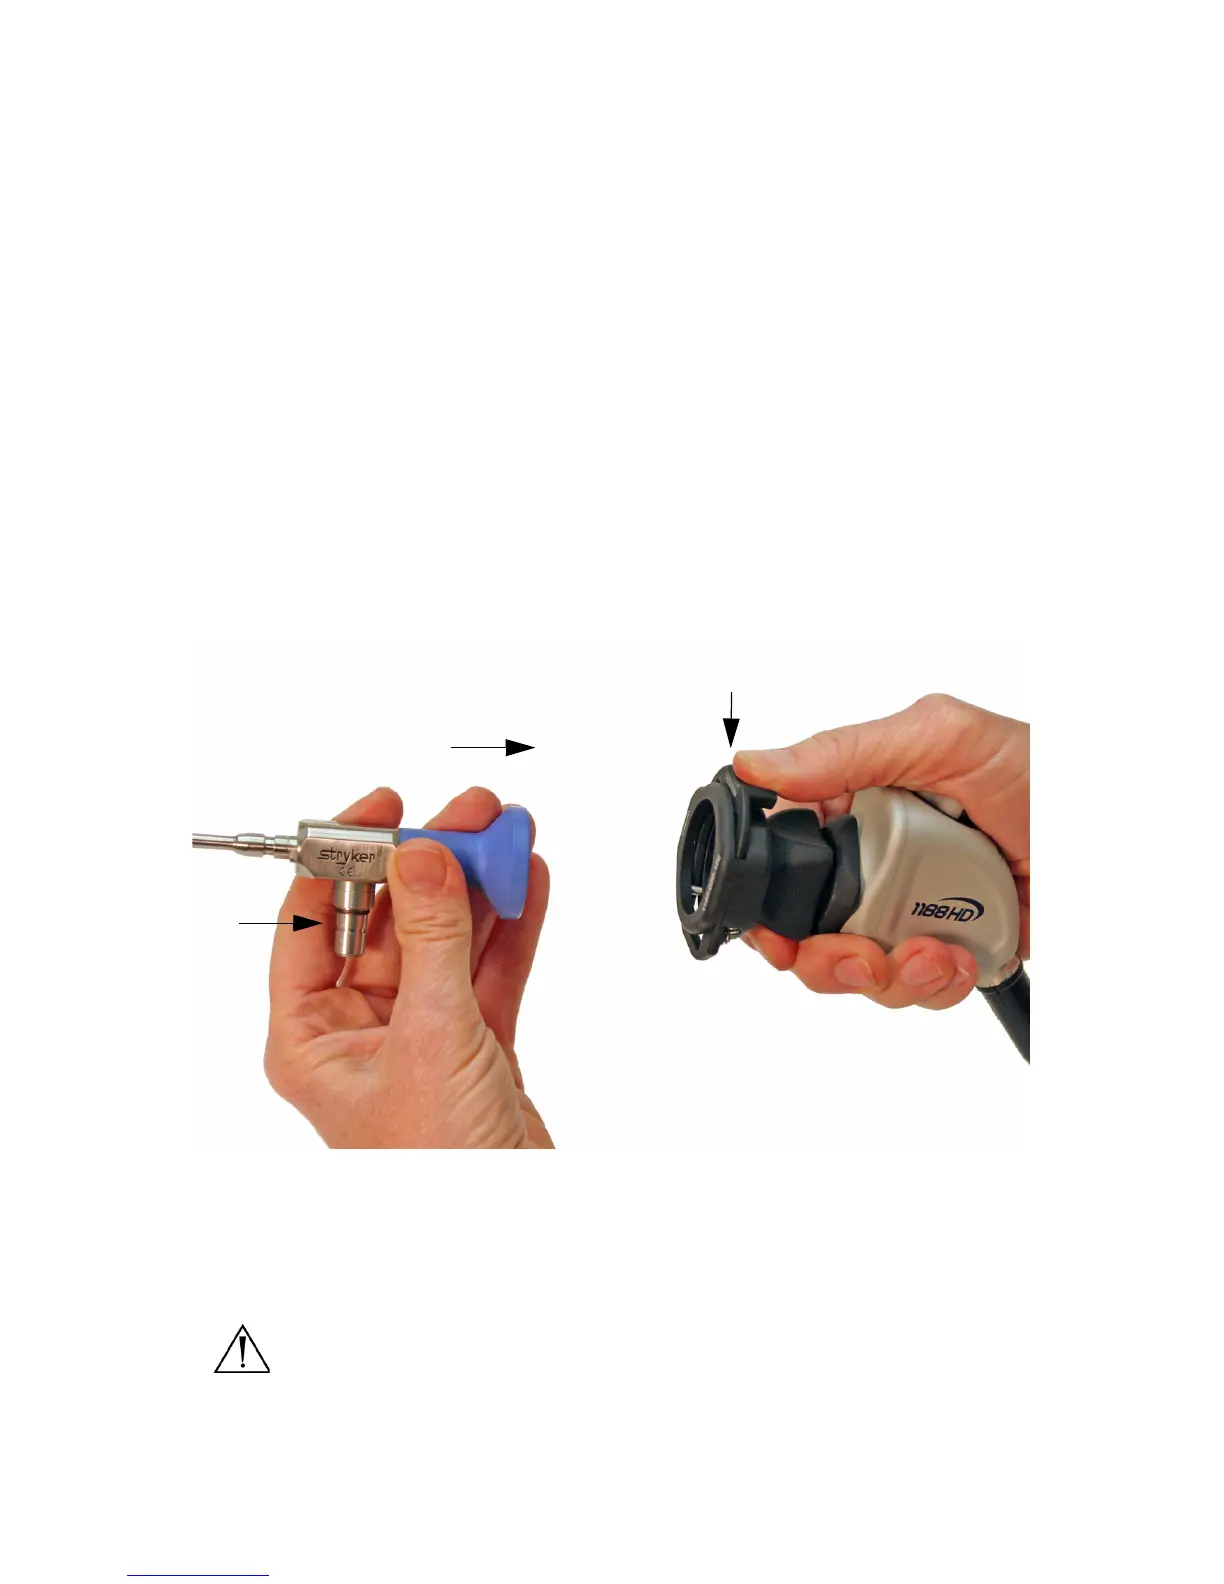
• Push down on the endobody clamp (a) and insert the scope into the
scope end of the coupler (b). (See Figure 6.)
• Release the endobody clamp.
Figure 6: Attaching an endoscope to the camera head via the coupler
3. Attach a light cable from the light source to the light post on the
endoscope (c) as seen in Figure 6.
Warning Before each use, check the outer surface of the endoscope to
ensure there are no rough surfaces, sharp edges, or
protrusions.




 To Next Page