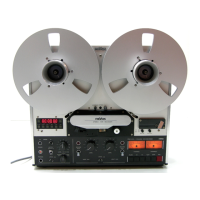
PR99 MKtII
3/7
3.13.
Bandabhebe-Einheit ausbauen
—
Laufwerkabdeckung
entfernen
(siehe
3.2.).
—
Kopftrager losen
(3
Schrauben) und
auf
die
Seite
kippen.
—
Bandabhebe-Einheit
losen
(3
Schrau-
ben).
3.1
4.
N
F-Steckkarten ausbau°en
—
Gehause entfernen
(siehe
3.1
.).
—
Abschirmblech
entfernen,
2
Schrauben
losen.
—
Die
NF-Steckkarten
konnen
nun
ausge-
zogen warden
(auf
Oszillator-Steckkarte
den
Stacker von
Aufnahme-
und
Loschkopf-Zu-
fuhrung
ausziehen).
Input
Amp. Stecker von
Line Buchse
und
2 Stecker von Cal/Uncal
Schalter abziehen.
Output
Amp. Stecker von
Line Buchse
und Mas-
senverbindung
ausziehen.
3.
1
5.
Laufwerksteuerungs-Steckkarte
ausbauen
-
Gehause
entfernen (siehe
3.1. ).
—
alle Stecker-Verbindungen ausziehen.
-
Print-Befestigungsschraube
losen.
—
Laufwerksteuerungs-Steckkarte
von
Stromversorgungsplatine abziehen.
3.16.
Drehzah Iregel u ngs-Steckkarte
ausbauen
—
Gehause entfernen
(siehe 3.1
.).
—
3
Steckverbindungen
auf Drehzahlrege-
lungs-Steckkarte
ausziehen (wht,
org, bik).
—
Print-Befestigungsschraube
losen.
—
Drehzahl
regel u
ngs-Steckkarte von
Strom-
versorgungsplatine
abziehen.
3.17.
Netztrafo-Einheit
ausbauen
Gehause
entfernen
(siehe
3.1
.).
Laufwerkabdeckung
ausbauen
(siehe
3.2.).
Laufwerksteuerungs-Steckkarte
ausbau-
en
(siehe 3.1
5.).
Drehzahl
regelu
ngs-Steckkarte
ausbauen
(siehe
3.16.).
alle
Stecker
auf Stromversorgung
auszie-
hen.
Netzschalter
und Kabel freilegen.
4
Befestigungsschrauben
von
vorn losen.
3.13.
Removal of
tape lift
mechanism
—
Remove
front panel
(see section
3.2.).
—
Loosen headblock
(3
screws)
and
tilt
the
headblock
to the side.
—
Undo 3 mounting
screws of
the tape lift
mechanism.
3.14.
Removal
of audio circuit
boards
—
Remove
recorder
from its
case
(see
sec-
tion
3.1
.).
—
Remove
metal
shield,
undo 2
screws.
—
The
audio
circuit
boards
may
now be
removed
from
their
plug-in
sockets
(on
the
oscillator
board
the
plug-in
connections
for
the
recording
and
erase
heads
have
to
be removed).
Disconnect
the Input
Amp. connections
from
Line socket
and
2
plugs from Cal/Uncal
switch.
Output
Amp. plug from Line
socket
and earth
connection.
3.1
5.
Removal of tape
transport
control
board
—
Remove
recorder from its
case (see sec-
tion 3.1
.).
—
Unplug
the connector
on the back of
the control
board.
—
Undo
PC-board
mounting screw
.
—
The tape transport
control board
may
now
be
unplugged from the power
supply
board.
3.16.
Removal of speed
control board
—
Remove
recorder from
its
case
(see sec-
tion
3.1
.).
—
Disconnect
3
plug-in wires
(white,
orange,
black)
from
the
speed control
board.
—
Undo
PC-board
mounting
screw
(^^
.
—
Speed
control
board
may now
be
un-
plugged from
the
power
supply board.
3.17.
Removal of power transformer
unit
—
Remove
recorder from its
case (see
sec-
tion
3.1
.).
—
Remove
front panel
(see section
3.2.).
—
Remove
tape transport
control
board
(see
section
3.15.).
—
Remove
speed regulating
board (see sec-
tion
3.16.).
—
Disconnect
all plugs
of the
power
sup-
ply.
—
Expose the
Power Switch
and cable.
—
Unfasten 4
screws from
front.
3.13. Dipose
de Tuniti
d'icartement
de la
bande
—
Enlevez
la
plaque
de
recouvrement (voir
3.2.).
—
Devissez
les
3
vis
du
support
des
tetes et
basculez-le
sur
le c5te.
—
Devissez
les
3 vis de
I'unite
d'ecartement
de la bande.
3.14.
Demontage des
plaquettes enfichables
BF
-
Sortez
I'appareil
du
boTtier
(voir
3.1.).
-
Enlevez
la tole
de
blindage
(2
vis).
-
Retirez les
plaquettes
enfichables
BF
(pour
I'oscillateur,
debranchez
tout
d'abord
la
fiche
des tetes
d'effacement
et
d'enregistre-
ment).
Debranchez le connecteur Input Amp. de la
pri-
se
Line et 2connecteurs
du
commutateur
Cal/-
Uncal
Connecteur
Output Amp. de la prise Line
et de
la
liaison
masse
3.15.
Demontage
de la
plaquette
de comman-
de
du
micanisme
—
Sortez
I'appareil
du bottler (voir
3.1.).
—
Debranchez
la fiche
au dos de la pla-
quette.
_
—
Divissez
la
vis
de
fixation
(^
.
—
Retirez
la plaquette
de commande
du
micanisme
du circuit
d'alimentation.
3.16.
Demontage de la
plaquette
de
rigulation
de Vitesse
—
Sortez
I'appareil du
bottler
(voir 3.1
.).
—
Debranchez
les
3
fils
(blanc, orange
et
noir).
—
Devissez
la vis
de
fixation
(j^
.
—
Retirez
la
plaquette
de
regulation
de
Vitesse
du circuit
d'alimentation.
3.17.
Depose du transformateur
d'alimenta-
tion
—
Sortez
I'appareil
du
bottler
(voir
3.1
.).
—
Enlevez
la plaque
de
recouvrement
(voir
3.2.).
—
Sortez
la
plaquette
de
commande
du
mecanisme
(voir 3.1
5.).
—
Sortez la
plaquette
de
regulation
de
Vitesse
(voir
3.16.).
—
Debranchez
toutes les fiches
secteur.
—
Liberez
le
commutateur
et le cable.
—
Devissez
par
I'avant
les
4
vis.
 Loading...