Wh e n t h e Ma s t e r Co n t r o l l e r i s p o w e r e d u p i t a l w a y s t r a n s m i t s t h e c o n t e n t s o f t h e p r o g r a m
memory.
Af t er programmi ng any paramet ers, t he cont ent s of t he memory i s t ransmi t t ed when exi t i ng
EDI T m o d e .
To transmit the contents of the memory while in play mode press the ENTER/EDIT button twice.
Ex i t i n g t h e EDI T m o d e a u t o m a t i c a l l y s t o r e s t h e n e w l y c h a n g e d p a r a m e t e r s , i f a n y , i n t o t h e
memory.
Wh e n p o w e r i n g d o wn t h e u n i t a l l i n f o r m a t i o n i n m e m o r y i s r e t a i n e d a n d t h e n t r a n s m i t t e d
agai n upon power up.
You can not enter t he EDI T MODE i f you are holding down keys or pressing t he sust ain pedal.
You must release all pedals and keys before enteri ng i nt o t he edit mode.
Wh e n r e - e n t e r i n g t h e E DI T M ODE i t w i l l b e o n t h e p a r ame t e r s e t t i n g a n d ZO NE s e l e c t i o n a s i t
was l ef t when previ ousl y i n t he EDI T MODE.
Wh e n E DI T MO D E i s se l e c t e d , t h e k e y b o a r d d o e s n o t so u n d . To t e s t t h e p r o g r amme d v a r i a t i o n s
and pl ay t he keyboard exi t t he EDI T MODE.
Th e se s u g ge s t i o n s a r e d e si g n ed as a s t a r t i n g p o i n t t o h e l p st i mu l a t e y o u r o w n c r e a t i v e u sa g e
of these features for your own musical applications and needs.
Th e ZONES ar e t h e h e a r t o f t h e SL - 7 6 0 Ma st er Co n t r o l l e r . Cr e a t i v e u s e o f t h e ZONE' s p a r a me -
ters and the ZONES themselves gives the player new found flexibility and control over their
sounds and modul es. We've al ready di scussed how t o operat e t he ZONES.
Now we apply t hem t o musi cal appl ications. You can use t he t hree (3) ZONES i n a number of
different ways: Here are some opt ions and possibl e appli cat i ons using the f eat ures of t his key-
board.
Se t a l l t h r e e Z ONES t o t h e s a m e r a n g e o f n o t e s a n d a s s i g n e a c h o f t h e m t o t h r e e s i m i l a r St r i n g
patches or t hree simil ar Piano patches.Try t wo piano patches and a stri ng patch. Experi ment
wi t h di sabl ing some of t he feat ures on some of t he ZONES such as, AFTERTOUCH or SUSTAI N.
Wh i l e p l a y i n g o n e se c t i o n o f a so n g , l e a v e so m e o f t h e l a y e r s t u r n e d o f f a n d t h e n s w i t c h t h e m
on during t he "Chorus" by pressi ng t heir ZONE SWI TCHES to buil d dynamics in t he song. On
your modul e t ry sett i ng and stori ng your PI ANO pat ches t o not respond t o MI DI volume (CC#7)
then using a Volume Pedal on your Master Controller you can bring up the Strings behind the
Pi a n o w h en n ee d ed .
Se t t w o Z ONES i n y o u r l e f t h a n d f o r a n El e c t r i c P i a n o / Pa d l a y e r a n d s e t Z ONE ( 3 ) i n t h e r i g h t
hand for a st ring or horn part . Use t he TRANSPOSE feat ure t o bring these ZONES into a useful
range.
Try a Bass pat ch usi ng one ZONE in the lowest two octaves of the keyboard, disable the
SU STA I N PEDA L a n d TRA N SP OSE u p a n o c t a v e o r t w o t o p l a c e i t i n t h e r a n g e o f a b a s s g u i t a r .
Now create a SPLIT i n t he middle range wi t h ZONE (2) set t o a Breat hy Synt h or Comping
patch, and t he last ZONE for t he top octave or so on a Brass pat ch wit h t he SUSTAI N PEDAL
disabled. You can pl ay a bass l ine with your l eft hand, sust ain chords you've played on t he Pad
sound usi ng t he Sust ai n Pedal and now pl ay Hor n st abs or l i nes above i t wi t h your ri ght hand.
*Note On Splits: Always remember to use the TRANSPOSE feature to place your parts in pro-
per perf ormance range no mat t er where on t he 76 keys you may place a ZONES upper and lower
limits. Think of the whole keyboard as 76 keys or triggers available rather than the traditio-
nal not e pl acement and t uni ng as on an Acoust ic Piano.
GEN ER A L PR OGR A M M I N G
INFORMATION
APPLI CATI ONS USES AND
USER TI PS
TH E ZON ES
TH E BI G LAYER
TH E SPLI T
ANOTHER SPLI T?
INSTRUCTIONS MANUAL
17
EN GL I SH
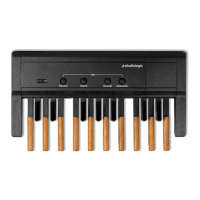
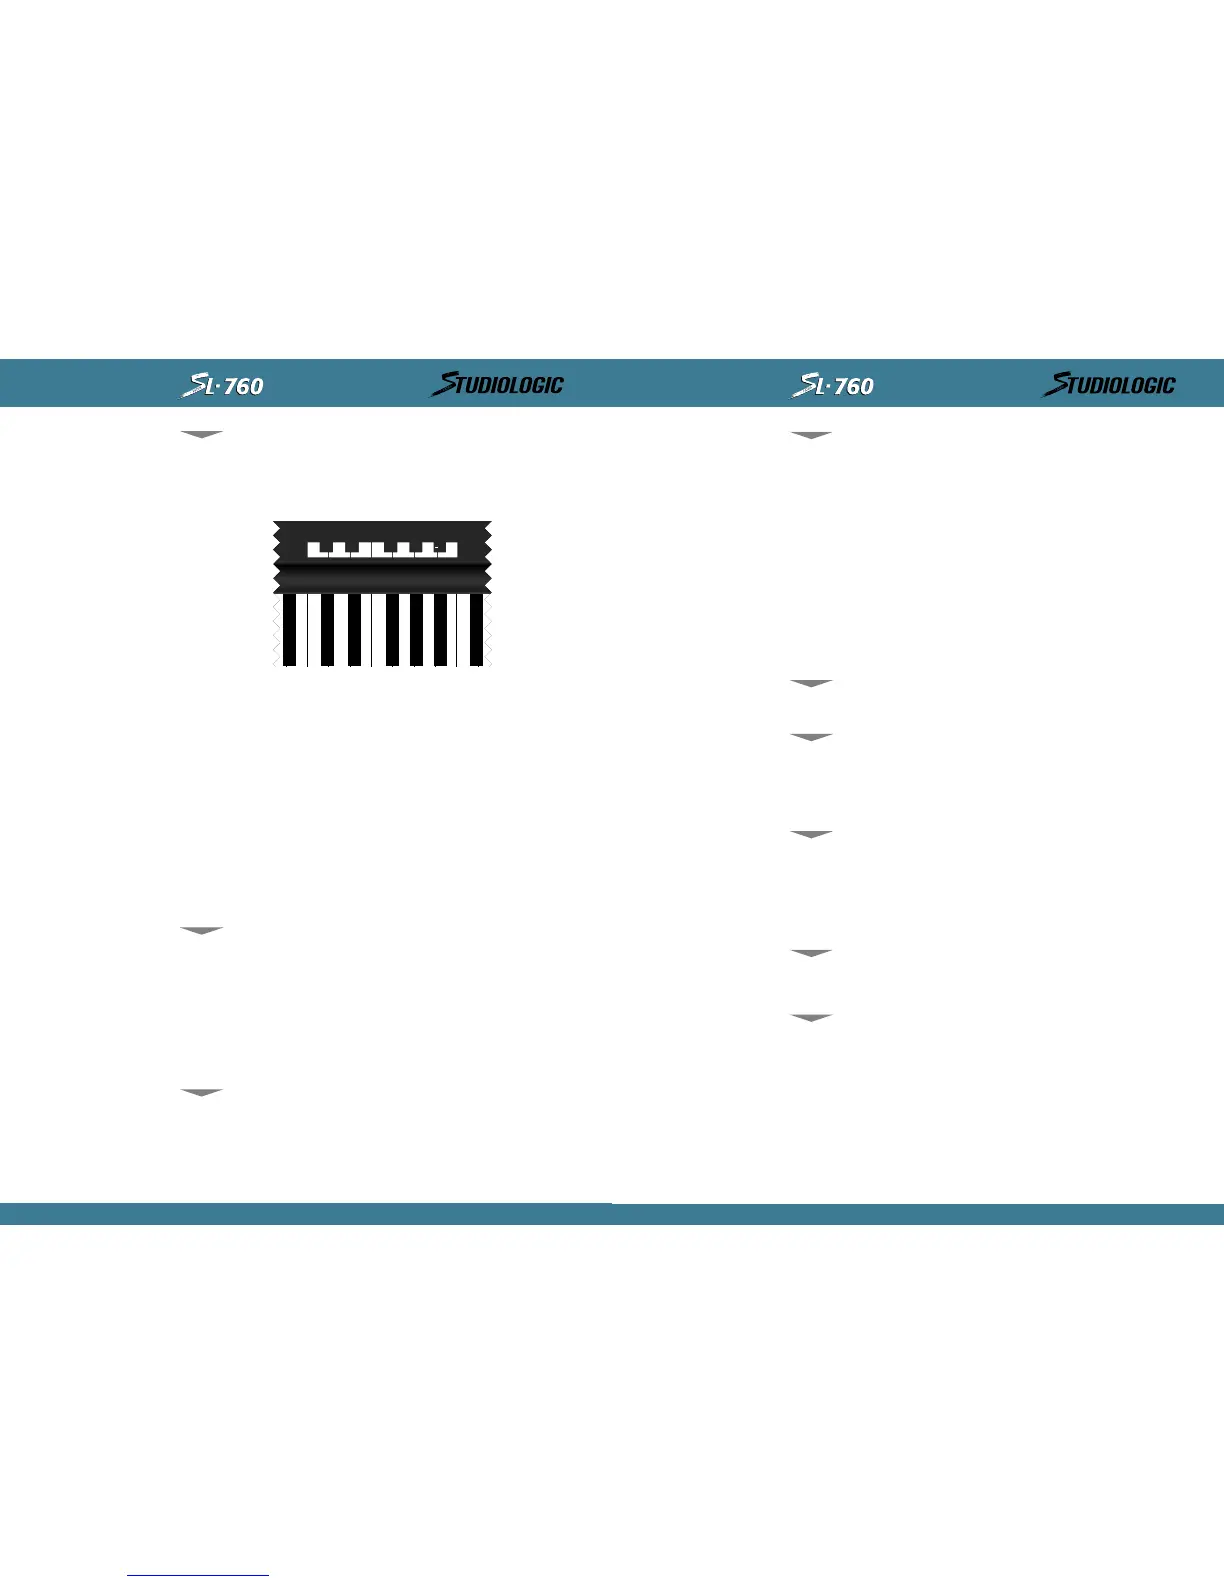
As you have most li kely f igured out by t his poi nt t he St udio Logic Master Cont rol ler SL-760
uses t he keyboard it self i n EDI T mode as t he 10 KEY KEYPAD and data entry source. The keys
in the central octave, starting at the middle C, are assigned to specific functions for data entry
in EDIT mode and are clearly labeled as indicated in the diagram below. While you are in the
EDI T m o d e a n d u s i n g t h e n u m e r i c a l k e y p a d t h e k e y b o a r d i t s e l f d o e s n o t t r a n s m i t MI D I n o t e s
and perf ormance i nf ormat i on. You must exi t t he EDI T mode t o pl ay not es f rom t he keyboard.
SECTI ON 5 .
Pr o g r a mmi n g t h e St ud i o Lo g i c SL - 7 6 0 Mas t e r Co n t r o l l e r :
Cr e a t i n g m u si c a l l y u se f u l Pa t c h e s a n d h o w t o d o i t .
Bef ore we get i nt o some progr ammi ng exampl es and t i ps, t he f ol l owi ng i nfor mat i on i s about
the design architecture and how the Studio Logic SL-760 Master Controller operates.
Wh e n y o u r M a s t e r Co n t r o l l e r i s s w i t c h e d o n f o r t h e f i r st t i m e i t w i l l t r a n s m i t t h e f o l l o w i n g
defaul t set t ings:
ZONE # 1 ON, Zo n e s # 2 , # 3 OFF. Th e t h r e e z o n es a r e s e t t o t r a n sm i t o n MI DI c h an n e l s
1 through 3 respecti vely, t heir SPLIT i s set to t he full ext ensi on of all 76 keys and all
swi t chabl e commands are i n t he ON posi t i on.
Al l ZONES set t o SHAPE #1, VELOCI TY = 4, TRANSPOSE = 0.
VOL UME SETTI NGS OF 1 2 7 i f n o VOL UME PEDA L i s c o n n e c t e d . I f a VOLU ME
PEDA L i s c o n n e ct ed wh a t e v e r p o s i t i o n t h e p e d al i s i n w i l l b e t r a n smi t t ed .
SU STA I N OFF. ( PED A L i s e n a b l e d b u t i n t h e o f f p o s i t i o n , CC 6 4 = O)
PI TCH B END v al u e = 0 , MODUL ATI ON WHEEL v a l u e = 0
To reset t he uni t t o t he above fact ory set t i ngs:
Power up t he keyboard while hol ding down al l t hree UP-DOWN-ENTER but t ons, hol d for a few
seconds t hen rel ease al l t hr ee but t ons.
10 KEYPAD,
(H) AND (-),
(ON) AND (OFF):
DEFAULT SETTI NGS
GEN ER A L RES ET
16
INSTRUCTIONS MANUAL
 Loading...