28
SN 131766 - ...
1
2
3
90°
5
7
270°
180°
6
4
Stûv 30-compact haut - 02/14
Orientation du foyer (suite)
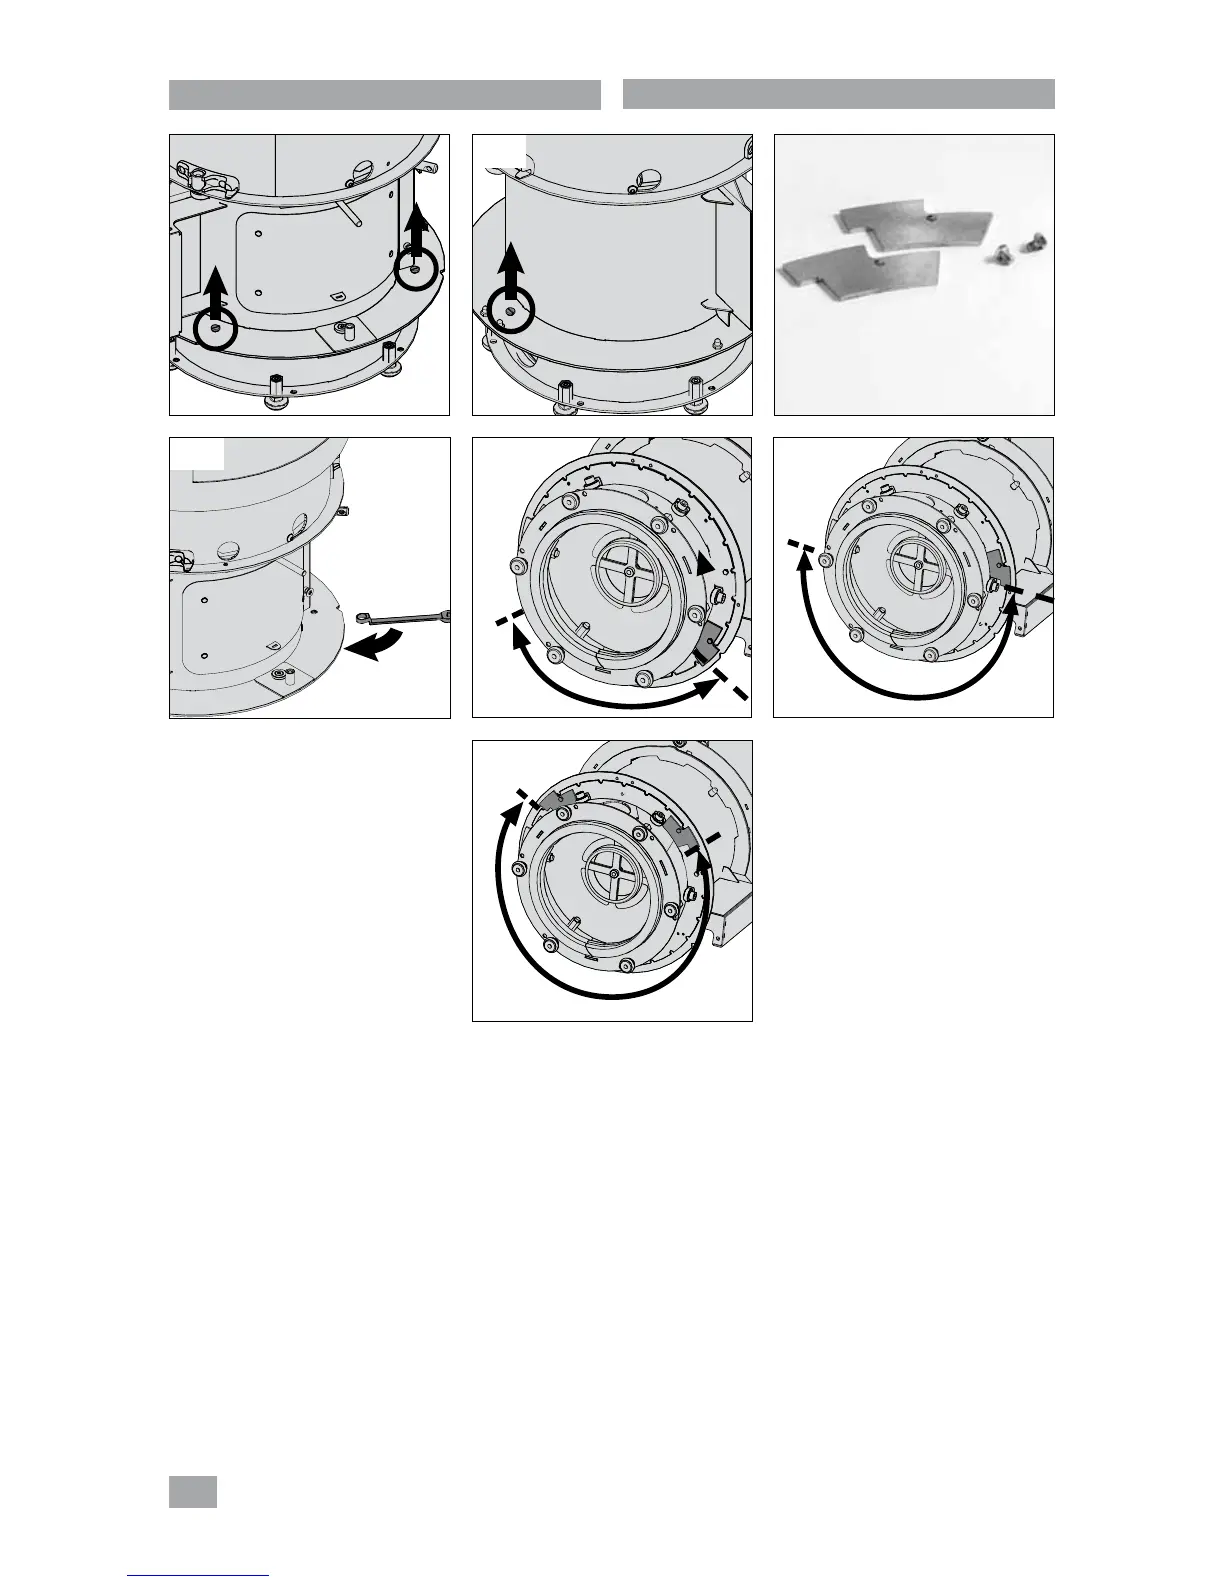
Butée de rotation
La butée de rotation permet de choisir
un angle maximal de rotation dans
lequel il sera permis d'orienter le
foyer.
> Choisissez tout d'abord comment
configurer le foyer (voir pages
précédentes). Cela définira votre angle
maximal de rotation.
> Enlever les 3 vis étagées avec un
tournevis plat (2 vis à l'avant, 1 vis à
l'arrière) [photos1 et 2].
Attention ! Une fois les 3 vis étagées retirées, en aucun cas
ne déplacer ou basculer le foyer. Cela risque d'abîmer l'axe
de rotation du foyer.
> Limiter l'angle de rotation à 90°, 180° ou 270° en fixant
les butées [photo3] (avec les vis M5x6 tête hexagonale)
suivant la position:
> pour 90° [photo5]
> pour 180° [photo6]
> pour 270° [photo7]
Attention! Veiller à fixer la butée dans le bon sens
(regarder attentivement les photos).
Directing the stove (continuation)
Rotation stop
The rotation stop enables you to
choose a maximum angle of rotation
to which the stove can turn.
> First of all, choose your
configuration for the stove (see
previous pages). This will define your
maximum angle of rotation.
> Take out the 3 stepped screws with
a flat screwdriver (2 screws at the
front, 1 screw at the back)
[photos 1 and 2].
Please note ! Once the 3 stepped screws have been
removed, do not under any circumstances move or tilt the
stove. This risks damaging the rotation axle of the stove.
> Limit the angle of rotation to 90°, 180° or 270° by fixing
the stops [photo 3] (with the M5x6 hexagonal screws) in
position :
> for 90° [photo 5]
> for 180° [photo 6]
> for 270° [photo 7]
Please note ! Ensure that you fix the stop the right way
around (look closely at the photos).