29
SN 131766 - ...
1
2
3
270°
4
Stûv 30-compact haut - 02/14
Montage final
Si vous avez allégé votre foyer, re-monter les pièces
suivantes :
– le berceau du déviateur de fumée
– la fonte de la sole foyère
– la traverse protection inférieure
– la grille de décendrage
– la fonte de dos
– les fontes latérales
– les deux clefs latérales
– les 2 déviateurs en vermiculite
– le déviateur de fumées
Suivez le chemin inverse du démontage! (voir pages 13 à
18)
Attention! Ne pas confondre les pièces symétriques de
gauche et de droite.
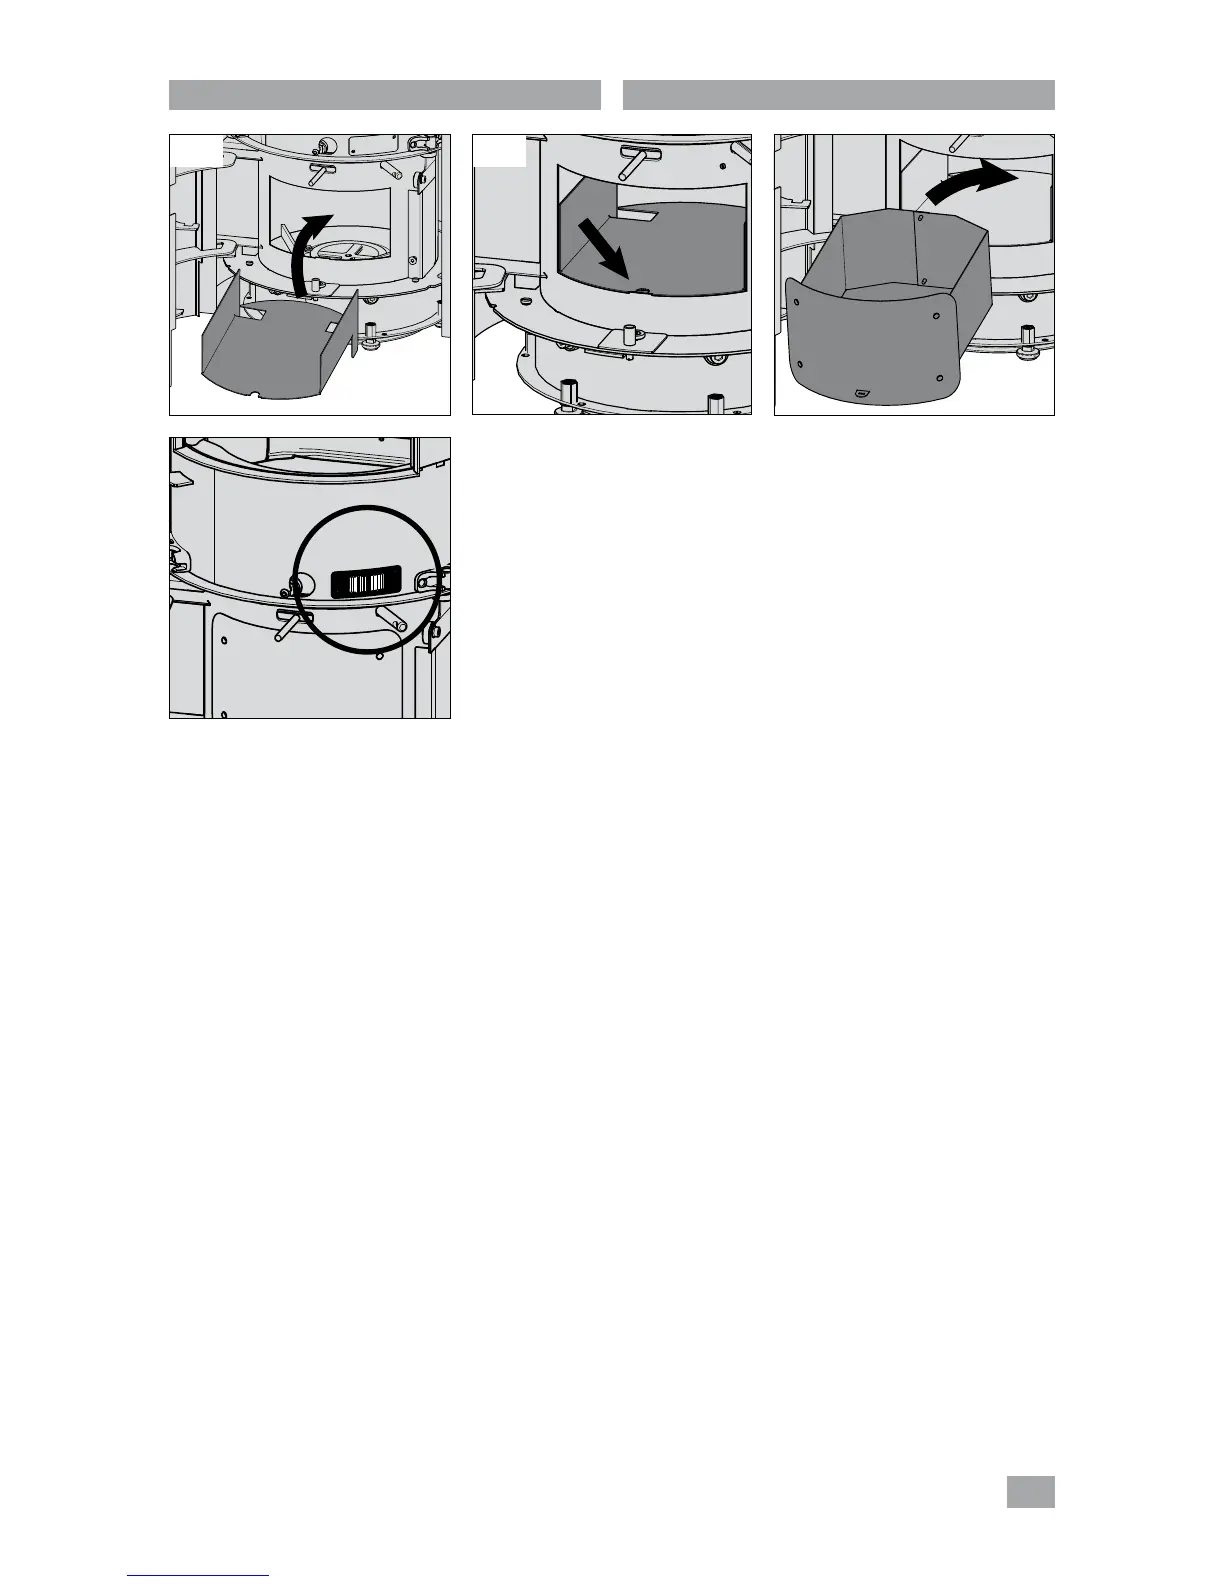
Remettez en place les dernières pièces :
> le support cendrier, l'insérer jusqu'au fond du foyer.
Exercer une pression à l'avant du support cendrier pour
qu'il soit bien encoché [photo1et2].
> le cendrier [photo3].
> les portes: attention au sens des portes :
– la porte métallique se positionne au dessus de la face
où se situe le numéro de série, dans le bas du tambour
[photo4].
Final assembly
If you have dismantled your stove, re-assemble the
following parts :
– the smoke deflector cradle
– the stove hearth holder
– the lower protection strut
– the ash grille
– the back holder
– the lateral holders
– the lateral keys
– the 2 vermiculite deflectors
– the smoke deflector
Follow the reverse of the dismantling steps ! (see pages 13
to 18)
Please note ! Do not mix up the left and right symmetrical
parts.
Put the last parts back in place :
> the ash pan support, insert it right to the back of the
stove. Press down at the front of the ash pan support so
that it slots properly into place
[photo 1 and 2].
> the ash pan [photo 3],
> the doors ; be careful to get the doors the right way
around :
– the metal door is positioned above the fascia where the
serial number is displayed, at the bottom of the drum
[photo 4],