Component Removal
7-23
#7015817 - Revision A - January, 2010
INTEGRA
INTEGRA
TED
TED
(736 T
(736 T
all SWS #2970000)
all SWS #2970000)
SERIES
SERIES
Upper Compartment Heat Exchanger Removal
The upper compartment heat exchanger passes down
through a hole in the back left corner of the mullion.
The heat exchanger then passes down through the
lower compartment behind the heat exchanger cover,
and through a hole in the back left corner of lower com-
partment floor.
NOTE: Before attempting to remove a heat exchanger,
evacuate the refrigerant from the sealed system.
To remove the upper compartment heat exchanger, the
following components must first be removed: the upper
light diffuser, upper evaporator cover, both drawer
assemblies, left side drawer slides, heat exchanger
cover in the lower compartment and the kickplate/grille.
The unit tray will also need to be slid out.
NOTE: It will be necessary to disconnect the compres-
sor electrical leads in order to pull the tray out far
enough to remove the heat exchanger.
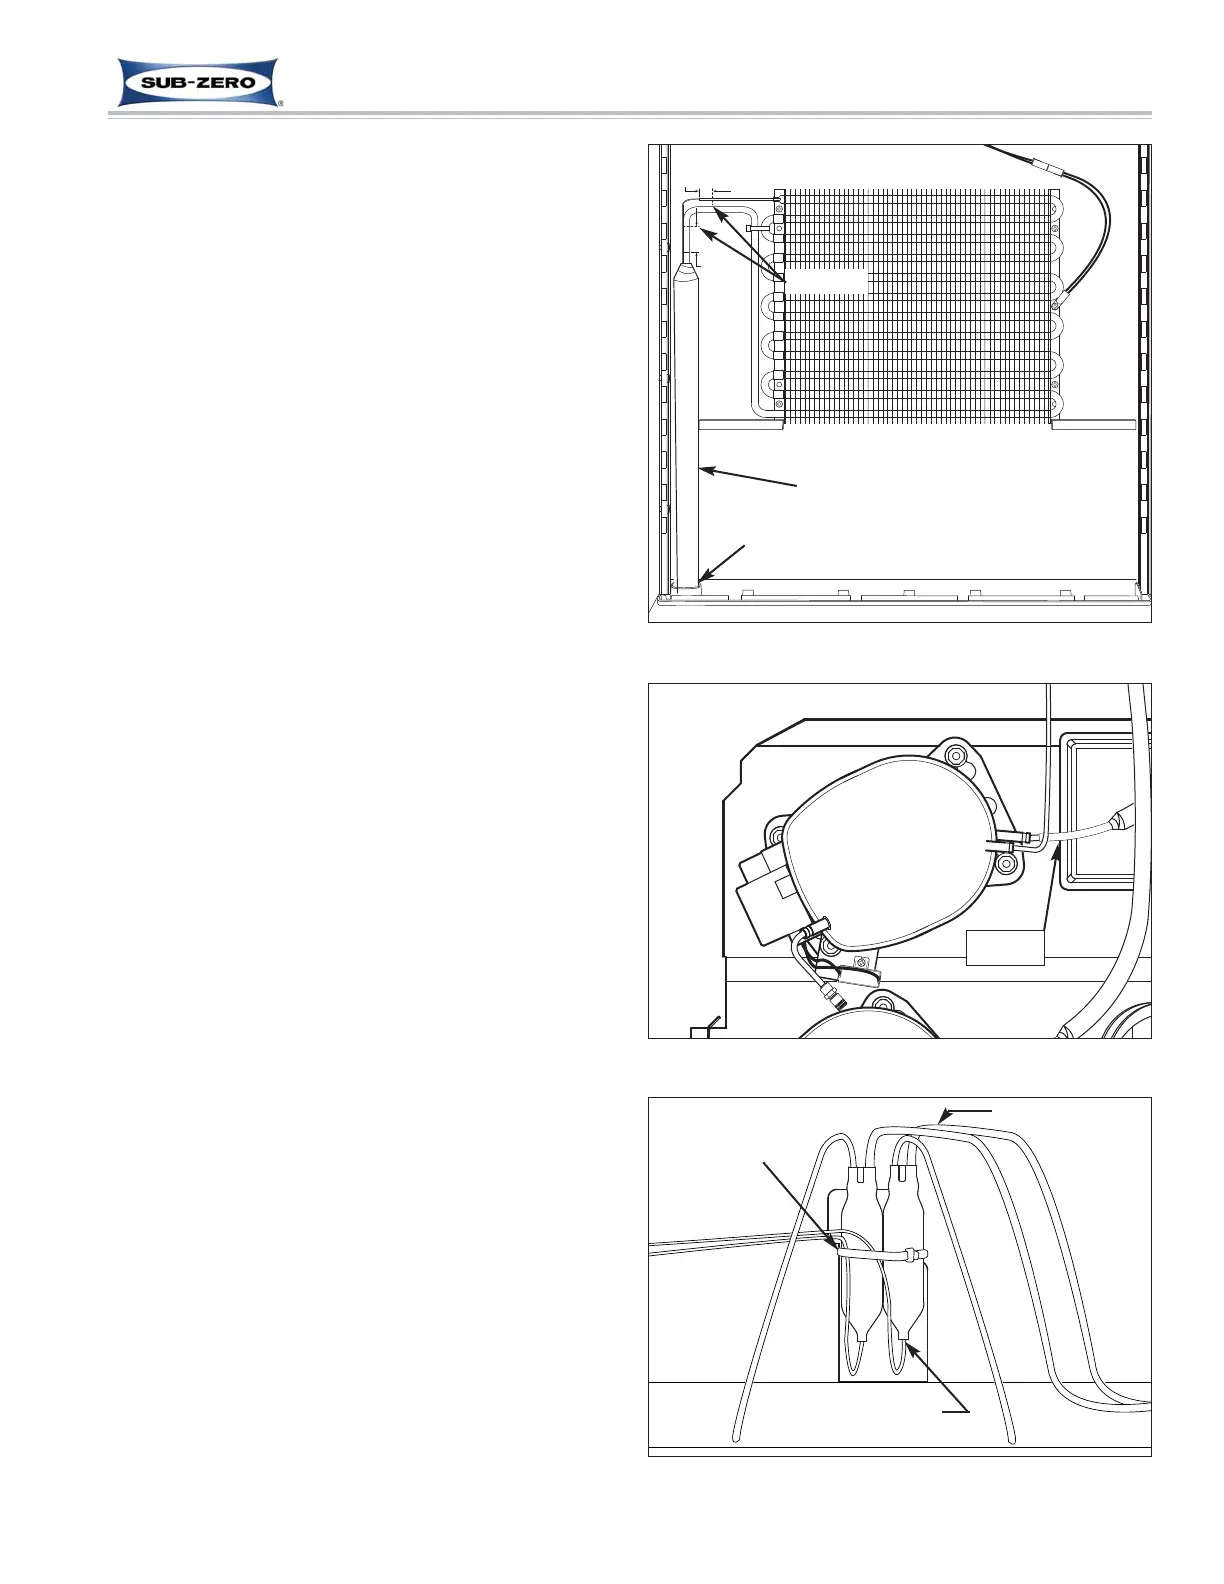
1. Begin removing heat exchanger by cutting the inlet
and outlet tubes at evaporator. (See Figure 7-52)
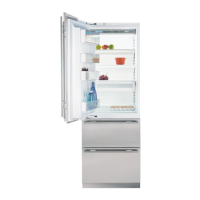
2. Cut suction line approximately two inches from
compressor. (See Figure 7-53)
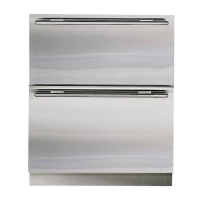
3. Since the filter-drier will be replaced at the same
time, cut drier inlet tube approximately one inch
from drier, leaving capillary tube attached. (See
Figure 7-54)
4. The heat exchanger will be scrapped, so use a tin
snips or similar tool to cut heat exchanger near
hole in mullion and hole in floor of the lower com-
partment. (See Figure 7-53)
5. Pull the pieces of heat exchanger out and clear the
Hot-Melt away from holes.
NOTE: To avoid damaging the unit from the brazing
torch flame, remove the evaporator from the compart-
ment and attach the new heat exchanger to the evapo-
rator outside of the unit.
NOTE: Applying dish soap on the tubing insulation of
the heat exchanger and around the holes in the mullion
and lower compartment floor, will assist in working the
heat exchanger through the holes.
NOTE: When installing replacement heat exchanger,
be sure to thoroughly clean the tubing before brazing.
NOTE: Apply a bead of silicone around the heat
exchanger where it passes through the holes in the
mullion and lower compartment.