400 Series
400 Series
Component Access and Removal
6-24
Figure 6-51.
Wine Storage Control Panel Assembly
Figure 6-53.
Refrigerator Control Panel Assembly
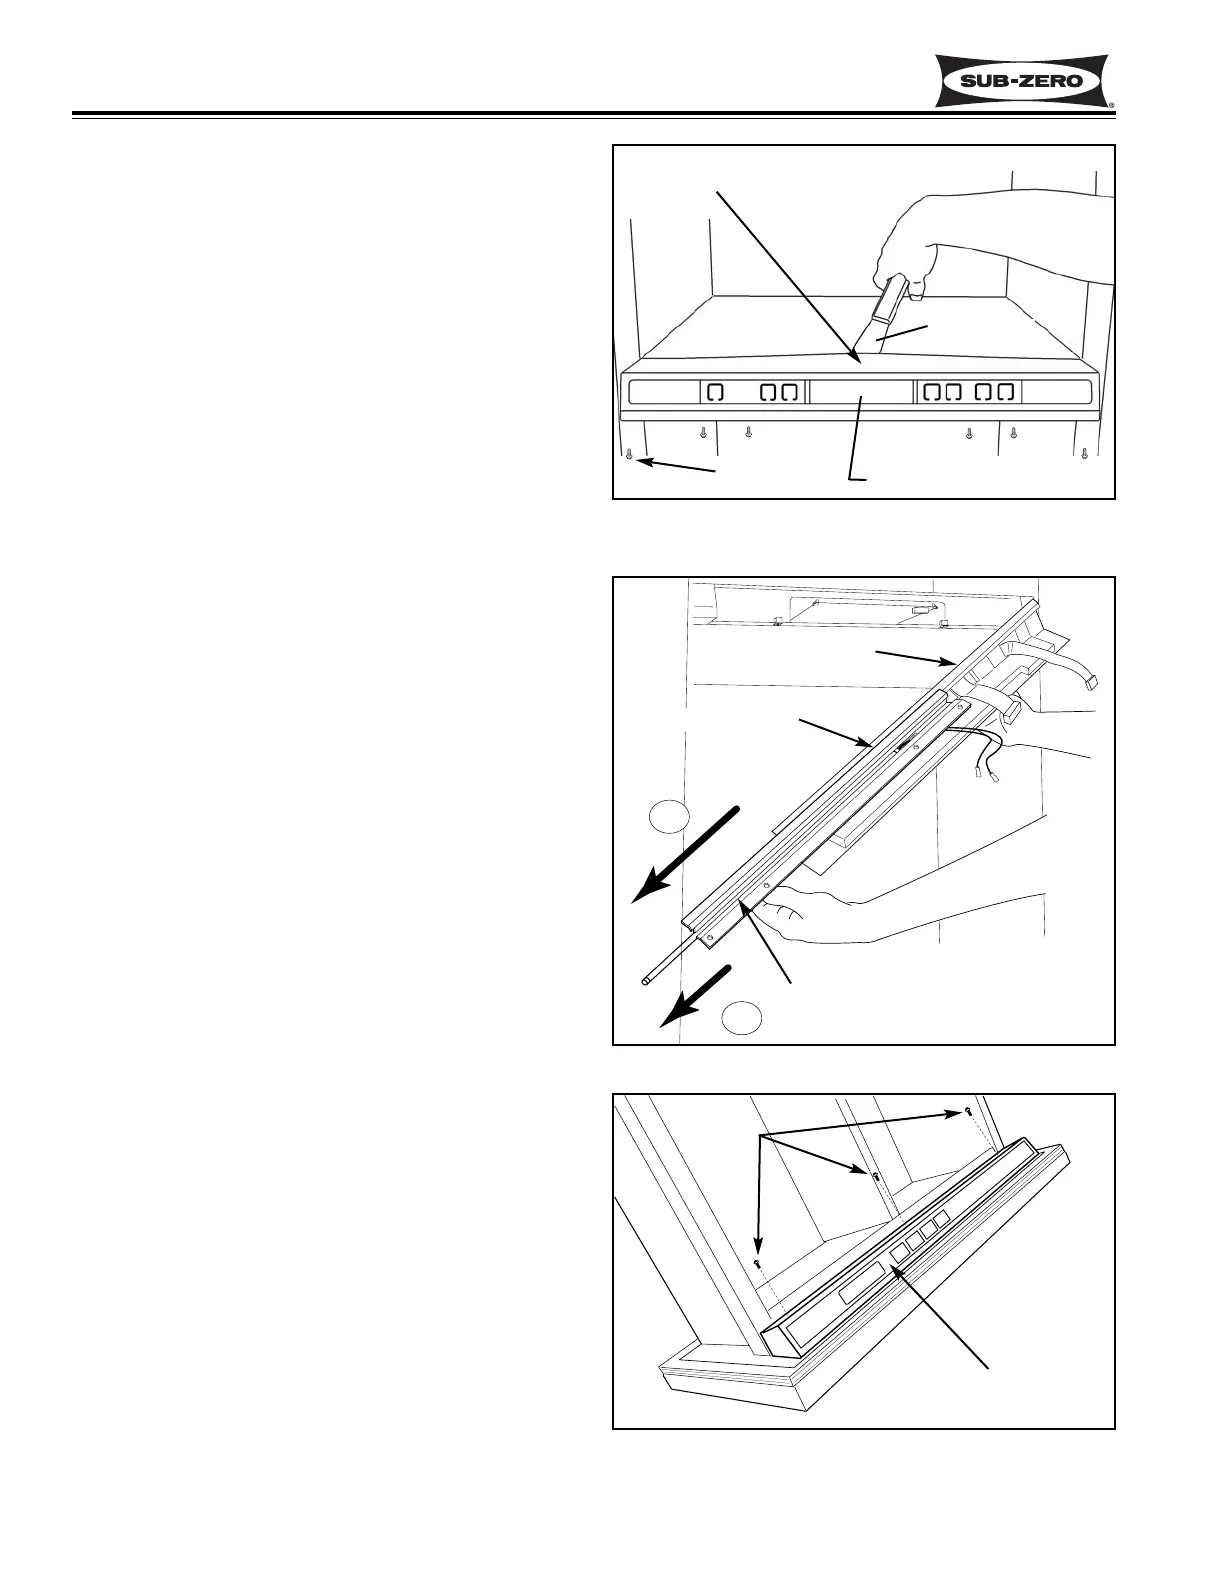
Wine Storage Control Panel Assembly Removal
(Models 427 & 427R)
The control panel assembly is set at the front of the
wine compartment divider and is secured by six screws
at the bottom, and a silicone seal under the top flange.
Tabs at the bottom and a concealed tab at the top cen-
ter of the control panel housing help to position the con-
trol panel assembly.
NOTE: See ELECTRIC SHOCK WARNING at begin-
ning of this section.
To remove the control panel assembly, first access the
control board and disconnect the lower light strip electri-
cal leads, LED ribbon cable and the membrane switch
ribbon cable. Then, extract the six screws at the bot-
tom of the control panel. Now, slide the blade of a putty
knife under and along the top flange of the control
panel housing to break the silicone seal. (See Figure
6-51)
NOTE: Do not lift the top flange of the control panel
housing too vigorously. Doing so will break the con-
cealed tab at the top center.
After breaking the silicone seal, pull the control panel
assembly forward and disconnect the ground wire.
NOTE: When reinstalling the control panel assembly,
you must reapply a bead of silicone along the inside of
the top flange.
Lower Light Strip Access and Removal
(Models 427 & 427R)
NOTE: See ELECTRIC SHOCK WARNING at begin-
ning of this section.
The lower light strip is held in the channel of the light
strip housing, which attached to the control panel
assembly. To remove the lower light strip, you will first
need to remove the control panel assembly. Now, slide
the light strip housing off of the control panel assembly.
Then, slide the light strip out the end of the channel in
the housing. (See Figure 6-52)
Refrigerator Section Control Panel Assembly
Removal (Model 427R ONLY)
The refrigerator control panel assembly is attached to
the inside of the top drawer with three screws.
NOTE: See ELECTRIC SHOCK WARNING at begin-
ning of this section.
To remove the refrigerator control panel assembly,
extract the three screws and tilt the control panel back
towards the drawer tub. (See Figure 6-53) Now, dis-
connect the power supply to the control panel assembly
and lift the control panel assembly up and out.
Control Panel Assembly
Putty Knife
Screws (6)
Do not break
concealed
tab
1
2
Control Panel Assy
Light Strip Housing
Light Strip
Figure 6-52. Lower Light Strip
Refrigerator
Control
Panel Assembly
Screws