Do you have a question about the Sub-Zero 427R and is the answer not in the manual?
Highlights the critical nature of proper installation by qualified personnel for Sub-Zero units.
Provides detailed dimensions and door swing clearances for Models 424 and 424FS.
Details rough opening dimensions and preparation requirements for the 424 wine storage unit.
Specifies power supply, circuit breaker, and receptacle requirements for models 424 and 424FS.
Details home alarm system wiring connections for models 424 and 424FS.
Provides instructions for uncrating the unit, removing packing materials, and moving the appliance.
Explains how to install the anti-tip bracket for stable and safe installation of the unit.
Details anti-tip bracket installation methods for wood and concrete floors.
Instructions for installing an optional accessory lock kit for the wine storage unit.
Guides on positioning the unit into the installation opening and ensuring proper engagement.
Explains how to adjust the leveling legs to ensure the unit is stable and level.
Details on making home alarm system wiring connections for the appliance.
Instructions for installing the kickplate after the unit is leveled and wired.
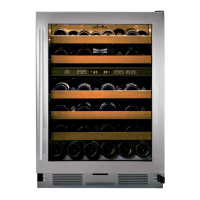
Describes the two design applications (stainless steel and overlay) for Model 424 door panels.
Details the process of installing an overlay door panel, including handle attachment.
Provides important cautions regarding drilling and panel fitting for overlay door panels.
Instructions for adjusting the door hinges to ensure proper alignment and fit.
Directs users to checklists and service information after installation is complete.
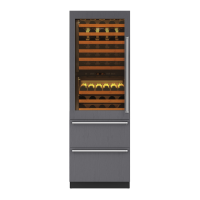
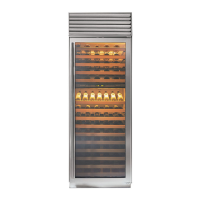
Presents overall dimensions for the 427 and 427R wine storage unit models.
Details rough opening dimensions and door swing requirements for 427 and 427R units.
Specifies electrical supply, circuit breaker, and receptacle needs for 427 and 427R models.
Details home alarm system wiring connections for models 427 and 427R.
Instructions for unpacking, removing packing materials, and moving the appliance safely.
Guides on installing anti-tip brackets for stable installation of 427 and 427R units.
Details concrete wedge anchor installation for anti-tip brackets.
Provides instructions for disconnecting cables and positioning the 427R drawers and unit.
Instructions for installing an optional lock kit for the 427 and 427R wine storage units.
Guides on positioning the unit, checking engagement, and ensuring proper alignment.
Explains how to adjust front and rear leveling legs for stability and proper operation.
Instructions for snapping decorative molding strips into place on the unit.
Details wiring connections for dual installation heater kits and home alarm systems.
Instructions for installing the kickplate/grille, ensuring proper ventilation and serviceability.
Discusses stainless steel and integrated designs for 427 and 427R door panels and drawers.
Details the installation of stainless steel door panels, including screw locations.
Explains the installation of overlay door panels, including handle and lock attachment.
Provides important cautions for drilling and panel fitting for overlay door panels.
Guides on positioning and attaching drawer panels for the Model 427R.
Instructions for installing side panels, ensuring they are securely fastened.
Details on anchoring the unit to cabinetry and side panels using provided clips and kits.
Explains how to adjust the 90° door stop built into the hinge system.
Overview of installation requirements and design alternatives for the WS-30 model.
Details site preparation, rough opening requirements, and tools/materials needed for installation.
Provides opening dimensions for framed, overlay, and stainless steel WS-30 models.
Details opening dimensions for flush inset applications of the WS-30 model.
Specifies opening dimensions for dual installations of framed, overlay, and stainless steel models.
Provides opening dimensions for dual flush inset installations of the WS-30 model.
Specifies power supply, circuit breaker, and receptacle requirements for the WS-30 model.
Instructions for unpacking the unit, inspecting for damage, and preparing for installation.
Details how to remove and reinstall the top grille assembly for access and adjustment.
Explains critical placement and installation of anti-tip brackets for stability.
Details concrete floor installation for anti-tip brackets, including anchor requirements.
Guides on moving the WS-30 unit into position using rollers and engaging anti-tip brackets.
Instructions for adjusting leveling legs and rear rollers for proper unit alignment.
Details three types of door adjustments: in/out, tilt, and up/down.
Instructions for anchoring the unit to cabinetry and ensuring proper fit and security.
Details wiring connections for integrating a home alarm system with the unit.
Steps to complete installation, including reinstalling drain pan and kickplate.
Instructions for installing the 90° door stop for proper door opening.
Guidance on installing front panels for framed and overlay models.
Instructions for installing framed panels, including handle and trim molding removal/reinstallation.
Details framed panel specifications and considerations for routed or raised panels.
Instructions for installing overlay panels, including handle hardware and panel fitting.
Details overlay panel specifications and considerations for grille panel assembly.
Instructions for installing flush inset panels, including handle hardware and panel fitting.
Details flush inset panel specifications and cautions regarding dimensions and airflow.
Illustrations and chart for panel offsets and reveals in flush inset dual installations.
Guidance on dual installations, including requirements for filler strips and kits.
Details adjustments and kits required for dual flush inset installations.
Provides panel offsets, reveals, and cautions for dual flush inset installations.
Instructions for installing custom side panels, including routing and height considerations.
Steps to complete installation, including reinstalling drain pan and kickplate.
A comprehensive checklist to ensure all installation steps are completed properly.
Provides guidance on obtaining service, identifying model/serial numbers, and rating plate locations.
| Brand | Sub-Zero |
|---|---|
| Model | 427R |
| Category | Wine Cooler |
| Language | English |