400 Series
400 Series
Component Access and Removal
6-26
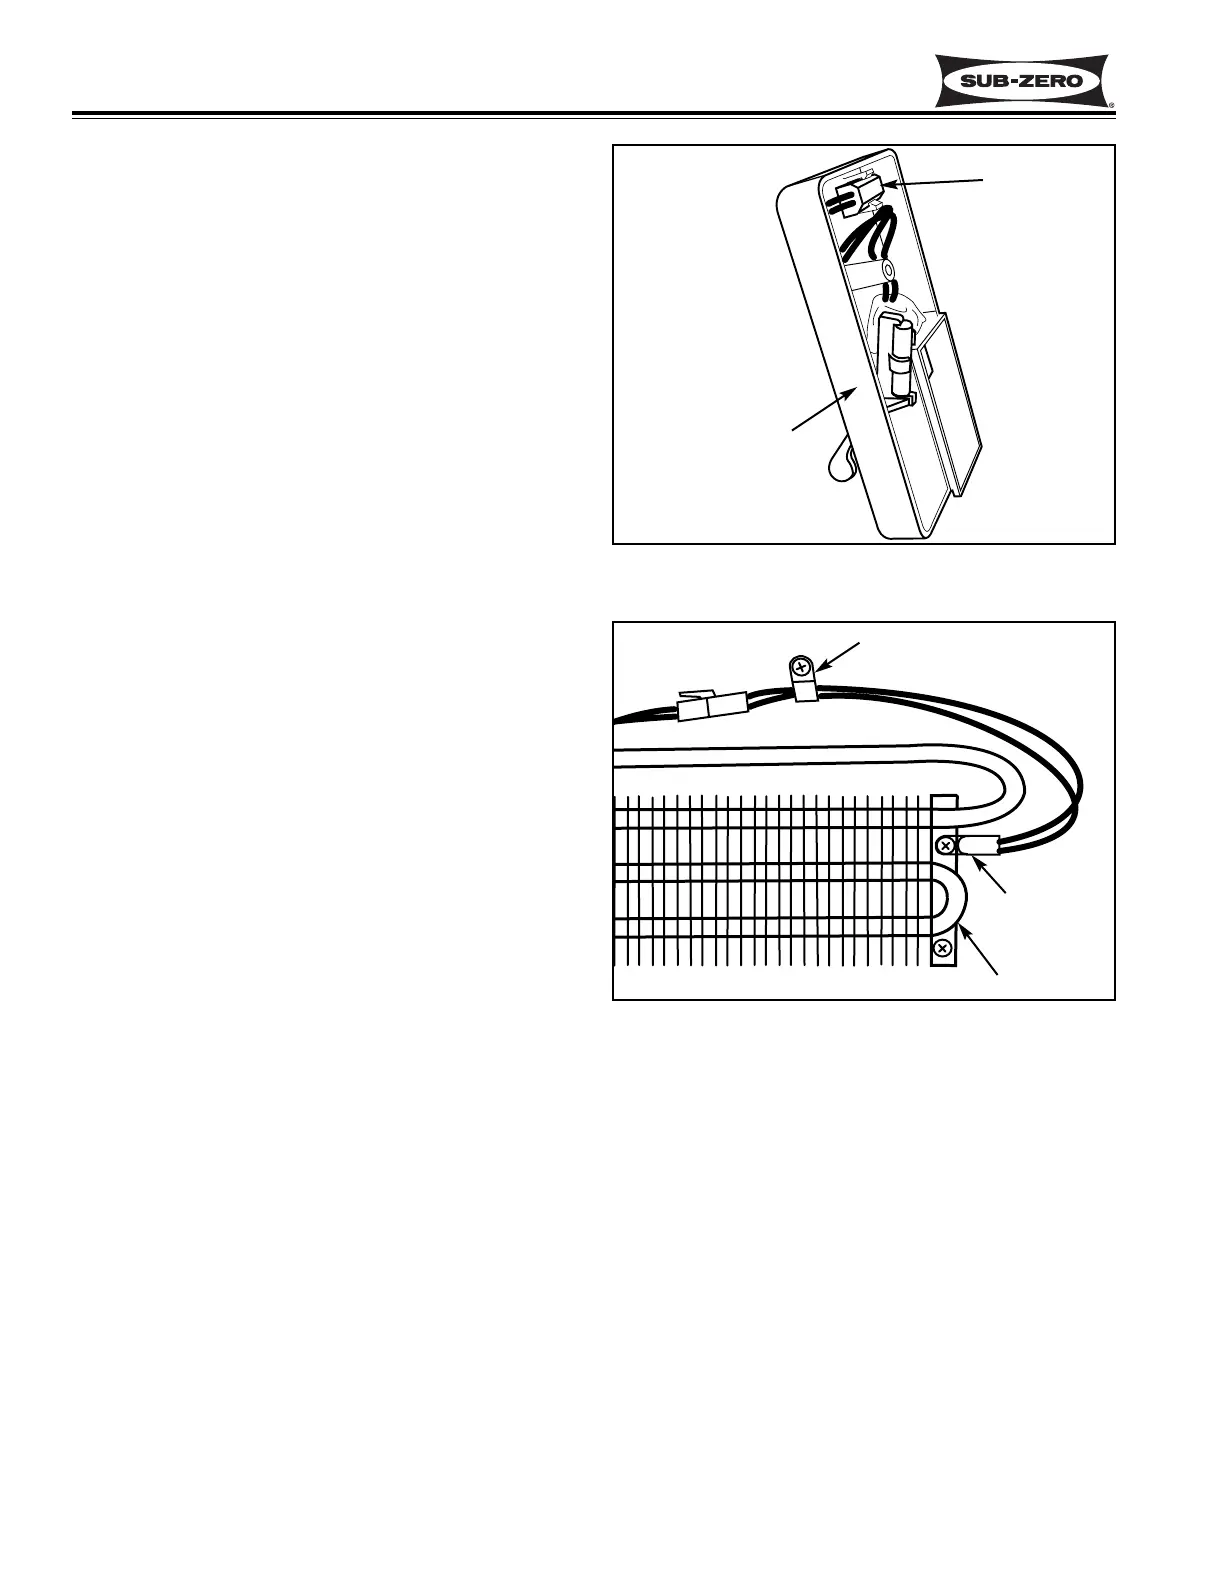
Refrigerator Compartment Thermistor Access and
Removal (Model 427R ONLY)
The compartment thermistor in the refrigerator section
is located behind the upper drawer, inside the top Reed
switch assembly, and is considered part of the top Reed
switch assembly. To replace the compartment thermis-
tor, the complete top Reed switch must be replaced
(See Figure 6-56)
NOTE: See ELECTRIC SHOCK WARNING at begin-
ning of this section.
To access and remove the top Reed switch assembly,
extract the Reed switch mounting screw. Lean the top
of the Reed switch forward, disconnect the electrical
leads from the back side, and pull the Reed switch out.
NOTE: When reinstalling a Reed switch, plug in the
electrical leads. Place the bottom flange of the switch
housing into the opening in the evaporator cover.
Then, rotate the top back and insert the screw.
Refrigerator Evaporator Thermistor Access and
Removal (Model 427R ONLY)
The refrigerator section evaporator thermistor is
attached to the right side evaporator brackets with a
Phillips-head screw. (See Figure 6-57)
NOTE: See ELECTRIC SHOCK WARNING at begin-
ning of this section.
To access the refrigerator evaporator thermistor, you
must first remove the evaporator fan cover mounting
screws and the evaporator fan cover. Extract the
grounding screw towards the top right, and remove both
Reed switches. Pull the top of the evaporator cover for-
ward and down and lift off of pegs at bottom. Remove
the screw from the evaporator thermistor and discon-
nect the evaporator thermistor electrical leads.
Upper and Lower Wine Storage Evaporator Fan
Assembly Access and Removal (Model 427 & 427R)
The wine storage evaporator fan assemblies are
attached to the rear wall of each wine compartment with
four Phillips-head screws. (See Figure 6-58)
NOTE: See ELECTRIC SHOCK WARNING at begin-
ning of this section.
To access and remove a wine storage evaporator fan
assembly, you must first remove the wine racks in the
appropriate compartment. Then, remove the evapora-
tor fan cover mounting screws and the evaporator fan
cover. Remove the evaporator cover mounting screws
towards the bottom of the evaporator cover. Rotate the
side of the evaporator cover farthest from the false wall
out slightly and push the compartment thermistor elec-
Figure 6-56. 427R Refrigerator
Compartment Thermistor / Reed Switch
Figure 6-57.
427R Refrigerator Evaporator Thermistor
trical leads and rubber grommet from the slot in the
evaporator cover. You will find a ground wire riveted to
the back of the evaporator cover. The other end of the
ground wire has a screw securing it to the rear wall.
Extract the ground screw and continue rotate the side
of the evaporator cover farthest from the false wall out
until the flange behind the false wall clears the false
wall. Pull the evaporator cover out. Pull the fan blade
from the fan motor shaft. Extract the screw from the P-
clamp holding the fan wires. Then remove the four
screws from the fan bracket and disconnect the fan
motor electrical leads.
Thermistor
P-Clamp
Evaporator
Upper Reed
Switch Assembly
with Compartment
Thermistor
Thermistor
 Loading...