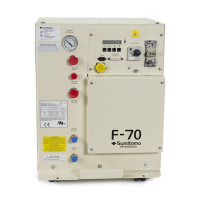
Troubleshooting
6. If the motor passes these electrical checks, replace the terminal box cover and the
compressor’s cover.
Replace Fuses
Parts required: Internal fuse kit, F-70H (high volt only), P/N 267127A, including
(3) Power fuses, 1.0 ampere, 600 V, class CC, P/N 34162
(3) Control board fuses, 0.63 ampere, 250 V, IEC Type T, P/N 34687
Internal Fuse Kit, F-70L (low volt only), P/N 267128A, including
(3) Power fuses, 2.0 ampere, 600 V, class CC, P/N 34164
(3) Control board fuses, 0.63 ampere, 250 V, IEC Type T, P/N 34687
Tool required: #2 Phillips screwdriver.
AVOID ELECTRIC SHOCK. Permit only qualified electrical technicians to open
electrical enclosures, to perform electrical checks or to perform tests with the
power supply connected and wiring exposed. Failure to observe this warning
can result in serious injury or death.
AVOID ELECTRIC SHOCK. Disconnect the power to the compressor before
troubleshooting the electrical components.
Three (3) Class CC time delay fuses (1.0 ampere for F-70H, 2.0 amperes for F-70L), FU-1, FU-
2 and FU-3, are located in the electrical chassis box. See Figure 3.
Three (3) 0.63 AT fuses, FU-4, FU-5 and FU6 are located on the printed circuit board (PCB 1) in
the electrical chassis box. See Figure 3.
If the LCD display reads Phase Seq-ERR, check all fuses FU-1 through FU-6. If no phase
sequence error is indicated but the diagnostic interface connection signals are behaving
erratically or the compressor will not run or build pressure, check fuses FU1-FU3.
1. Disconnect the power to the compressor.
2. Remove the compressor's cover.
3. Remove the ventilated cover from the electrical chassis box.
4. Remove, inspect or check each fuse to find a blown fuse(s). Replace the defective fuse(s).
5. Reinstall the cover on the electrical box.
6. Reinstall the compressor’s cover.
7. Reconnect the power to the compressor.