PG 5
SEAT / BRACE
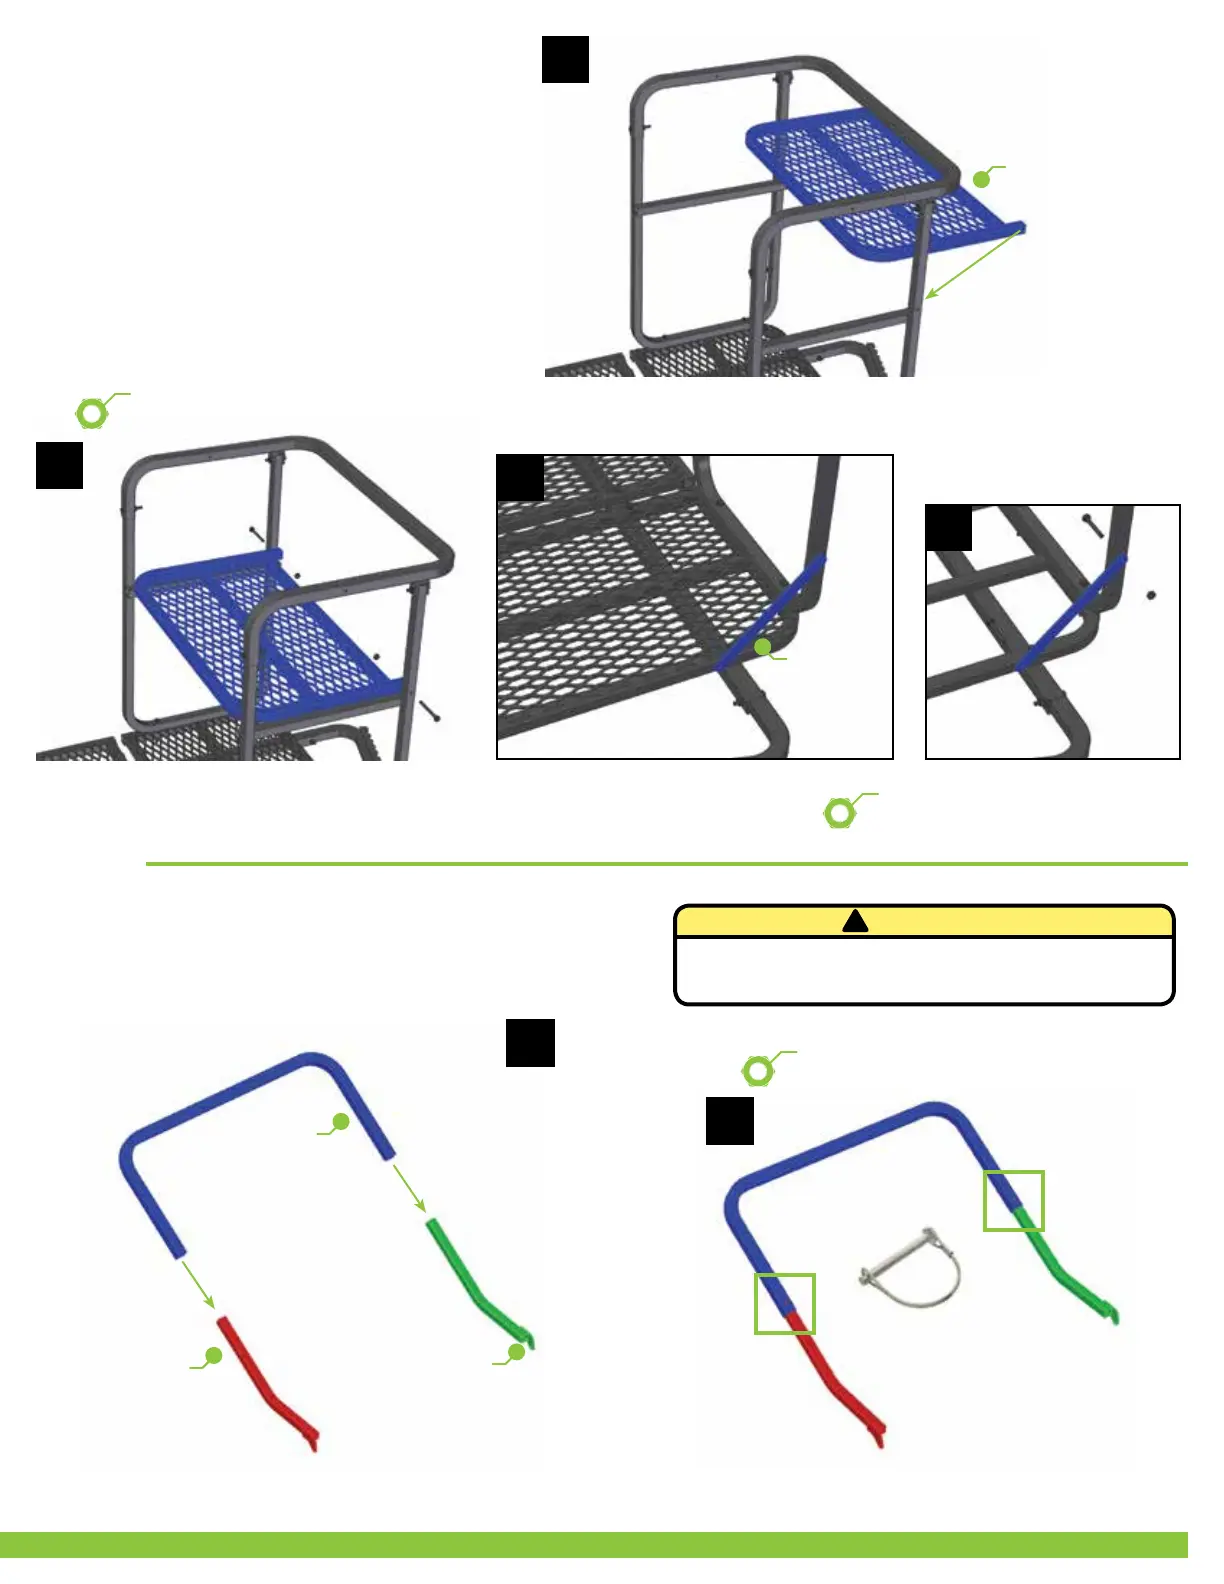
1. Position the Seat Base between the
Seat Supports as shown in figure 14.
2. Line up the holes and secure using
two 2 1/2” bolts with lock nuts. Do not
overtighten as this connection is designed
to pivot. (see figure 15)
3. Position one of the Cross Tension Bars
between the Seat Support and Platform
as shown in figure 16.
4. Secure using two 1 3/4” bolts and lock
nuts. (see figure 17)
5. Repeat for the other Cross Tension Bar.
14
SEAT
BASE
(PN 82065.600)
2 1/2” BOLTS, LOCK NUTS -
WRENCH TIGHTEN
15
CROSS
TENSION
BAR
(PN 82065.010)
16
1 3/4” BOLTS, LOCK NUTS -
WRENCH TIGHTEN
17
GUNREST
1. Slide the Gunrest Bar onto the Left and Right Gunrest Arms as
shown in figure 18.
2. Secure the Gunrest Bar using two 1/4” Wire Lock Pins as shown in
figure 19. The Wire Lock Pins allow adjustment of the Gunrest Bar by
sliding it in or out.
RIGHT
GUNREST ARM
(PN 82065.830)
LEFT
GUNREST
ARM
(PN 82065.820)
GUNREST
BAR
(PN 82065.810)
18
19
!
CAUTION
DO NOT use the Gun Rest Bar as a hand hold while
climbing into our out of this stand.
1/4” WIRE LOCK PINS