SHOT OF STEAM
MD
VERTICALE
La caractéristique Shot of Steam
MD
verticale permet d’utiliser votre fer
comme un presseur de vêtements. CONSEIL: Accrochez le vêtement
sur un cintre pour obtenir de meilleurs résultats lorsque vous utilisez la
vapeur verticale sur un vêtement. Les draperies et les rideaux suspen-
dus peuvent aussi être traités à la vapeur.
Si vous désirez utiliser la vapeur verticale:
1. Assurez-vous que le fer est réchauffé (2 minutes).
2. Tenez le fer en position verticale et proche du tissu que vous voulez
vaporiser mais sans le toucher.
3. Tenez le tissu bien tendu avec votre autre main.
4. Appuyez sur le bouton du Shot of Steam
MD
durant des intervalles
de 3 secondes pendantque vous déplacez le fer d’un côté à l’autre
de la région froissée.
AVERTISSEMENT: Gardez vos mains éloignées de la région vaporisée
afin d’éviter les risques de brûlures.
AVERTISSEMENT: NE PAS vaporiser des vêtements pendant que vous
les portez; cela peut occasionner des blessures.
• Placez le fer à vapeur en position verticale.
• Branchez le fer sur une prise murale.
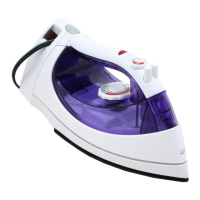
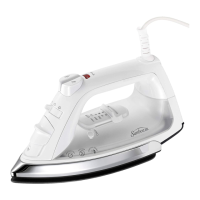
• Réglez le cadran du régulateur de température (figure 4) sur la
température indiquée sur l’étiquette ou dans le tableau suivant.
-E8-
VERTICAL SHOT OF STEAM
®
The vertical Shot of Steam
®
feature allows your iron to function as
a garment steamer. Tip: When using the vertical Shot of Steam
®
on clothing, hang the clothing on a clothes hanger for best results.
Hanging curtains and drapes may also be steamed.
How to use Vertical Steam:
1. Allow iron to warm up (2 minutes).
2. Hold the iron in a vertical position, with the iron close to but not
touching the fabric you want to steam.
3. With your other hand, pull the fabric tight.
4. Press the Shot of Steam
®
button in approximately 3-second intervals
as you move the iron across the wrinkled area.
WARNING: To prevent the risk of burns, keep your hand away from the
area being steamed.
WARNING: DO NOT steam garments while wearing them; this may
result in injuries.
• Set the Iron in an upright position.
• Connect the Iron to an electrical wall socket.
• Set the Temperature Control Dial (figure 4) to the correct ironing
temperature as indicated on the label or the temperature settings
table.
POUR RÉGLER LA TEMPÉRATURE
-F8-
SETTING THE TEMPERATURE
(figure 4)
(figure 4)