4
5
FEATURES
Thank you for choosing the
S
UNBEAM
®
M
IXMASTER
®
M
IXER
. For generations we have
been helping cooks prepare moist cakes, light and fluffy meringue and chewy cookies.
You can even make bread dough with your
S
UNBEAM
®
M
IXMASTER
®
M
IXER
.
The
S
UNBEAM
®
M
IXMASTER
®
M
IXER
offers
you a choice of 12 different mixing speeds.
The Bowl-Fit Beaters and Bowls have been designed to mix ingredients thoroughly
and evenly.
No problem ejecting the beaters either – just push the Ejector Button located on the side
of the handle.
Surely you’ll love being able to make so many things with your Mixer!
ASSEMBLING THE STAND MIXER
Before assembling the mixer,
be sure the speed control dial is
in the OFF position and the
electric cord is unplugged.
ATTACHING THE
TURNTABLE
Place the revolving turntable into
the base of the stand by pressing the
turntable into the center hole of the
adjustment slot until it snaps into place.
ADJUSTING THE
TURNTABLE
The turntable must be adjusted
depending upon which bowl size is
being used (see “Adding the Mixing
Bowl”). To adjust, press down on the
turntable locator switch and slide switch
to the proper icon.
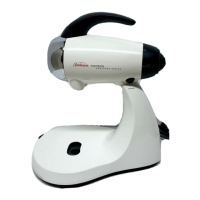
ATTACHING AND REMOVING MIXER HEAD
To attach the mixing head, press in on
the mixer-release trigger, located at the
rear of the stand.
Place the mixer head on the stand so
that the metal pivot on the bottom of
the mixer head goes into the latched
opening on the top of the stand.
As you release pressure from the
mixer-release trigger, the top of the
latch should clamp around the
metal pivot. Once the mixing head
is lowered into position, it will lock
into place.
To raise the mixing head, press the
head lock button downward while
pulling up on the handle of the mixing
head. Once unlocked, the mixing head
can be removed by pressing the mixer
release trigger.
Be sure the mixer head is securely
in position before using.
N
OTE
:
This mixer is NOT intended
for use away from the stand.
ADDING THE
MIXING BOWL
Move the turntable locator switch to the
proper setting – the large bowl icon if
you are using the large bowl; the small
bowl icon if you are using a small bowl.
Place the desired mixing bowl onto
the turntable.
Mixing bowls should NEVER be used in
a conventional oven, microwave oven,
on top of the range or on any other
heated surface.
If mixing bowls are scratched
or chipped, do not use mixer.
Mixer bowl should not be used
to blend in hot liquids.
MIXER-RELEASE
TRIGGER
LATCHED OPENING
BALL BEARING
E
XTENSION
MIXER
HEAD
MIXER-RELEASE
TRIGGER
METAL
PIVOT
STAND
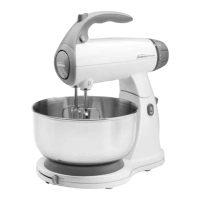
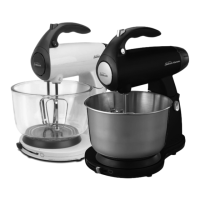
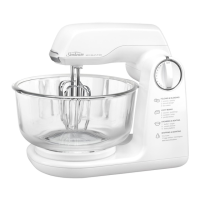
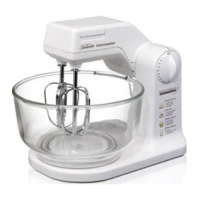
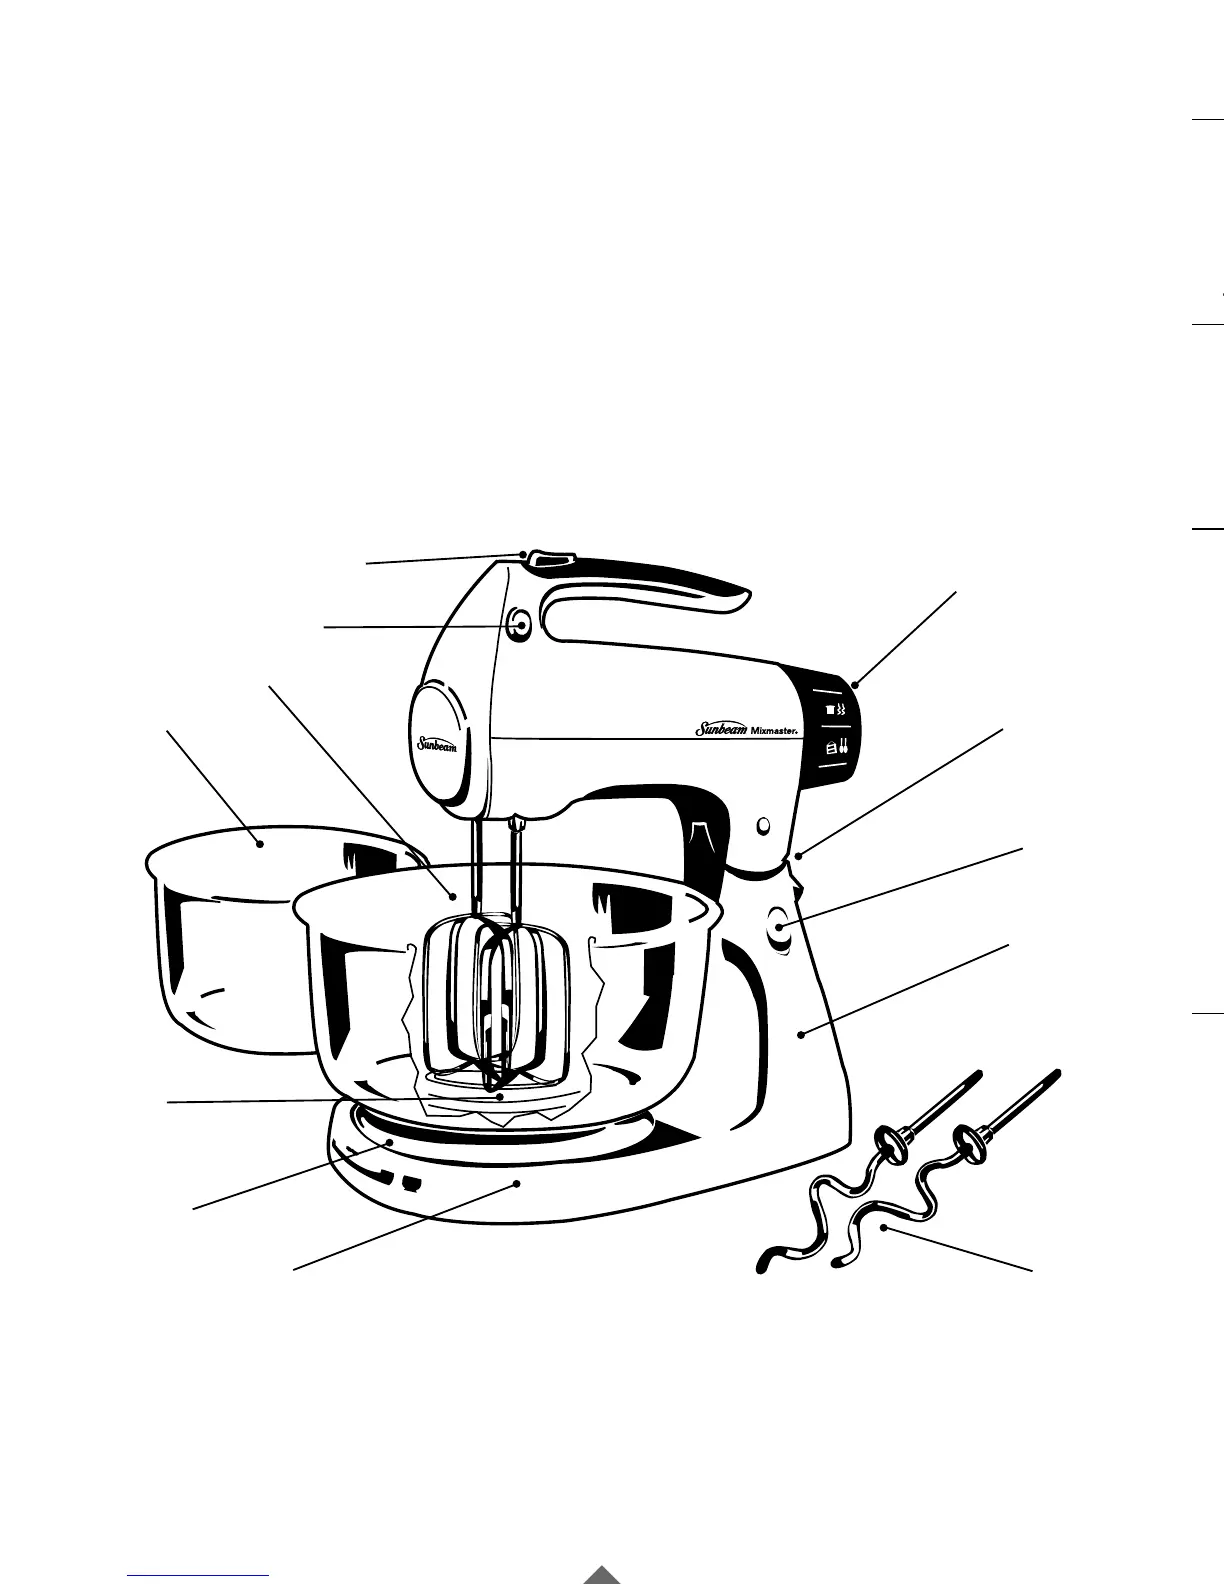
1
11a
11b
10
9
8
7
6
5
4
2
3
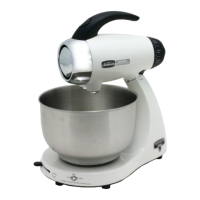
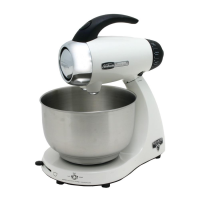
1. Beater Ejector
2. B
URST OF
P
OWER
®
Feature
3. Speed Control Dial
4. Mixer-Release Trigger
5. Headlock
6. Stand
7. Dough Hooks
(Not Included in 2366)
8. Turntable Locator
Switch
9. Turntable
10. Bowl-Fit Beaters
11a. Large Mixing Bowl
11b. Small Mixing Bowl
(Not Included in 2386/2388)