22
2.2 Accessories / Spare parts
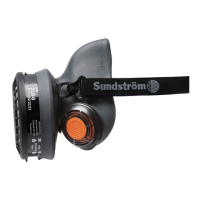
Fig. 4
Ite m Ordering. No.
1. Breathing hose R06-0635
2. Gasket for hose R01-3011
3. Exhalation membrane R06-0614
4. Head harness R06-0601
5. Head harness seal R06-0610
6. Sweatband R06-0602
7. Face seal R06-0603
7. Face seal, flame retardant T06-0611
8. Visor set, PC R06-0616
9. Peel-off 10 pcs T06-0601
9. Peel-off 100 pcs T06-0608
10. Clips for peel off T06-0607
11. Bump cap T06-0602
12. Neck cover T06-0603
12. Neck cover, flame retardant T06-0610
Note! T06-0602 is required
13. Cover with thread and knob T06-0640
15. Cleaning tissues SR5226, box of 50 H09-0401
16. Comfort kit T06-0606
3. Use
3.1 Installation
See also the user instructions for fan unit SR500/SR700 or
compressed air attachment SR507 whichever is used.
Breathing hose
Connect the breathing hose according to fig. 5.
3.2 Donning
See also the user instructions for fan unit SR500/SR700 or
compressed air attachment SR507 whichever is used.
• Raise the visor and put the face shield on. Fig. 6.
• If necessary, adjust the head harness. There are a lot
of adjustment options, see fig. 11. To adjust the head
harness easier, remove the head harness from the face
shield, see 4.4.6 To change the head harness.
Height adjustment.
A - how deep the head end up in the head part.
B - how high the face shield sits on the head. If neces-
sary, adjust for hearing protectors.
Angle adjustment between visor and head harness.
C - the angle against the visor. Adjust if the face is too
close to the visor or if the hearing protector not is sealed
around the ear.
D - adjustment of the angle of the headband around the
back of the head.
Width adjustment of the head harness.
E - rough adjustment of the width of the head harness.
F - the width of the head harness.
• Lower the visor unit by pulling the face seal down under your
chin. A clicking sound indicates that the visor unit has been
lowered fully. Fig. 7.
• Insert a finger between your chin and the face seal and run
the finger along the contact surface of the face seal all the
way round to check that it fits well against the face. Fig. 8.
• Check and adjust so that the breathing hose runs along your
back and that it is not twisted. Fig. 9.
Airflow deflector
The airflow can be directed towards visor or face for optimal
comfort. Fig. 10.
Peel-off
• Press the peel-off clip into the center of the side of the visor.
Fig. 12.
• Secure the peel-off to the peel-off clips. Fig. 13. When
mounting more peel-offs, mount them so that the tabs end
up different to ease the removal. Fig. 14.
Bump cap
It is possible to mount the bump cap on the SR570 to get
head protection that protects the user's head when colliding
with stationary objects. A bump cap is not a safety helmet and,
for this reason, should not be used to protect against falling or
moving objects. When the bump cap is mounted, the entire
crown of the head is covered on the user.
Hearing protectors
It is possible to attach hearing protectors into the slot connec-
tion on the sides of the face shield. Fig 15.
If necessary, adjust the head harness of the face shield to get
the hearing protectors in correct position, see 3.2 Donning.
3.3 Doffing
Do not take off the equipment until clear of the hazardous area.
See also the user instructions for fan unit SR500/SR700 or
compressed air attachment SR507 whichever is used.
4. Maintenance
The person who is responsible for cleaning and maintenance
of the equipment must have suitable training and be well
acquainted with work of this type.
4.1 Cleaning
Sundström cleaning tissues SR5226 are recommended for
daily care.
If the equipment is more heavily fouled, the head harness seal,
face seal and sweatband can be put in a laundry bag and
mashine wash (max 40°C). Other items can be washed in the
dishwasher (max 55°C).
If necessary, spray the face shield with 70 % ethanol or
isopropanol solution for disinfection.
NOTE! Never use solvents for cleaning.
4.2 Storage
After cleaning, store the equipment in a dry and clean place
at room temperature. Store the face shield with the visor in
the fully raised or fully lowered position. Avoid exposing it to
direct sunlight.
4.3 Maintenance schedule
Recommended minimum requirements on maintenance
routines so you will be certain that the equipment will always
be in usable condition.
Before use After use Annually
Visual inspection
• • •
Performance check
• •
Cleaning
• •
Change of gasket for
breathing hose
•
Change of exhalation
membrane
•
 Loading...