13
+1 (855) 251-1649
sunfireheaters.com
ASSEMBLY:
When unpacking the unit, some assembly is required before initial use. This process can be completed individually,
but a helper may be useful for some steps. Do not add fuel to the heater until the assembly process is complete.
The following tools will be used in the assembly process:
• 7/16” Wrench
• 1/2” Wrench
• Mallet / Hammer
• 5/16” Powered Driver
TO ASSEMBLE THE UNIT:
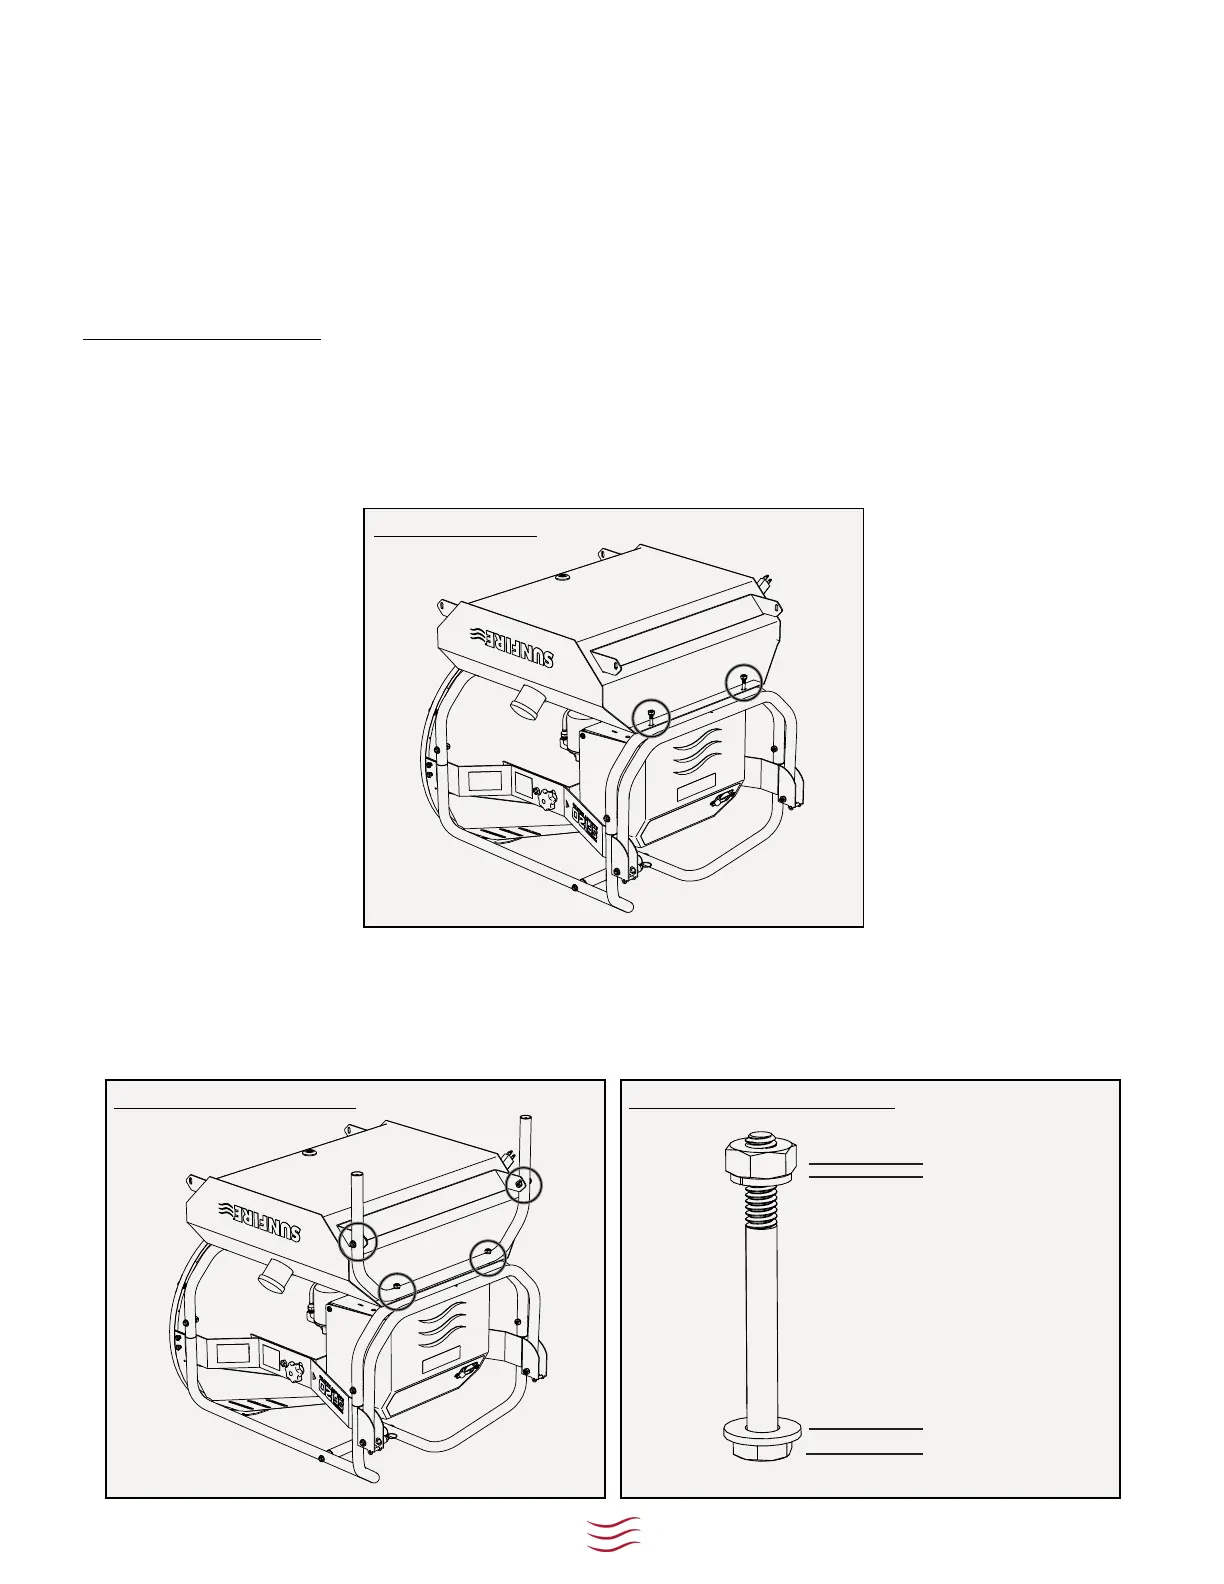
1. Unpack the heater assembly onto a soft surface, like a rug or mat (or use a portion of the packaging),
with room to work. Then, roll the heater sideways to invert it onto the work area, with the heater laying
on its top. Do not lay the heater on the dome face at any time. Using a 7/16” wrench and a 1/2” wrench,
locate and remove the two (2) nuts, locking washers, and spacers (not shown) from the bolts attaching the
upper frame to the tank on the rear of the unit.
INVERT THE UNIT
ATTACH LEG ASSEMBLY
2. Discard the spacers and reuse the bolts, washers, locking washers, and nuts, plus two (2) each of the 1/4”-
20tpi x 1-1/2” frame-mount bolts and associated washers and nut included in the packaging to affix the
leg assembly to the unit. Observe the correct arrangement of the fasteners and ensure the fasteners are
securely tightened before proceeding.
FASTENER ARRANGEMENT
Bolt
Washer
Locking Washer
Nut