© Sungrow Australia Group Pty. Ltd. All rights reserved.
As we continuously improving our services, changes to this document may occur without notice.
5.
Apply L-bracket to fix the battery to the wall.
6.
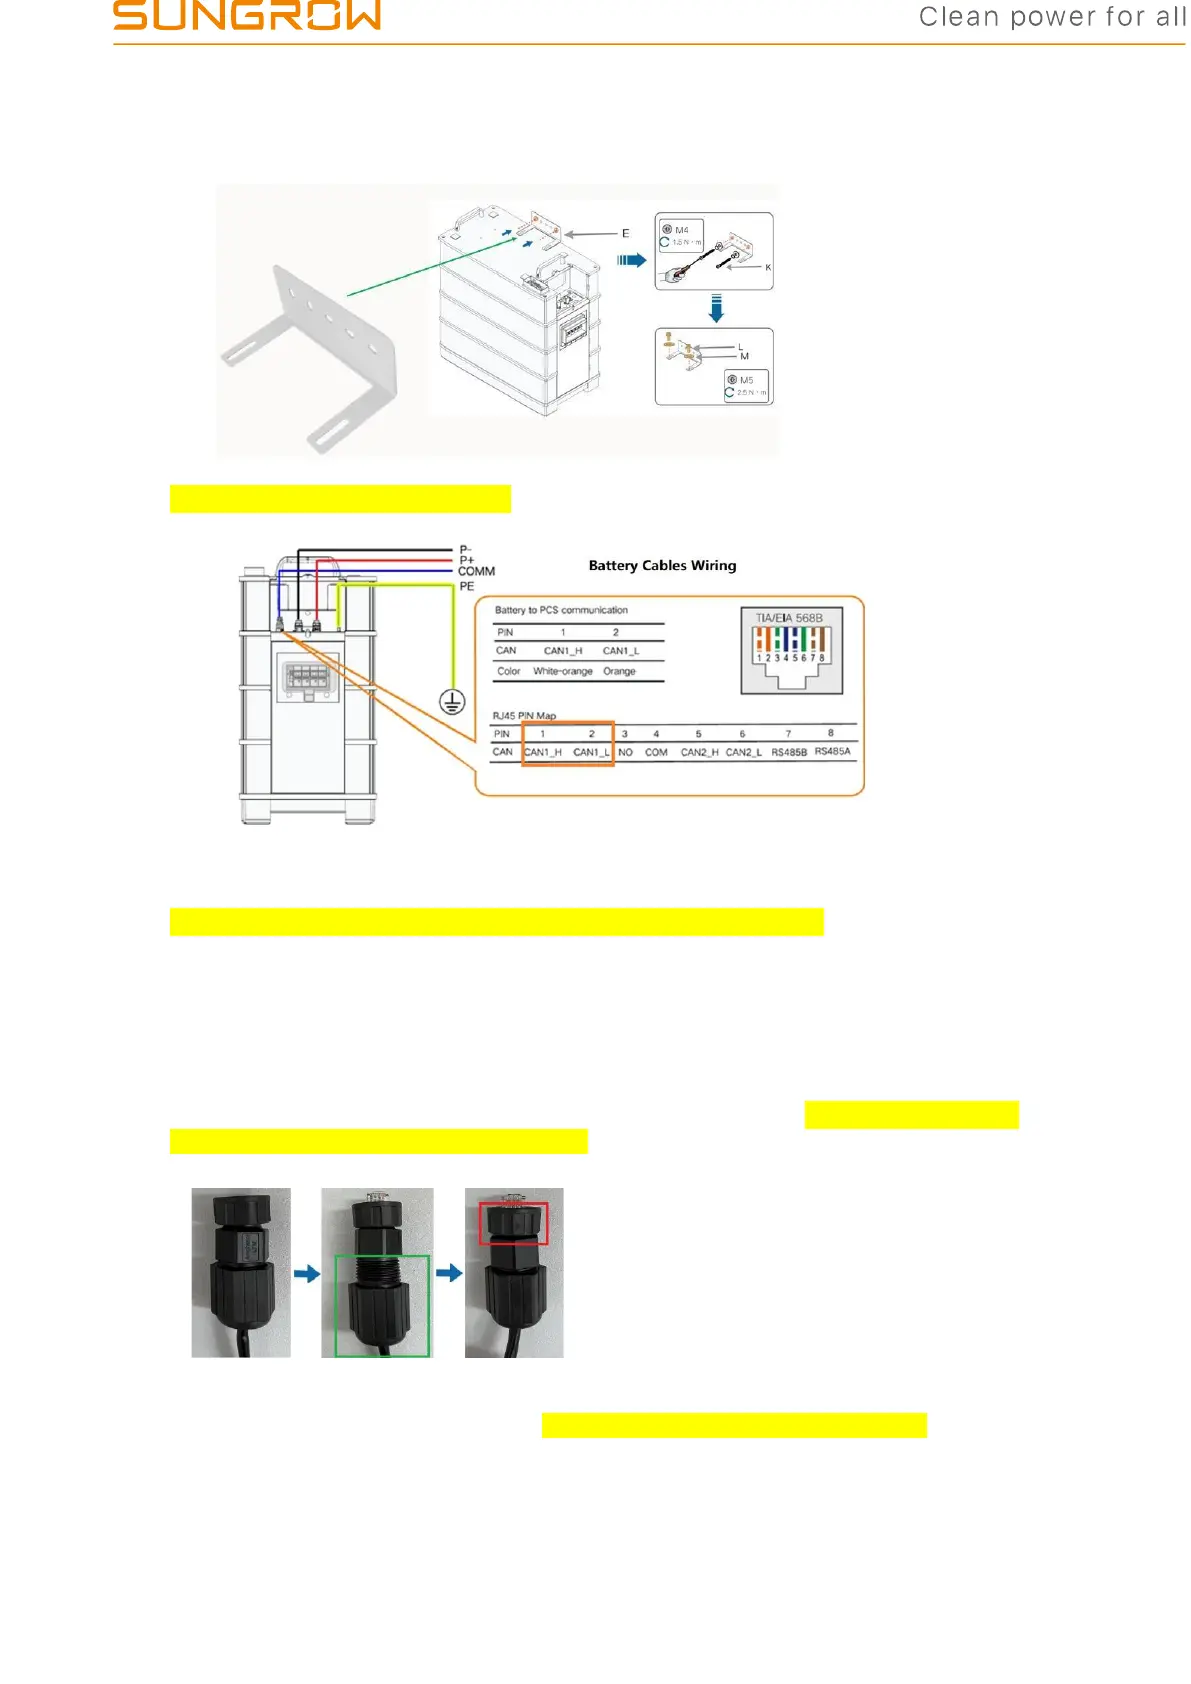
Cable’s plug-in and wiring
6-1. DC cables
Two DC cables (6mm2) need to be prepared by installers with Sunclix connectors.
One cable must have the same type of terminals at both ends to make sure
positive-to-positive & negative-to-negative connection.
6-2. Earthing
Green & Yellow earth cable (4mm2) needs to be prepared by installers.
6-3. COMM cable (Example of Sungrow COMM cable)
Sungrow provides battery COMM cable with 568B type, using White-Orange
cable for CAN_H, Orange cable for CAN_L
COMM Connection on battery side
Twist and loosen the green part and push the cable out as much as possible. Then fix
the green part.
Twist and loosen the red part, plug the terminal into battery COMM port and then screw
in to make sure the cable cannot be pulled out.

 Loading...