9
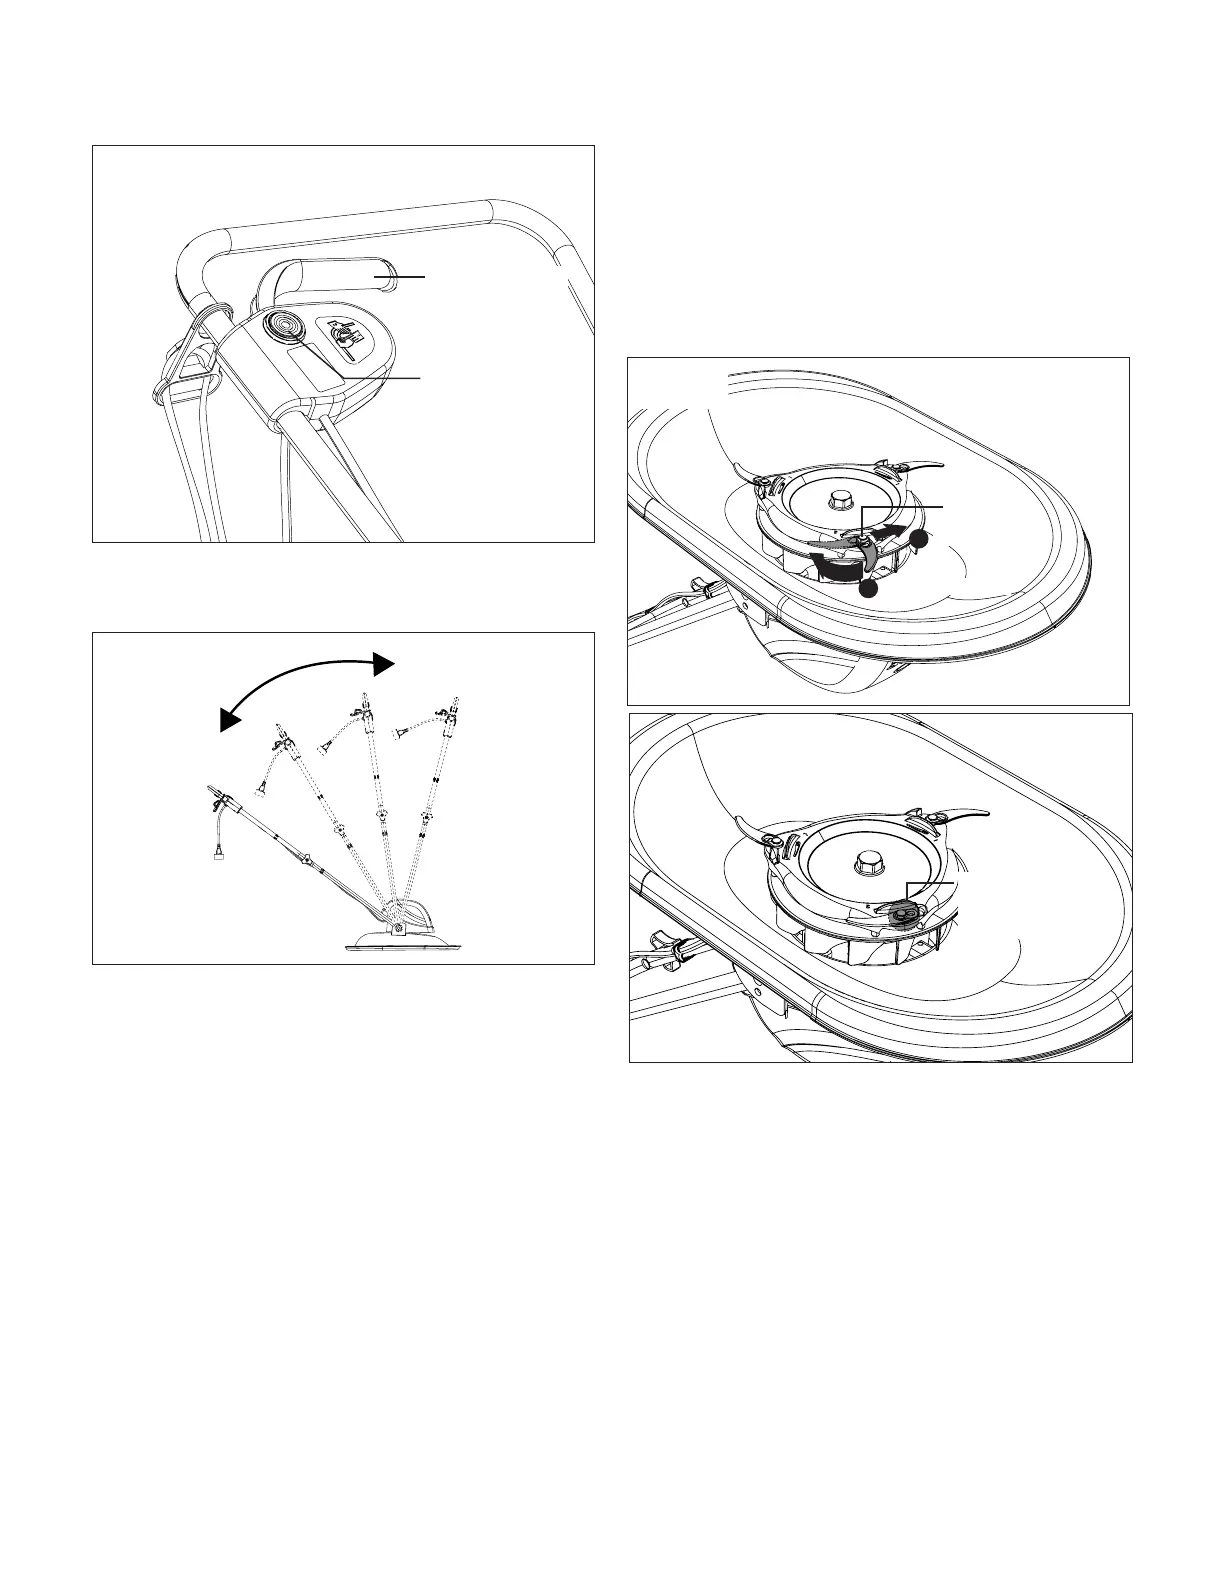
5. Let the motor get up to speed and start cutting. The
handle frame can rotate freely above the cutter to enhance
the maneuverability (Fig. 7).
6. To stop the hover blade grass cutter, release the switch
bar lever (Fig. 6).
Adjusting Cutting Height
This electric hover blade grass cutter is equipped with two
cutting height options of 0.4 in. and 0.8 in. (1 cm and 2 cm),
which is achieved by assembling the blades on dierent
locations of the blade hinges. If the blades are assembled
on the lower ends of the blade hinges, it will provide 0.8 inch
(2 cm) cutting reduction. If the blades are assembled on the
upper ends of the blade hinges, it will provide 0.4 inch (1 cm)
cutting reduction of the height of the grass (Fig. 11).
mWARNING! Always handle the blades with care – sharp
edges could cause injury. USE HEAVY-DUTY GLOVES.
1. Switch o and unplug the unit, wait until the blades and
the blade hub come to a complete stop.
2. The blades come preassembled on the lower hinge
setting. To remove the cutting blade, use one hand to
secure the blade hub, and use your other hand to rotate
the blade clockwise rst, and push it forward until the
blade hinge clicks into the bigger hole on the blade. Then
the blade can be removed from the blade hinge
(Figs. 8 to 9).
NOTE: Make a note of which direction the blades are facing
to ensure the new blades are reinstalled and realigned in the
proper orientation (as shown). Refer to embossing on blade
hub to ensure proper alignment (Fig. 10).
Fig. 6
Switch bar lever
Safety lock button
Fig. 7
Fig. 8
Blade hinge
1
Turn clockwise
2
Push forward
Fig. 9
Blade hinge is in
the large hole on
the blade