STEP 5
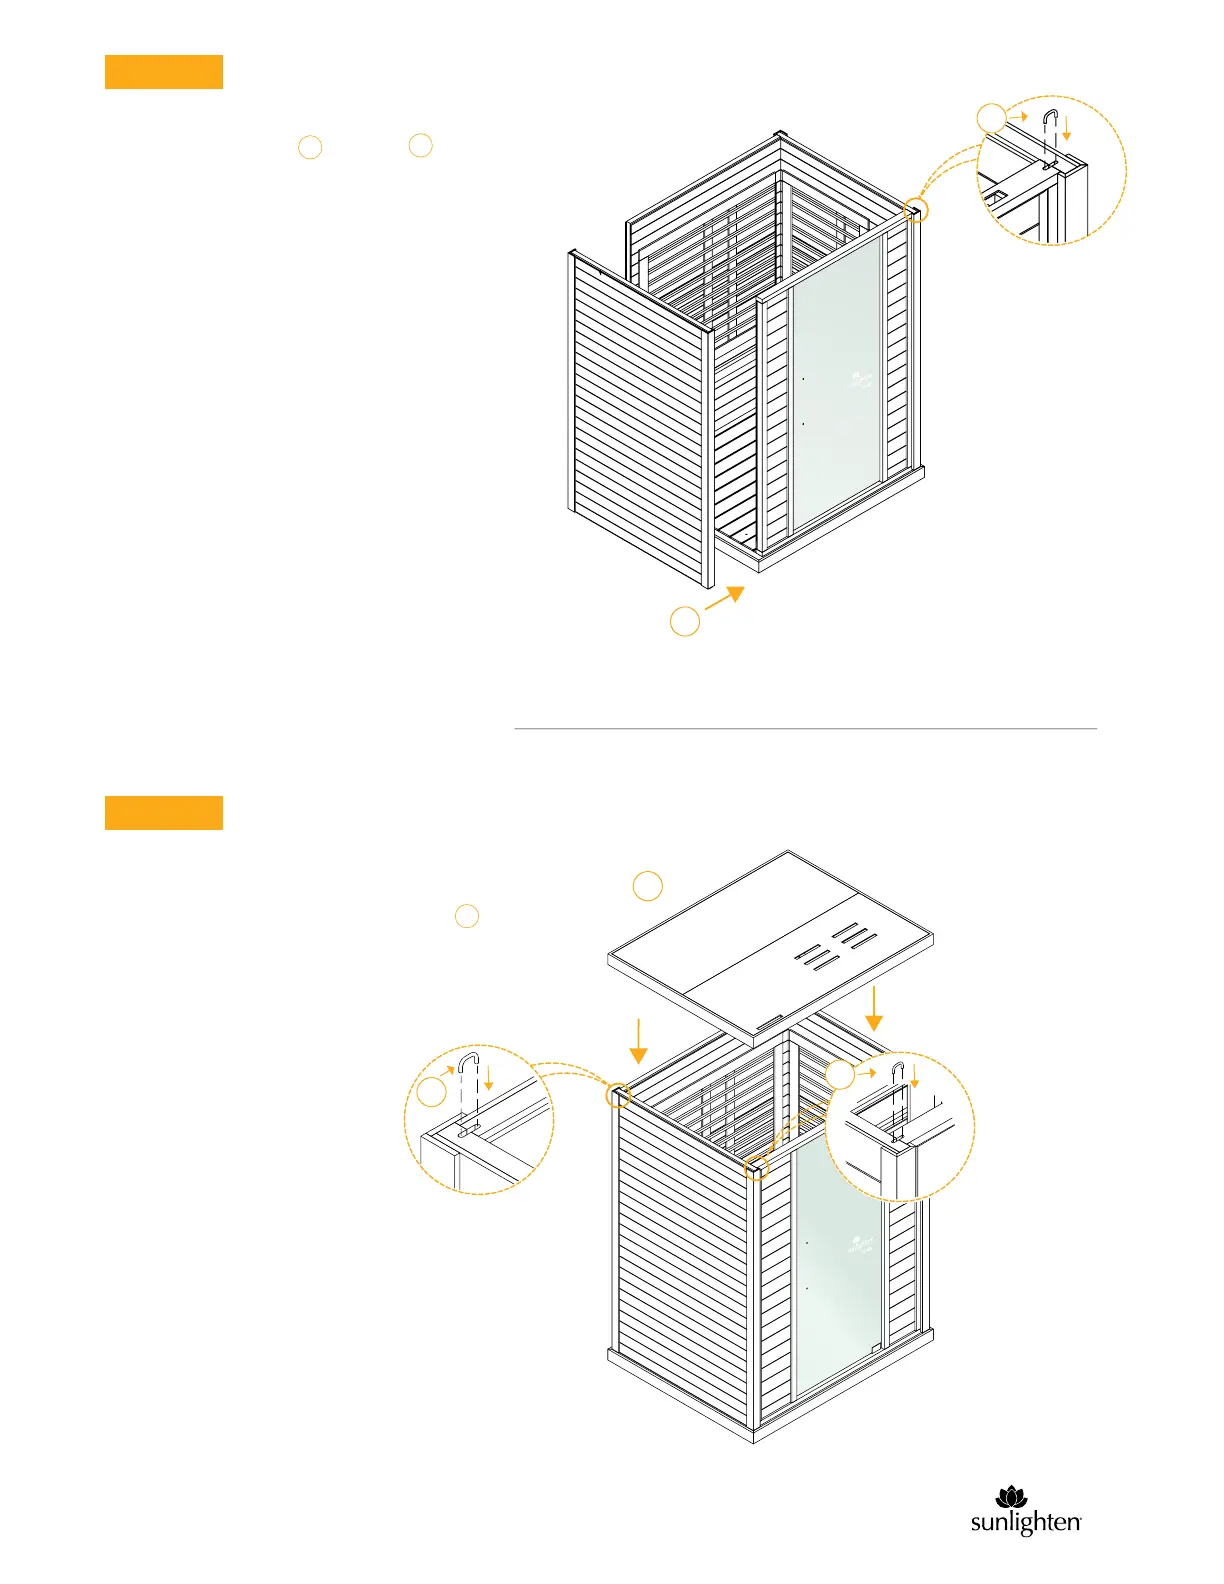
Once all the U-clips have been inserted in the
corners, the next step will be to place the roof
on top. Make sure the side with the main power
cord receptacle faces the back.
After securing the U-clip , the left wall will be
the last to be inserted. Make sure it is flush and no
gaps are showing in the corners.
NOTE: If you ever have trouble getting a U-clip to
slide in, this can be resolved by tapping it with a
hammer.
STEP 6
3
I
3
3
3
D
I
D
4
sunlighten.com/gb-en
 Loading...