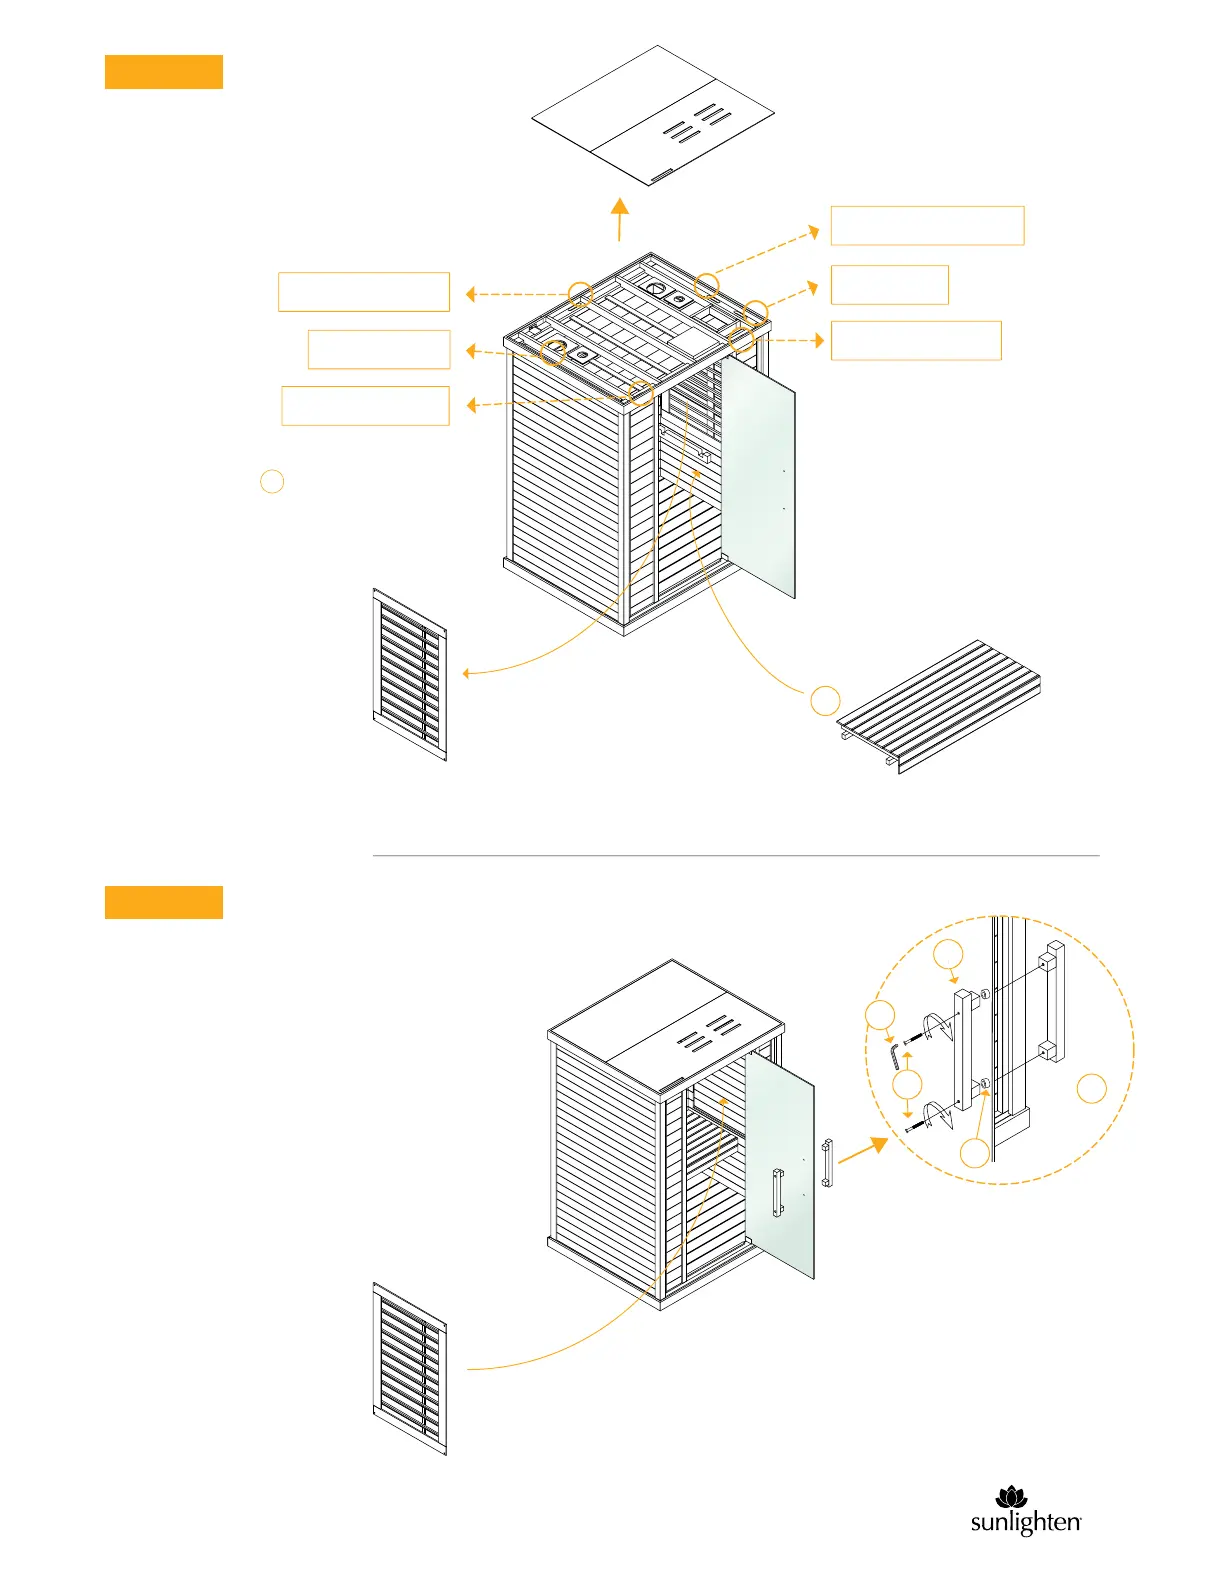
STEP 7
Please make all connections on roof of sauna as illustrated.
STEP 8
Befor
e the bench is placed, make
sure the heater frames are taken out to
allow the bench to be placed on its
support.
Left Wall Heaters
Full Spectrum Heater
Back Heater/Speakers
Right Wall/ Floor Heaters
Control Panel
Full Spectrum Heater
J
heater frame
heater frame
C
B
1
12
J
11
With the bench installed, the heater panel
frames can be inserted back into their
respectable walls.
The door handles come with the hardware
and can easily be screwed right in.
A second person should hold the handle
while the other screws the bolts in with the
Allen wrench. The dust cover should also be
replaced.
5
sunlighten.com/gb-en
 Loading...