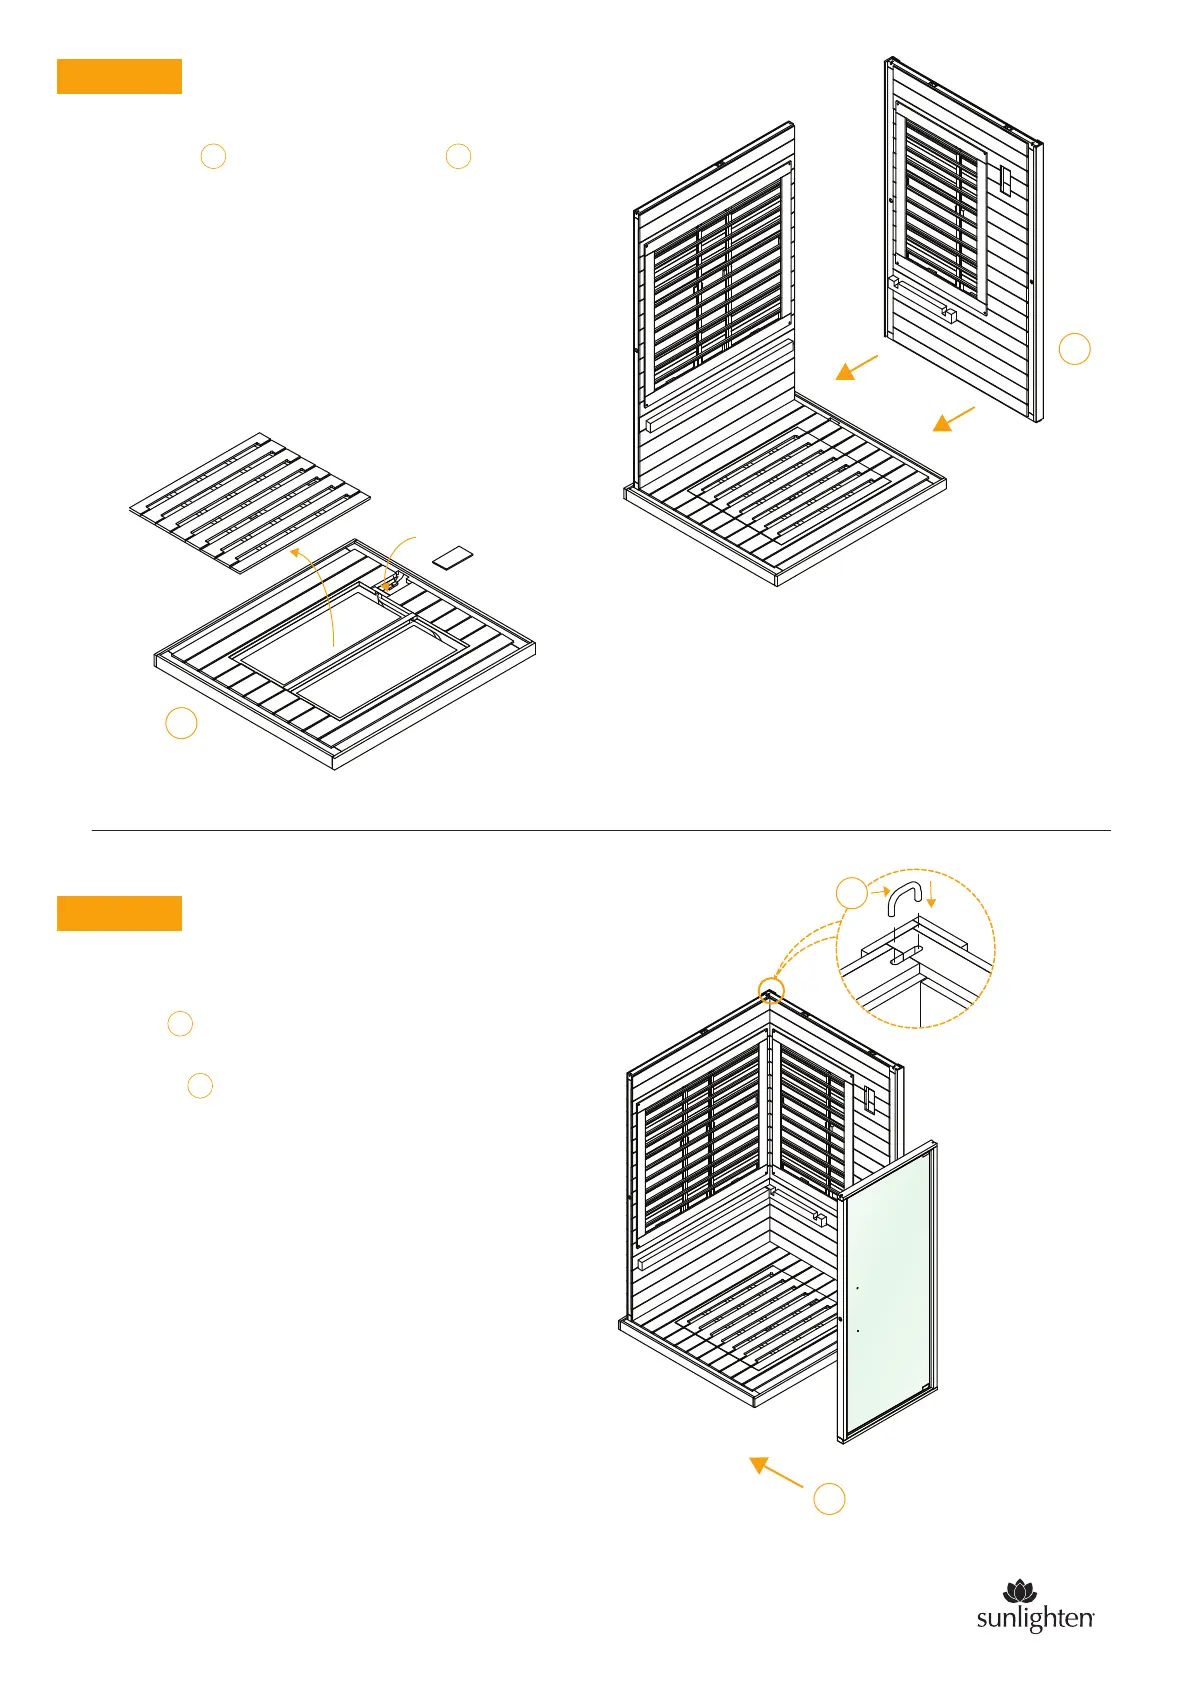
STEP 3
STEP 4
•
Place right wall on the right side of floor panel .
This wall panel should sit flush once properly seated.
•
Make sure no gaps are visible in the corner of the two
walls as you insert it. It should be inserted flush.
NOTE: The right wall of the sauna includes wire
connections underneath which will lead into
the floor panel (see illustration 3.2 below).
I E
3.2
Connect floor
heaters
•
If you have not yet done so, the floor heaters
will need to be connected to the right wall wires.
The diagram to the left shows where the connection is made.
•
You will need to remove the floor grate and
a small hatch covering the harness.
3
•
As you insert each wall segment, you will insert
the U-clips in the pre-drilled holes in the corner.
This will keep the walls sealed together.
•
The front wall will be inserted next. Be careful
of the glass door & panel as you insert the wall.
J
3
I
E
J
1
sunlighten.com.au
3
sunlighten.com.au

 Loading...