Do you have a question about the Sunny SF-RW5856 and is the answer not in the manual?
Consult physician before starting exercise. Be aware of body's signals and stop if experiencing adverse symptoms.
Keep children/pets away. Use on flat surface with clearance. Ensure parts are tight and use equipment as indicated.
Wear suitable clothing, keep hands clear of moving parts. Note weight capacity and home-use only limitations.
Provide model, product name, and part number for support. Contact email and phone number provided.
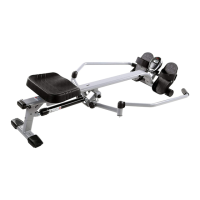
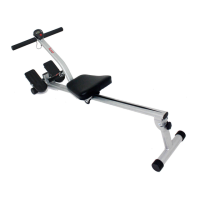
Connect Front Stabilizer to Main Frame using 2 Bolts (No. 69) and 2 Flat Washers (No. 74).
Attach Pedals (No. 30L/R) to Main Frame using Bolt (No. 60) and secure with nuts and washers.
Insert Seat (No. 32) into Sliding Rail (No. 3) and attach Rail to Rear Support (No. 5).
Connect Trunk Wire (No. 41) to Sensor Wire (No. 42) and attach Sliding Rail to Main Frame.
Remove Computer (No. 40), disconnect wires, install batteries, and reconnect wires.
Align computer buckles with frame slots, connect trunk wire, and push computer into position.
Use Tension Control Knob (No. 17) to increase or decrease resistance levels 1-8.
Lift Rear Support (No. 5) to use transportation wheels on Front Stabilizer (No. 2) for moving.
Rotate Foot Levelers (No. 35) clockwise to level the rower, then tighten counter-clockwise.
Pedal straps are adjustable and can be personalized to fit user's foot size.
Replace batteries by removing computer, disconnecting wires, installing new batteries, and reconnecting.
Pull pin (No. 54), disassemble knob (No. 24), fold rail (No. 3) to vertical, reinsert pin, tighten knob.
Caution: Head may touch Rear Support (No. 5). Seat (No. 32) will glide down when folding.
Details the MODE, SET, and RESET keys for console operation and mode selection.
Explains SCAN, TIME, COUNT, TOTAL COUNT, CAL, DIST, RPM functions and their display modes.
Computer powers off after 4 minutes of inactivity; reactivates with motion or key press.
Lists SCAN rate, TIME, COUNT, RPM, CALORIES, TOTAL COUNT ranges, battery type, and operating temperatures.
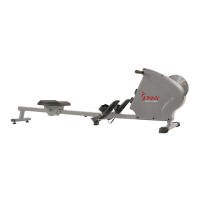
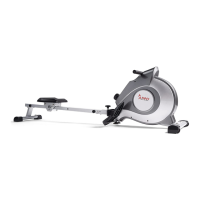
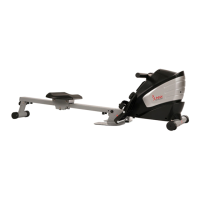
| Resistance Type | Magnetic |
|---|---|
| Resistance Levels | 16 |
| Display Metrics | Time, Count, Calories, Total Count, Scan |
| Seat Type | Padded |
| Transport Wheels | Yes |
| Display | LCD |
| Footplates | Adjustable Straps |
| Type | Magnetic Rower |