Do you have a question about the Sunny SF-RW5515 and is the answer not in the manual?
Advises consulting a doctor before starting any exercise program for safety.
Emphasizes stopping exercise if experiencing adverse symptoms like pain or dizziness.
States the equipment is for adult use only and to keep children and pets away.
Details requirements for a solid, flat surface and adequate clearance around the equipment.
Highlights regular tightening of bolts and examination for wear and tear.
Recommends monthly lubrication of moving parts and correct equipment usage.
Advises wearing suitable clothing and avoiding loose items that could get caught.
Specifies maximum weight capacity and notes non-therapeutic/commercial use.
Guides on careful lifting/moving and proper storage conditions to prevent corrosion.
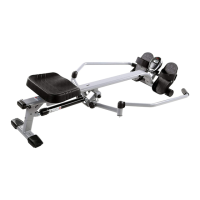
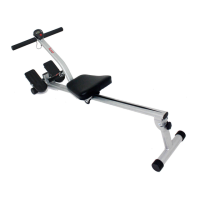
Connects the front stabilizer to the main frame using screws and washers.
Secures the pedals to the bottom and upper holes of the main frame.
Installs the saddle, limit axle, and limit mat onto the sliding rail.
Attaches the sliding rail to the rear support using hardware.
Connects wires, attaches the sliding rail to the main frame, and inserts a pull pin.
Explains how to adjust the pedal strap for a personalized fit.
Describes using transportation wheels for easy machine relocation.
Covers adjusting end caps for balance and the tension control knob for resistance.
Provides instructions on how to fold the sliding rail for space-saving storage.
Explains the purpose of the MODE, SET, and RESET buttons on the console.
Details how to use SCAN, TIME, COUNT, CALORIES, and TOTAL COUNT features.
Lists console specifications and notes auto power-off/on functions.
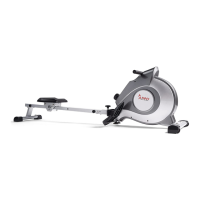
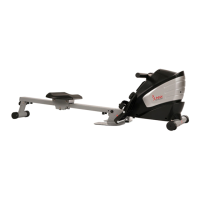
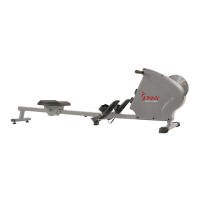
| Type | Magnetic Rowing Machine |
|---|---|
| Resistance Levels | 8 |
| LCD Monitor | Yes |
| Foldable | Yes |
| Max User Weight | 250 lbs |
| Warranty | 3-year structural frame, 180 days other parts and components |