EasyManua.ls Logo

Sunny SF-T7946 User Manual

Sunny SF-T7946
18 pages
To Next Page IconTo Next Page
Page #1 background imageLoading...
Page #1 background image
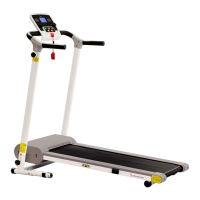
SLIM EASY ASSEMBLY TREADMILL
SF-T7946
USER MANUAL
IMPORTANT! Please retain owners manual for maintenance and adjustment instructions. Your
satisfaction is very important to us, PLEASE DO NOT RETURN UNTIL YOU HAVE
CONTACTED US: support@sunnyhealthfitness.com or 1- 877 - 90SUNNY (877-907-8669).

Questions and Answers:

Sunny SF-T7946 Specifications

General IconGeneral
BrandSunny
ModelSF-T7946
CategoryTreadmill
LanguageEnglish

Summary

Important Safety Information

Consult Your Physician Before Use

Consult a doctor before starting any exercise program to assess health risks and conditions.

Monitor Body Signals During Exercise

Pay attention to your body's signals and stop exercising immediately if you experience pain or discomfort.

Child and Pet Safety

Keep children and pets away from the equipment as it is designed for adult use only.

Operating Environment and Space

Use on a flat, level surface with adequate free space and floor protection.

Hardware Tightness and Inspection

Ensure all hardware is securely tightened and inspect regularly for wear and tear.

Proper Equipment Use and Maintenance

Use the equipment as indicated and discontinue use if defective components are found.

Appropriate Attire

Wear suitable clothing and avoid loose items that could become entangled in the equipment.

Preventing Entanglement

Do not place fingers or objects into the moving parts of the equipment.

Weight Capacity and Suitability

Observe the maximum weight capacity of 220 pounds (100 KG) and note it's not for therapeutic use.

Lifting and Storage Guidelines

Proper lifting is required; store in cool, dry conditions to prevent damage.

Home Use Restriction

This equipment is designed for indoor home use only, not for commercial purposes.

Pre-Use Lubrication

The running belt must be lubricated before the first use; refer to Page 7 for instructions.

Exploded Diagram and Parts

Exploded Diagram

Visual representation of all treadmill components with numbered parts.

Assembly Contents Overview

Lists the parts included in the carton for treadmill assembly.

Parts List Details

A comprehensive list of all treadmill parts with descriptions, specifications, and quantities.

Hardware Package Contents

Details the hardware components provided in the package for assembly.

Ordering Replacement Parts

Instructions for ordering replacement parts, requiring model, product name, and part number.

Assembly Instructions

Step 1: Prepare the Main Frame

Open the carton, remove contents, and place the main frame on a level workspace.

Step 2: Attach Upright Tubes with Knobs

Insert and securely screw rotary knobs into the left and right upright tubes.

Step 3: Install Handlebars

Attach the left and right handlebars to the treadmill frame in a horizontal position.

Step 4: Complete Final Assembly

Insert the tablet bracket front cover and safety key to finalize assembly.

Lubricating the Treadmill

Importance of Lubrication

Lubricating the running belt and board is essential for treadmill lifespan and operation.

Lubrication Schedule

A recommended timetable for lubrication based on user intensity (light, medium, heavy).

Maintenance Notes

Power off the treadmill for maintenance and ensure correct belt tension for optimal performance.

Maintenance Guide

General Cleaning Procedures

Keep the unit clean by dusting components regularly to prolong life and performance.

Adjusting the Running Belt

Instructions on how to adjust the running belt for centering and tension using an Allen wrench.

Folding and Unfolding

Treadmill Folding Procedure

Detailed steps to fold the treadmill by securing handlebars, removing knobs, and lowering the frame.

Treadmill Unfolding Procedure

Detailed steps to unfold the treadmill, including rotating the base frame and securing handlebars.

Moving the Treadmill

Tilting for Movement

Instructions on how to tilt the treadmill to rest on its wheels for easier moving.

Transporting Safely

How to hold and tilt the treadmill to move it using its wheels.

Important Electrical Information

Power Source Requirement

The treadmill requires a 110 Volt power source for proper operation and safety.

Grounding Methods and Safety

Product must be grounded via a properly installed outlet; improper connection risks electric shock.

Electrical Safety Warnings

Warnings against GFCI outlets, generators, removing covers, and moisture exposure.

The Display Console

LCD Window Display Functions

Explains the display of speed, time, distance, and calories on the console.

Console Button Functions

Details the function of each button on the console, including START, STOP, PROGRAM, and MODE.

Main Function Operation

Manual Start-Up

How to start the treadmill manually using the safety key and adjust speed with +/- buttons.

Countdown Modes Operation

How to use time, distance, or calories countdown modes and adjust settings.

Preset Programs Guide

How to select and use preset programs (P1-P12) with automatic speed adjustments.

Sleep Functionality

The system enters a sleep state after 10 minutes of inactivity and can be reactivated.

Running Data and Program Table

Data Display and Setting Ranges

Shows the range for speed, time, distance, and calories display and settings.

Preset Program Speed Settings

A table detailing the speed settings for each time interval across different preset programs.

Exercise Instructions

Getting Started with Exercise

Guidance on starting exercise, including consulting a physician and familiarizing with controls.

Using the Safety Lock

How to use the safety key for starting and stopping the treadmill immediately.

Powering Off the Treadmill

The treadmill can be turned off at any time without risk during or after an exercise.

Exercise Best Practices

Recommendations for slow starts, holding handlebars, and proper safety key usage.

Troubleshooting Guide

Error Code E01: Connection Issue

Solves issues related to loose wires between computer and control boards or abnormal power supply.

Error Code E02: Burst Clash Protection

Addresses bad motor contact or punctured power tubes needing replacement.

Error Code E03: No Sensor Signal

Fixes issues with the speed sensor signal or magnet sensor connection.

Error Code E05: Overload Protection

Resolves issues related to current overload, heavy resistance, or motor damage.

Related product manuals