www.SuperiorFireplaces.US.com
126715-01A 9
IMPORTANT: Vent-free gas log heaters add
moisture to the air. Although this is benecial,
installing firebox in rooms without enough
ventilation air may cause mildew to form from
too much moisture. See Air for Combustion
and Ventilation, page 6.
IMPORTANT: Make sure rebox is level. If re-
box is not level, log set will not work properly.
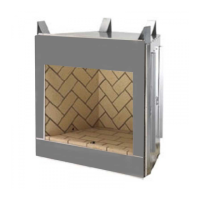
Note: Your rebox is designed to be used in zero
clearance installations. Wall or framing material can
be placed against any exterior surface on the rear,
sides, top or bottom of your rebox, except where
standoff spacers are integrally attached. If standoff
spacers are attached to your rebox, these spac-
ers can be placed directly against wall or framing
materials. Use the dimensions shown for rough
opening to create the easiest installation.
Use dimensions shown for rough openings
to create the easiest installation (see Built-In
Firebox Installation, page 10).
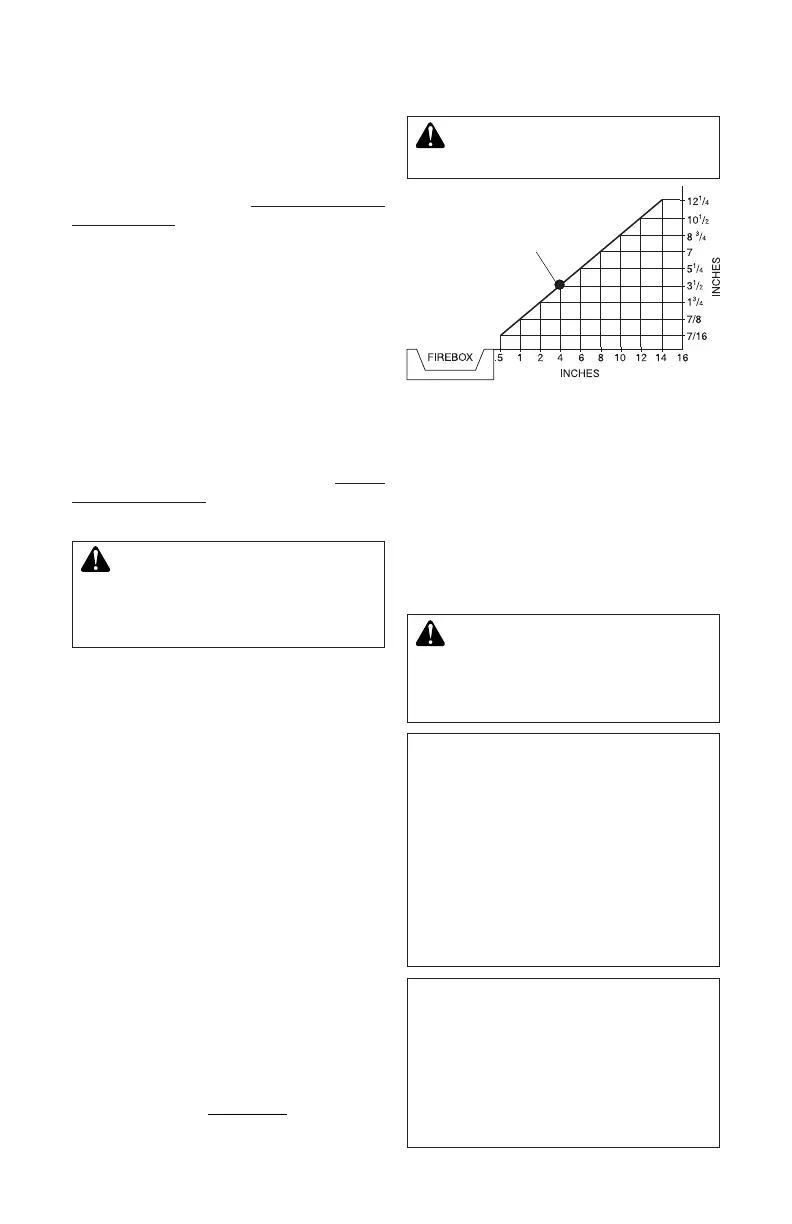
INSTALLATION CLEARANCES
WARNING: Maintain the
minimum clearances. If you can,
provide greater clearances from
oor, ceiling and adjoining wall.
Carefully follow these instructions. This will
ensure safe installation.
Minimum Wall and Ceiling Clearances (see
Figure 5)
A. Clearances from the side of fireplace
cabinet to any combustible material and
wall should follow diagram in Figure 5.
Example: The face of a mantel, bookshelf,
etc. is made of combustible material and
protrudes 3
1
/
2
" from the wall. This com-
bustible material must be 4" from the side
of the replace cabinet (see Figure 5).
B. Clearances from the top of rebox opening
to ceiling should not be less than 42".
C. When rebox is installed on carpeting or
other combustible material, other than
wood ooring, rebox should be installed
on a metal or wood panel extending the
full width and depth of enclosure.
D. Clearances from bottom of rebox to the
oor is 0".
These reboxes can be installed as freestanding
units against a wall with the approved, optional
cabinet mantels (see Accessories, page 17) or as
a built-in unit. Clearances are the same for either
installation method.
INSTALLATION
Continued
Figure 5 - Minimum Clearance for
Combustible to Wall
*Minimum 16" from Side Wall
*
CAUTION: Do not install re-
box directly on carpet or vinyl.
Example
Mantel Clearances for Built-In Installation
If placing custom mantel above built-in rebox,
you must meet the minimum allowable clear-
ance between mantel shelf and top of rebox
opening shown in Figure 6, page 10. These
are the minimum allowable mantel clearances
for a safe installation. Use larger clearances
wherever possible to minimize the heating of
objects and materials placed on the mantel.
CAUTION: Do not allow
the vent-free gas log heater
to touch or extend beyond the
replace screen.
NOTICE: Surface temperatures
of adjacent walls and mantels be-
come hot during operation. Walls
and mantels above the rebox
may become hot to the touch.
If installed properly, these tem-
peratures meet the requirement
of the national product standard.
Follow all minimum clearances
shown in this manual.
NOTICE: If your installation does
not meet the minimum clearances
shown, you must do one of the
following:
• raise the mantel to an accept-
able height
• remove the mantel