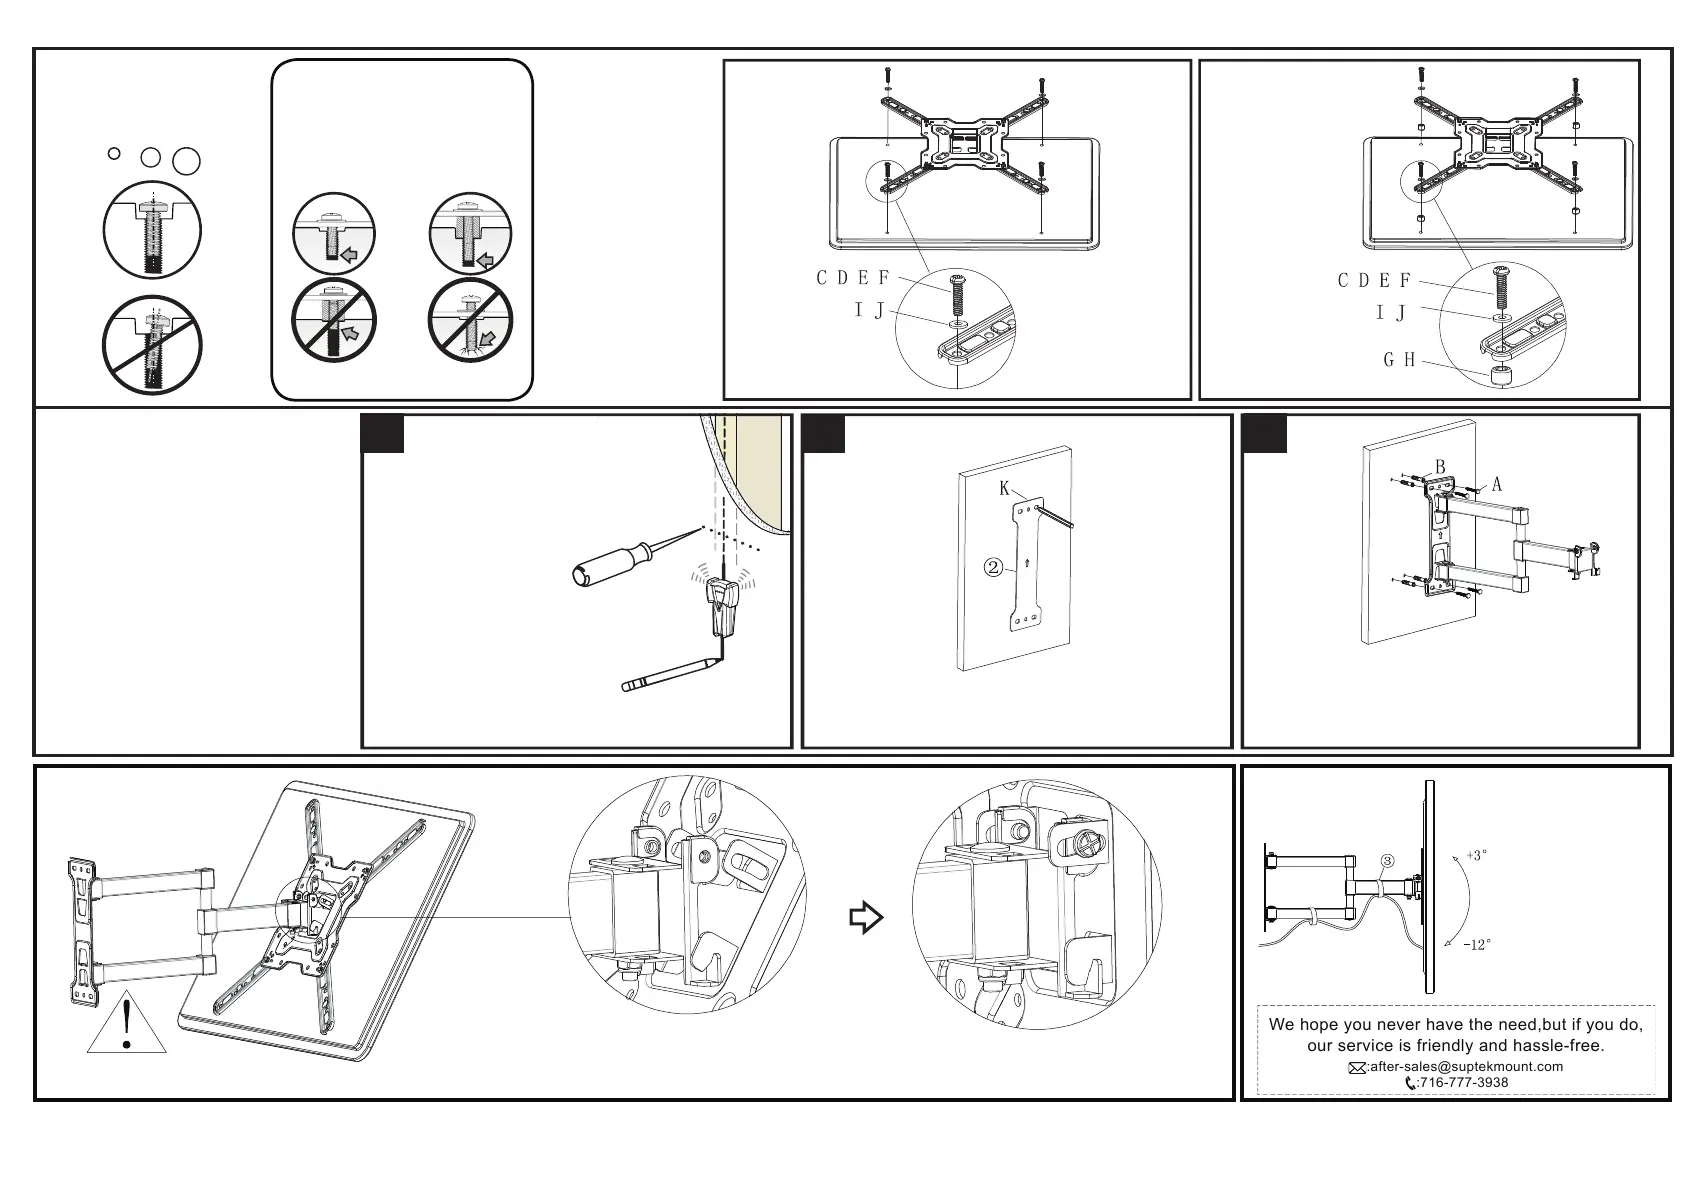
M5
M6
M8
Installation step 3
Use screws below
Warning: Correct screw
and washer usage
- Too short to fix the TV
- Too long to damage the TV
The method of
connecting the TV,
A or B which is
shown in figure 1.
Make sure your screw
is right on this TV
hole to screw into the
TV. Safely tightening
screws can be used
with or without
washers. Make sure
the screws are
tightened before
proceeding to the
next step.
TV back
TV back / Extension washer
Short Long
Installation step 4 wall mounting
Please make sure the wall is safe and
then install as shown.
Use a metal detector to find out if there
are other wires in the wall, and install the
base as far as possible to avoid the TV.
Use a pencil to draw the installed hole on the wall
and use the level to ensure the level.
If it is a wood wall, please use the self-tapping
screw A directly. If it is a cement wall, please
firstly insert the plastic expansion B into the wall,
then tighten with the self-tapping screw A.
Installation step 5
Correct
4-1 4-2 4-3
Need someone to carry the TV
Remove the pre-installed screws.
As shown in the picture, the TV is
hooked into the head frame and
pushed in.Then screw back in the removed screw.
Complete the installation as shown
Use the tape 3
to complete
the routing
We hope you never have the need,but if you do,
our service is friendly and hassle-free.
:716-777-3938
:after-sales@suptekmount.com