592860 4/20 | 80-000224_INST_C
Assembly Instructions
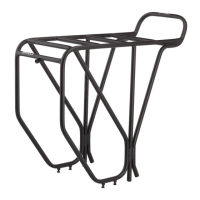
1. Start with a clean workspace, inventory hardware and gather supplies. Position the rack upside down, on your work surface.
The rear of the rack should overhang the edge of the work surface as shown in Figure 1.
2. Install the left and right lower clamps onto the rack. The larger diameter end of the clamp fits over the bottom of the rack —
grease the inside bore of each clamp, and use a mallet to tap each clamp onto the rack. Clamps should be arranged so bolt heads
face away from the wheel when installed. Slots of the clamps should align with the slots in the rack (Figure 2).
3. If you have difficulty installing the clamps, you can use the “penny trick”: (a) thread any of the M5 bolts into the threaded holes
of the clamp (b) insert thin coins partially into the clamp slot (c) use 4mm hex key to slowly tighten the bolts against the coins
until the clamp spreads enough to allow its installation (Figure 3).
4. Lightly grease the lower rack stays and install them into the clamps (Figure 4). Grease the threads of the 12mm cap screws
and use a 4mm hex key to partially thread the screws into the clamps (Figure 5). Don’t tighten them yet.
5. Grease the threads of the M8 set screws and use a 4mm hex key to thread them into the upper barrels approximately 5–6mm.
6. Drop the upper tube blocks into the upper barrels with flat side positioned down towards the M8 set screw (Figure 6).
7. Install upper barrels onto the rack tube as shown in Figure 7.
8. Install the lower tube block through the upper barrel so it sits on top of the rack tube (Figure 8).
9. Figure 9 shows how the tube blocks and sliders should be assembled. Tighten the M8 set screws just enough to keep the
assembly together. Keep loose enough to allow adjustment for installation (Figure 9).
Figure 9
Rack tubing
Lower Clamp
12mm cap screws
WARNING:
Make sure lower
rack stay extends
past both clamps
and the diagonal
rack tube. Improper
installation could
lead to rack failure.
Minimum Insertion
Depth 55mm
Figure 5
Figure 4
Figure 6
Upper tube
block
Upper
barrel
M8 set
screw
Upper
barrels
Figure 7
Figure 8
YES NO
Lower tube block
Rack
tube
Figure 3Figure 2Figure 1