8-4
EMERGENCY SERVICE
84MM6-01E
NOTE:
For more details, please contact an autho-
rized SUZUKI dealer.
Changing Wheels
To change a wheel, use the following pro-
cedure:
1) Clear all passengers and luggage from
the vehicle.
2) Remove the jack (if equipped), tools (if
equipped) and spare wheel from the
vehicle.
3) Loosen, but do not remove the wheel nuts.
4) Jack up the vehicle (follow the jacking
instructions in this section).
5) Remove the wheel nuts and wheel.
6) Before installing the new wheel, clean
any mud or dirt off from the surface of
the wheel and hub with a clean cloth.
Clean the hub carefully; it may be hot
from driving.
7) Install the new wheel and replace the
wheel nuts with their cone shaped end
facing the wheel. Tighten each nut
snugly by hand until the wheel is
securely seated on the hub.
54G116
Tightening torque for wheel nut
85 Nm (8.7 kg-m, 62.7 lb-ft)
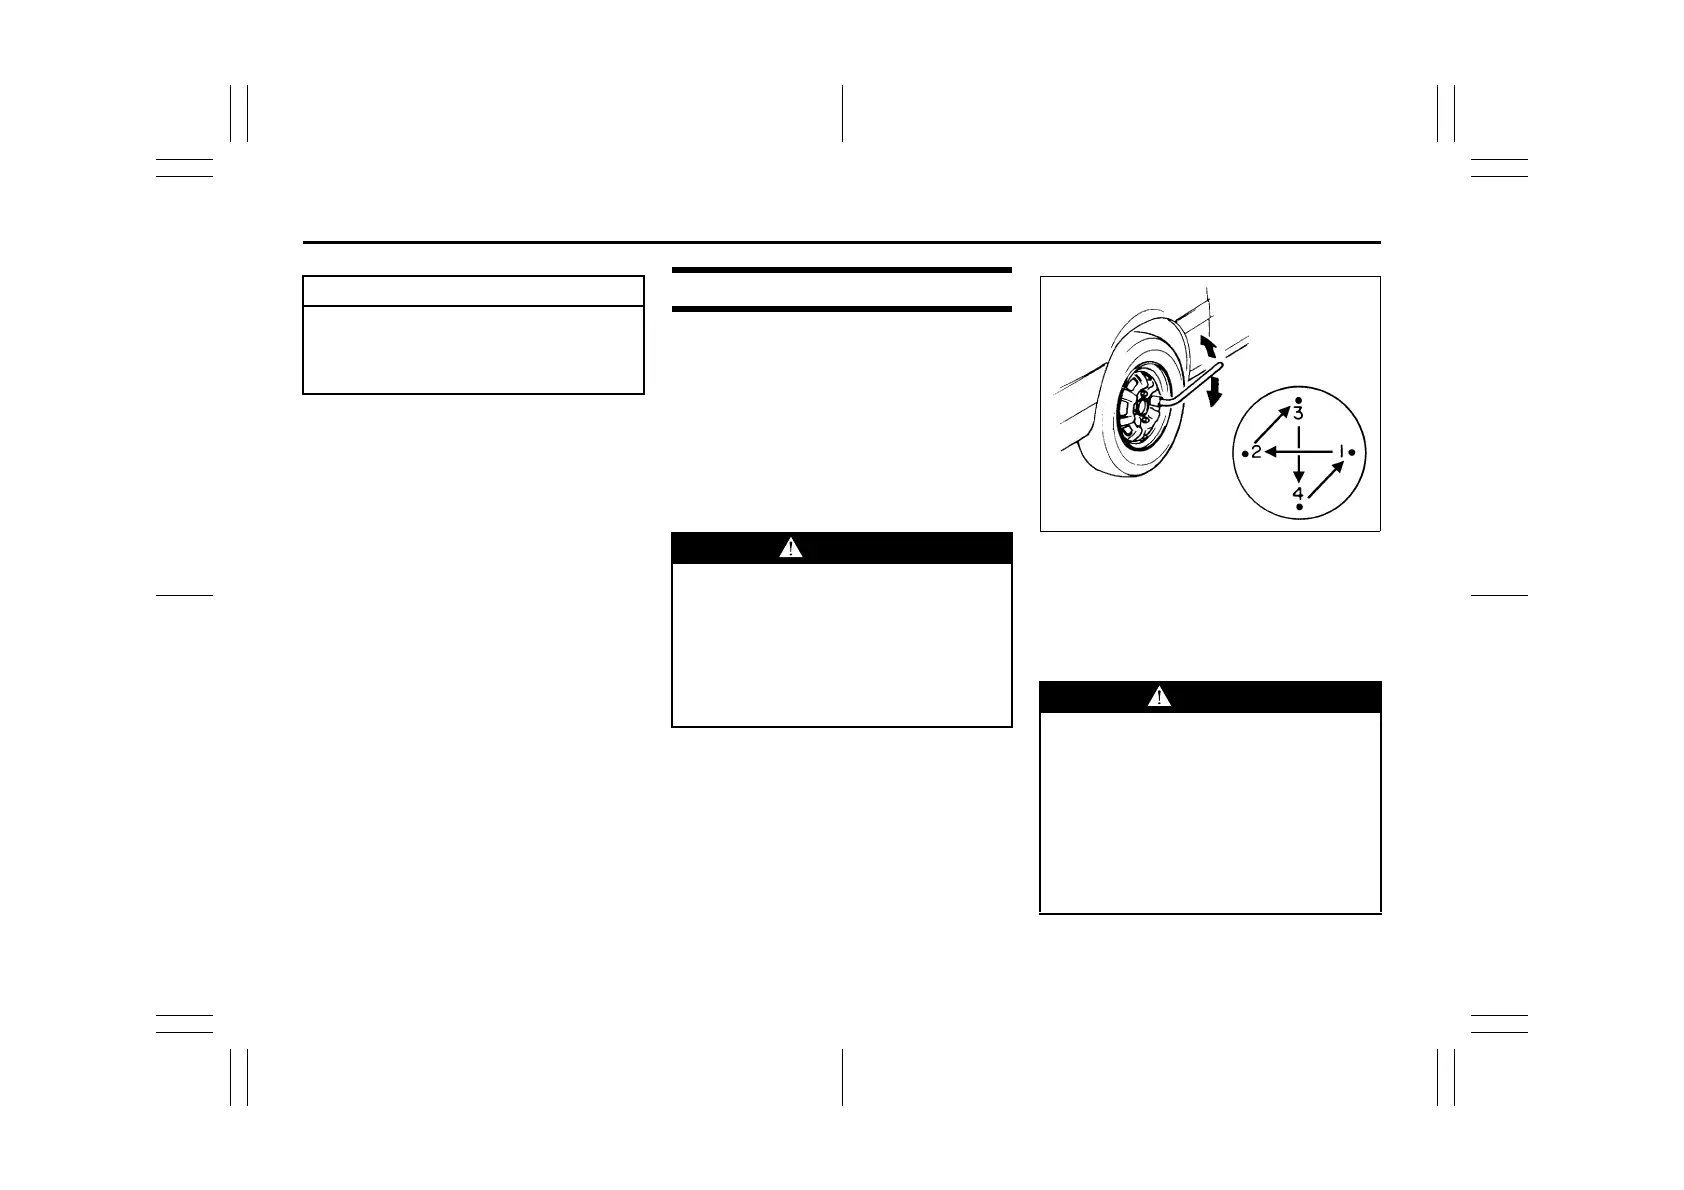
8) Lower the jack and fully tighten the nuts
in a crisscross fashion with a wrench as
shown in the illustration.
NOTICE
Never apply a garage jack to the
exhaust pipe, side under spoiler (if
equipped), engine undercover or rear
torsion beam.
WARNING
• Be sure to shift into “P” (Park) in
CVT, or shift into “R” (Reverse) in
manual transaxle/Auto Gear Shift
when you jack up the vehicle.
• Never jack up the vehicle with the
transaxle in “N” (Neutral). Other-
wise, unstable jack may cause an
accident.
WARNING
Use genuine wheel nuts and tighten
them to the specified torque as soon
as possible after changing wheels.
Incorrect wheel nuts or improperly
tightened wheel nuts may come
loose or fall off, which can result in
an accident. If you do not have a
torque wrench, have the wheel nut
torque checked by an authorized
SUZUKI dealer.