Do you have a question about the Suzuki SV 650 2016 and is the answer not in the manual?
Accessing the motorcycle's interior by removing the seat and preparing for component installation.
Installing two electrical control units, identified as 'Suzuki' and another unit, under the seat.
Performing detailed wiring connections, shown in three sub-steps (3a, 3b, 3c), likely for the installed components.
Securing a mounting bracket using bolts, illustrating the process in two views.
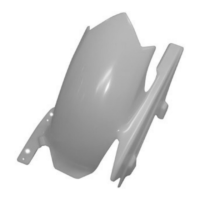
Preparing a component, possibly a license plate holder, and attaching hardware to it.
Attaching brackets to the motorcycle frame, involving multiple bolts and securing points.
Tightening and securing various fasteners, demonstrated through multiple sub-steps (7a-7d).
Completing the fastening process by tightening remaining bolts and securing components.
Applying silicone spray and making electrical connections, shown in four sub-steps (9a-9d).
Managing wiring and reinstalling the motorcycle seat, detailed across several sub-steps.
Disassembling and reassembling the headlight area, including wiring adjustments.
Adjusting and securing components within the headlight assembly.
Completing the headlight wiring and final assembly.
Integrating the main headlight unit with the motorcycle's mounting structure.
Performing final adjustments to the headlight and surrounding components.
| Compression Ratio | 11.2:1 |
|---|---|
| Fuel System | Fuel injection |
| Starter | Electric |
| Transmission | 6-speed |
| Front Suspension | Telescopic, coil spring, oil damped |
| Rear Suspension | Link type, coil spring, oil damped |
| Overall Length | 2, 140 mm (84.3 in) |
| Wheelbase | 1, 445 mm (56.9 in) |
| Ground Clearance | 135 mm (5.3 in) |
| Seat Height | 785 mm (30.9 in) |
| Curb Weight | 197 kg (434 lbs) |
| Engine Type | 4-stroke, liquid-cooled, DOHC |
| Power | 75 hp (56 kW) @ 8, 500 rpm |
| Torque | 47 lb-ft (64 Nm) @ 8, 100 rpm |
| Bore x Stroke | 81.0 mm x 62.6 mm |
| Front Brakes | Dual 290 mm disc |
| Rear Brakes | Single 240 mm disc |
| Front Tire | 120/70ZR17 |
| Rear Tire | 160/60ZR17 |
| Overall Width | 760 mm (29.9 in) |
| Fuel Capacity | 14.5 liters |