5. Camera Software Installation Settings
5.1 Camera Driver Installation
1. Driver Download
Please download the latest driver from the SVBONY official website.
https://www.svbony.com/Support/SoftWare-Driver/
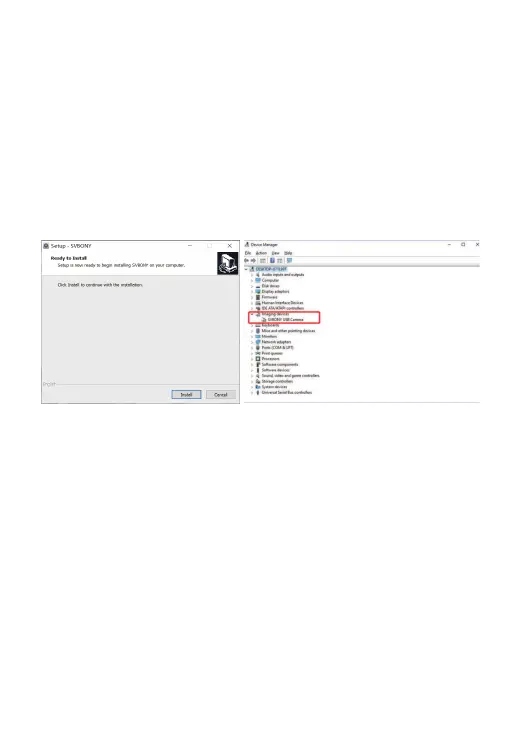
2. Install the Windows Driver
①Double-click the driver installation package, select the language, and enter the
installation page
②Click install and wait for completion
③Check the driver installation. After the installation is complete, connect the
camera to the USB port of the computer via a USB cable, and the camera will
automatically recognize it.
④Check the camera status in the device manager
Note: Please do not connect the camera before installing the driver.
5.2 Image Software Installation
1. Installation and Use of Image Software
①Use the Sharpcap software to download the latest version from the sharpcap
official website.
②Click install, set the installation path (default), and the installation is complete.
③After the installation is complete, perform a preliminary test. Open the
software, find the model of Svbony Camera in the camera drop-down menu and
click connect.
④Set the Image storage path.
⑤The introductory operation guide of sharpcap can be viewed in the "Help"
option of the software. At the same time, the download of PDF format files is
provided under "Documents" on the homepage of sharpcap official website,
which can be downloaded and studied.
03