7 How to check Needle Position and correct.
(1) Check Head gap
1) Check F/R gap from No.3 Needle Bar
2) Change the Needle Bar by No.1 needle bar
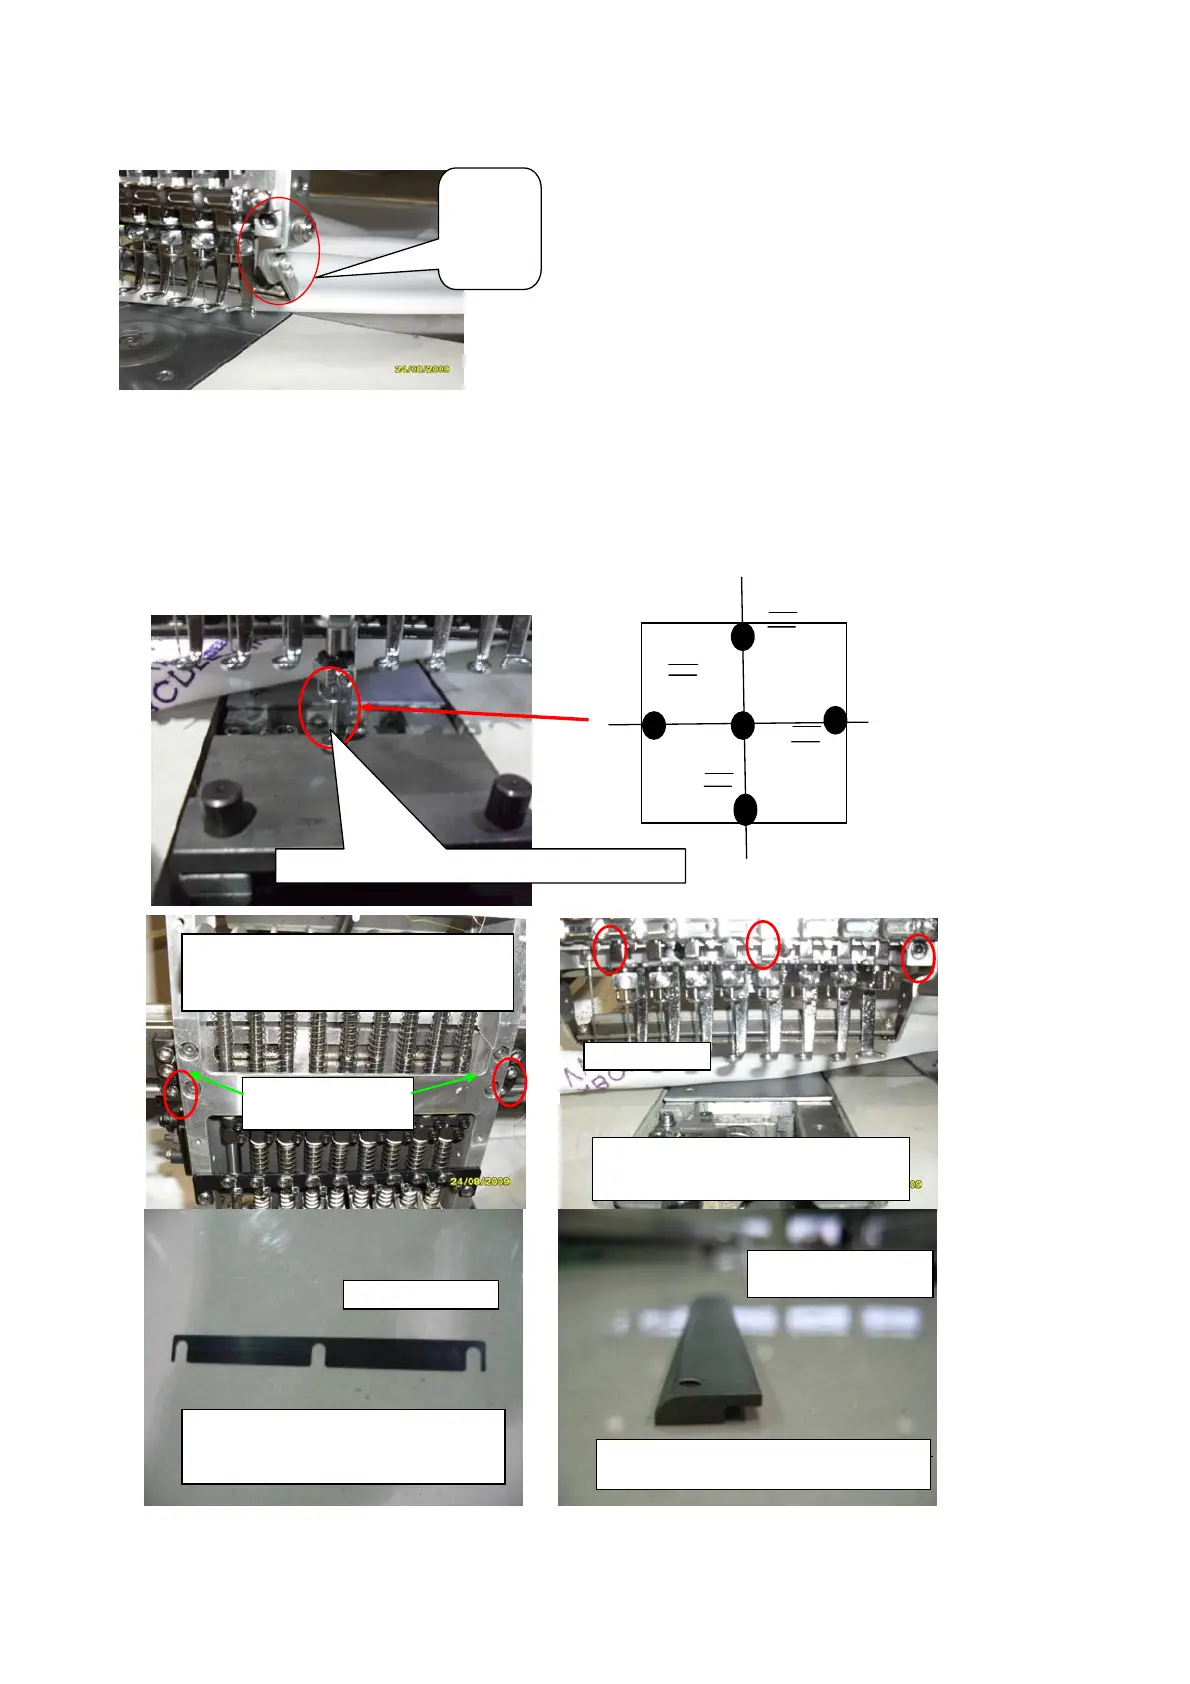
(2) Check Needle Position
1) Set the L/R Needle Position first and then F/R after.(with 3mm T Wrench)
If it is on ③ ,change the Head Rail for small one for adjustiong position.
If it is on ④, insert Gage of B.D.P between Head Rail and Head for adjusting.
2)After adjusting,check needle position between No.1 Needle and Last Needle.
※ If head gap is too much,Cutting Thread and
needle broking may occur. If gap is too
less,resistance problem will be happened( C/C).So
set the machine as minimum gap of it.
3 If F/R gap occurred,with M3 Wrench,set the
gap scope under 0.1mm(minimum)
Open the
M3 Bolt and
set head
gap.
COLOR CHANGE
SHAFT BRACKET
When adjusting ③,④ position, loosening
Head Rail Bolt (3 each)3mm with T-
wrench.
If it is placed ①,②, loosen the COLOR
CHANGESHAFTBRACKETBoltforadjusting
NeedlepositionL/R
.
Head Rail Bolt
The hall size of Zig is length,width each
If the needle is on ④, insert Guage to
between Head Rail and Head
for adjusting.(with 0.1T,0.2T,0.3T)
If the needle is on the ③ ,replace it with thin
Head Rail for adjusting.
Head Rail Guage
Replace 4.5T
4.3 ,4.0 T as base
Page 13 Of 17 (주)SUNSTAR SWF CS Center
 Loading...