This document is an operations manual for the Swift 40V Lithium-Ion Cordless Grass Trimmer, Model E312D.
Function Description:
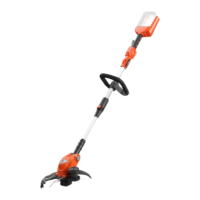
The Swift 40V Lithium-Ion Cordless Grass Trimmer is designed for trimming and cutting lawn edges, small grassy areas, and lawns in private sectors. It is not suitable for trimming bushes, hedges, and shrubs. The device operates on a 40V lithium-ion battery and is intended for use according to the descriptions and safety instructions provided in this manual. Improper use is not covered by the warranty, and the manufacturer rejects liability for such cases. The user is responsible for any injuries to third parties and damage to their property resulting from improper use. The unit should only be operated in the technical condition stipulated and delivered by the manufacturer; arbitrary changes will exclude the manufacturer from liability for injury or damage.
Important Technical Specifications:
- Tool Type: Grass Trimmer
- Model: E312D (Note: The specifications table lists EB310D, while the cover page lists E312D. Assuming E312D is the correct model from the cover.)
- Rated Voltage: 40V
- No Load Speed: 9000 rpm
- Cutting Line Diameter: 1.6mm
- Cutting Swath Diameter: 9.84"
- Weight (w/o battery pack): 2.5kg (5.5lbs)
- Guaranteed Sound Power Level: 96 dB(A)
- Battery Pack: EB20 (2.0Ah)
- Battery Charger: EBC05
Usage Features:
- Safety First: Before using, users must read the operating manual, all safety warnings, and instructions, including site rules and regulations for accident prevention. Failure to comply may result in electric shock, fire, or serious injury.
- Battery Operation: The trimmer is cordless, powered by a 40V lithium-ion battery. Batteries are not fully charged on delivery and must be charged prior to initial operation using the specified charger (EBC05).
- Assembly:
- Guard Installation: The guard must be installed by loosening screws, placing the guard on the motor housing, aligning holes, and tightening screws. The trimmer should never be operated without the guard in position.
- Handlebar Attachment: The handlebar attaches to the foam tube. It can be adjusted to the required position by loosening and securing a locking lever.
- Split Shaft Assembly: The trimmer length can be adjusted to the user's height by inserting the shafts together.
- Blade Attachment: Two replacement blades are inserted onto slots on the underside of the cutting head. Blades are replaced by rotating and pushing inwards to lift off the locating knob, then reversing the process to install new blades firmly.
- Operating Angle Adjustment: Five operating angles can be adjusted on the lawn trimmer, allowing access to problematic and difficult-to-reach areas in the garden. The cutting head should always be parallel to the ground.
- Operating Mode (Clearance Cutting): The cutting head is guided parallel to the ground. When clearance cutting, the trimmer should be guided in a semi-circle in front of the body.
- Battery Insertion/Replacement: The charged battery is pressed into the power tool until it clicks into place. To remove, the release button is pressed, and the battery is pulled out.
- Switching On/Off: To switch on, first press and hold the switch interlock, then pull the On/Off switch. To switch off, release the On/Off switch. A rotating blade caution is given, as the blade continues running softly after being switched off.
- Battery State of Charge: A button allows checking the battery's charge state via an LED indicator. If the LED lights red, the battery needs recharging. If the LED does not light up after pressing the button, the battery is faulty and must be replaced.
- Work Instructions:
- Attach the shoulder belt and pull it over the head.
- Hold the unit with both hands: one on the rear handle, the other on the handlebar.
- Keep the cutting attachment parallel to the ground and make sweeping movements from side to side.
- Walk slowly forwards.
- Use only the tip of the line for cutting, especially along walls, to maintain cutting capacity.
- Cut grass taller than 20cm from top down in small stages to prevent premature wear and engine resistance.
- Only cut dry grass weeds.
- Safety Precautions During Operation:
- Do not switch on if people (especially children) or animals are nearby.
- Interrupt work if people or pets are noticed nearby.
- Keep hands and feet away from the rotating line.
- Keep the trimmer parallel to the lawn when switching on the motor.
- Maintain a safe distance from the rotating line.
- Maintain firm footing and balance, especially on sloping areas.
- Do not work in potentially explosive environments.
- Be careful when walking backward due to tripping risk.
- Use the unit at walking pace only.
- Never leave the unit unattended when interrupting work; keep it in a safe place.
- Do not keep the unit within reach of children.
- Ensure ventilation slots are clean.
- Use only original or authorized spare parts.
- Repairs must be carried out by a qualified technician or service center.
- Battery Charger Safety:
- Keep the charger away from rain or moisture.
- Keep the charger clean.
- Check the charger, cable, and plug before each use. Do not use if damaged.
- Never open the charger; take it to a service center if defective.
- Do not place objects on the charger or on soft surfaces.
- Ensure main voltage matches the charger's rating plate.
- Use only original batteries with the correct voltage.
- Recharge only with the specified charger.
- Avoid damaging the battery with pointed objects or external forces.
Maintenance Features:
- General Maintenance: Before any maintenance or cleaning, remove the battery.
- Cleaning:
- Do not use water or liquid detergents.
- Remove dirt and dust from the housing with a paintbrush and dry cloth.
- Remove grass clippings from the underside of the trimmer.
- Keep ventilation slots clean and free of dust.
- Storage:
- Store the unit in a dry, soft, and frost-free place (10-25°C).
- Store the battery and unit separately.
- Charge the battery before storing the unit in winter.
- Keep the unit and its plastic components away from brake fluids, petrol, petroleum products, penetrating oil, fertilizers, and other garden chemicals, as these can damage or destroy plastic parts.
- Repairs: Check the unit for damage. Repairs may only be carried out by an authorized customer service center.
- Disposal Information:
- Render redundant garden tools unusable by removing the power cord (for mains operated tools) or battery (for battery-operated tools).
- In EU countries, electric power tools must not be thrown into household waste but collected separately and recycled according to European Directive 2012/19/EC.
- Guarantee:
- A 24-month manufacturer's warranty for the grass trimmer and a 12-month warranty for the battery, starting from the purchase date.
- Covers defects attributed to material/production faults or non-performance of warranted characteristics.
- Requires original sales receipt for claims.
- Repairs under guarantee must be carried out by authorized workshops/service centers.
- The guarantee is valid only if the power tool has been used as intended.
- Invalid for defects caused by misuse, abuse, neglect, commercial use, unauthorized repairs, or damage from external effects, foreign objects, substances, or accidents.