Do you have a question about the Swiss Madison Carre SM-WT455 and is the answer not in the manual?
Pre-installation checks including inspection, code observation, and surface preparation.
Advice on reading instructions, using proper tools, and wearing safety accessories.
Lists essential tools and materials required for the toilet installation process.
Inventory of all components included with the wall-hung toilet for installation.
Instructions for safely disconnecting and removing the existing toilet.
Initial placement and marking of the flange and inlet pipe for correct fitting.
Guidance on applying lubricant and marking pipes for size determination.
Instructions for cutting the straight tube and connecting pipe, including chamfering edges.
Steps for connecting pipes and mounting the toilet bowl to the wall.
Instructions for leveling the bowl, attaching it with hardware, and sealing gaps.
Procedure for taking apart the toilet seat cover cap and hinge.
Steps for assembling the toilet seat hinges with screws and fixings.
How to attach the hinges to the toilet bowl using screw fixings.
Aligning hinges for proper seat fitting and placing covers.
Aligning and securely attaching the toilet seat to the hinges.
Instructions for removing and re-installing the toilet seat.
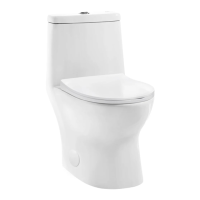
This document provides comprehensive installation instructions and product information for the Swiss Madison Carré Wall-Hung Toilet, available in models SM-WT455 and SM-WT455MB. The manual is designed to guide users through the entire process, from initial preparation to final installation and maintenance, ensuring a well-made and long-lasting product experience.
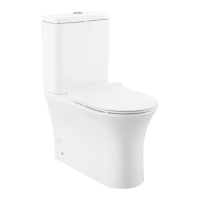
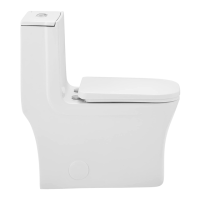
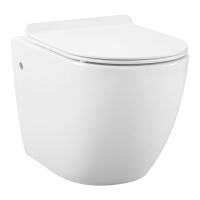
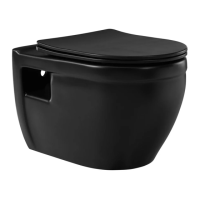
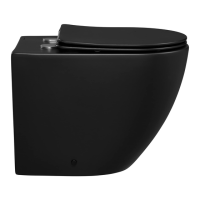
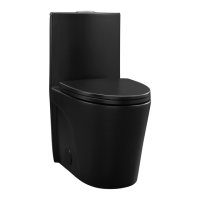
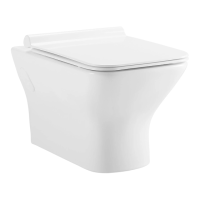
The Swiss Madison Carré Wall-Hung Toilet is a modern and space-saving fixture designed for contemporary bathrooms. Its primary function is to provide a sanitary and efficient waste disposal system, mounted directly to the wall rather than resting on the floor. This wall-hung design offers several advantages, including a sleek aesthetic that enhances the visual appeal of the bathroom, easier floor cleaning underneath the toilet, and the ability to customize the bowl height during installation for personalized comfort. The toilet is engineered for durability and reliable performance, reflecting Swiss Madison's commitment to quality craftsmanship.
Before commencing installation, it is crucial to perform a thorough inspection of the toilet to identify any potential damages that may have occurred during shipping. This initial check ensures that the product is in perfect condition before any work begins. Adherence to all local plumbing and building codes is paramount, as these regulations vary by state and local requirements and are essential for a safe and compliant installation. If replacing an existing toilet, the old fixture must be carefully removed, including closing the water supply valve, flushing the tank completely, and disconnecting the supply line. Any excess water should be removed with a towel or sponge. If the old valve is also being replaced, the main water supply must be shut off first. The old mounting hardware should be removed, and the toilet should be carefully lifted away. It is important to plug the floor waste opening to prevent any gases from escaping during the installation process. Finally, the closet bolts from the flange should be removed, and the base area should be thoroughly cleaned, ensuring a clean and level mounting surface for the new toilet. All dimensions provided in the manual are nominal, emphasizing the importance of measuring the actual toilet prior to installation to ensure proper fit and alignment.
The installation process begins with a dry fit of the flange and inlet pipe. This step involves fully inserting the straight tube into the cistern flushing outlet and connecting the pipe into the discharge outlet. Once these components are in place, lines should be drawn to mark the finished wall location on each pipe, as illustrated in the manual. This marking is critical for accurate cutting in the subsequent step.
Determining the correct pipe size is the next crucial stage. Lubricant should be applied to the rubber washers of both the straight tube and the connecting pipe to facilitate smooth insertion into the ceramic holes of the toilet. Once inserted, lines should again be drawn on the pipes as pictured in the manual. These lines serve as precise guides for cutting the pipes.
Cutting the pipes accurately is essential for a proper fit. Using the marked lines, the straight tube and connecting pipe should be cut as instructed. After cutting, it is imperative to chamfer the cut edges. Chamfering helps to create a smooth, beveled edge, which prevents damage to the rubber seals and ensures a tight, leak-free connection.
Connecting the pipes and mounting the toilet bowl follows. Lubricant should be applied to the joint surface of both the straight tube and the connecting pipe to ensure easy assembly and a secure seal. The length of the connecting bolt needs to be adjusted to be "d+20mm," where "d" represents a specific measurement indicated in the diagrams. This precise adjustment ensures the toilet bowl is securely mounted to the wall. Once the bolts are adjusted, the toilet bowl can be carefully mounted onto the wall.
Leveling and attaching the bowl is the final step in securing the main fixture. The bowl should be attached using the provided washers and bolts. It is critical to ensure that the bowl is perfectly level before tightening the bolts. Once secured and leveled, the included caps should be used to cover the bolts, providing a clean and finished look. Any remaining gaps around the toilet should be filled with cement or sealant to prevent water ingress and provide additional stability.
The manual also includes detailed instructions for toilet seat installation. This process begins with disassembling the cover cap and the hinge components of the toilet seat. Next, the hinges are constructed by inserting a screw and nut into the hole on the hinge, followed by attaching the blind hole screw fixing to the bottom of the screw. These constructed hinges are then attached to the toilet bowl by inserting them, with the blind hole screw fixings, into the designated holes. The hinges should be lightly tightened with a screwdriver at this stage, allowing for later adjustment to achieve a perfect fit.
Adjusting and covering the hinges is crucial for proper seat fitting. Users must ensure that the hinge is positioned all the way forward. Once the hinges are correctly aligned, the covers can be placed onto them. The final step in toilet seat installation involves adjusting and attaching the seat itself. The seat should be aligned to the hinges, and then the hinges should be firmly tightened. The seat is then attached to the secure hinges and adjusted to align perfectly with the bowl.
The usage features of the toilet seat include a convenient removal mechanism for cleaning or replacement. To remove the seat, both inner buttons must be pushed until a "click" is heard, after which the seat can be pulled straight up. For re-installation, the hinge posts should be aligned with the reference marks on the seat, and then pushed down until a "click" is heard, indicating that the seat is securely locked in place.
Maintenance features are implicitly supported by the design and installation process. The wall-hung nature of the toilet simplifies floor cleaning, as there are no obstructions at the base. The ability to easily remove the toilet seat facilitates thorough cleaning of both the seat and the bowl, promoting better hygiene. The use of durable materials and precise installation techniques ensures the longevity of the product, minimizing the need for frequent repairs. Any gaps filled with sealant also contribute to easier cleaning and prevent dirt accumulation.
Swiss Madison provides a one-year limited warranty, underscoring their confidence in the quality of their products. This warranty covers defects in materials or craftsmanship under regular use within the first year of installation. Swiss Madison will provide replacement parts at no charge or, at its discretion, replace any product or part deemed defective. This warranty applies only to the original purchaser and requires proof of purchase for any claims.
The warranty emphasizes that all installations should be conducted by a licensed, professional plumber or contractor. Swiss Madison is not responsible for damages or product failures resulting from improper installation, misuse, or failure to utilize a licensed professional. The warranty is voided if installation recommendations are not followed, if the product is moved from its initial place, if it is modified from its packaged state, or if it has been subjected to improper maintenance, abuse, misuse, excessive use of chemicals, accidents, or other damages.
Swiss Madison clarifies that they make no implication that their products comply with all local building or plumbing codes. It is the consumer's responsibility to determine and ensure local code compliance prior to and during installation. The warranty extends only to the original purchaser and first consumer. Swiss Madison is not responsible for any special, incidental, or consequential damages associated with the installation, replacement, return, or use of the product, including freight costs, labor, travel time, lost profit, home damages, and other contingent liabilities. The warranty is a comprehensive and explicit limit of liability, and all items not disclosed within the warranty are not addressable within Swiss Madison's responsibility.
The manual concludes with a warning about the contents of the order, which may contain sharp or harmful pieces that could pose a hazard to children and adults. Swiss Madison is not responsible for personal damages in this regard. This comprehensive guide ensures that users have all the necessary information for a successful and safe installation, maximizing the benefits of their Swiss Madison Carré Wall-Hung Toilet.
| Bowl Shape | Elongated |
|---|---|
| Water Consumption | 1.28 GPF |
| Material | Vitreous China |
| Color | White |
| Rough-In | 12 inches |
| Seat Height | 16.5 inches |
| ADA Compliant | Yes |
| Bowl Height | 16.5 inches |
| Type | One-Piece Toilet |
| Flush Type | Gravity |
| Warranty | 1 Year |