Do you have a question about the Swiss Madison Concorde SM-1T106 and is the answer not in the manual?
Inspect for damages, check codes, remove old toilet, ensure clean and level surface, and measure dimensions.
Lists safety glasses, putty knife, wrench, tape measure, level, flexible supply tube, hacksaw, and screwdriver.
Includes one-piece toilet, wax ring/gasket, bolts, and side cover caps.
Close supply valve, flush, remove excess water, disconnect supply line, remove old hardware, and clean base.
Measure toilet's rough-in, typically around 12 inches, from wall to closet bolt.
Install closet bolts into flange channel, 6 inches apart and parallel to the wall.
Invert toilet, apply wax ring evenly around waste flange with tapered end facing toilet.
Install toilet on flange, aligning bolts with mounting holes, loosely attach washers and nuts.
Position toilet squarely, press down with rocking motion, alternately tighten nuts to seal to floor.
Insert rubber pieces, place hardware, screw in with washers, add cover caps, and attach seat.
Covers defects in materials or craftsmanship for one year, applies to original purchaser, void if improperly installed.
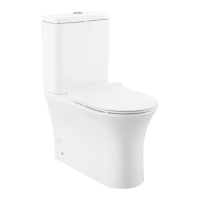
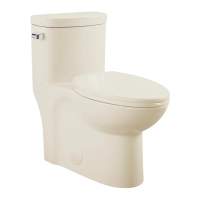
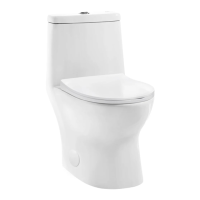
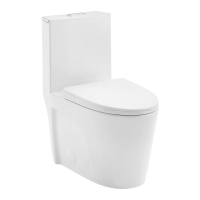
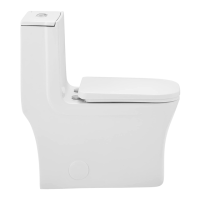
The Swiss Madison Concorde One-Piece Toilet is a modern and elegantly designed fixture intended for residential bathroom installations. This manual provides comprehensive instructions for its proper installation, ensuring optimal performance and longevity. The toilet is designed to be a durable and aesthetically pleasing addition to any bathroom, offering a blend of functionality and contemporary style.
The Concorde One-Piece Toilet serves the primary function of waste disposal in a hygienic and efficient manner. As a one-piece unit, the bowl and tank are integrated into a single seamless design, which not only contributes to its sleek appearance but also simplifies cleaning and maintenance. This design minimizes crevices where dirt and grime can accumulate, promoting a more sanitary bathroom environment. The toilet operates by flushing water from the tank into the bowl, creating a powerful siphonic action that effectively removes waste. The flushing mechanism is engineered for efficiency, aiming to provide a thorough clean with each flush while potentially conserving water. The toilet is designed for standard rough-in measurements, typically around 12 inches, making it compatible with most existing plumbing setups. Its robust construction ensures reliable performance over time, and the internal components are selected for their durability and resistance to wear. The toilet is equipped with a standard water supply connection, allowing for easy integration into a home's existing plumbing system.
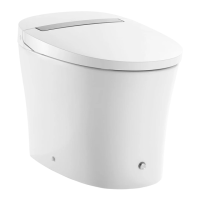
The Concorde One-Piece Toilet is designed with user convenience and comfort in mind. Its one-piece construction offers a smooth, continuous surface that is easy to wipe down, reducing the effort required for daily cleaning. The toilet seat, which is part of the installation, is designed for quick release, further simplifying the cleaning process by allowing users to easily remove the seat for thorough cleaning of both the seat and the ceramic fixture. This quick-release feature is a significant advantage for maintaining hygiene. The toilet's design aims to provide a comfortable seating experience, suitable for a wide range of users. The flushing handle or button, depending on the specific model, is positioned for easy access and operation, ensuring a smooth and reliable flush every time. The toilet's water-efficient design means it uses less water per flush compared to older models, contributing to water conservation and potentially lowering utility bills. The quiet operation of the flushing system is another user-friendly feature, minimizing disruption in the household. The overall footprint of the toilet is designed to fit comfortably in various bathroom sizes, from compact powder rooms to larger master bathrooms, without overwhelming the space. The clean lines and minimalist aesthetic of the Concorde toilet complement a variety of bathroom decors, from modern to transitional styles.
Maintaining the Swiss Madison Concorde One-Piece Toilet is straightforward, thanks to its thoughtful design and durable materials. The integrated one-piece construction is a key maintenance feature, as it eliminates the gap between the tank and bowl found in two-piece toilets. This absence of a seam prevents the accumulation of dust, dirt, and mildew, making the exterior much easier to clean with a simple wipe-down. The smooth, glazed ceramic surface is non-porous and resistant to stains, ensuring that the toilet retains its pristine appearance with regular cleaning. Standard non-abrasive bathroom cleaners are recommended for cleaning the ceramic surfaces, which helps preserve the finish. The quick-release toilet seat is a standout maintenance feature, allowing for effortless removal. This enables users to thoroughly clean around the seat hinges and the top rim of the toilet bowl, areas that are often difficult to reach on fixed seats. By removing the seat, users can ensure a more hygienic cleaning of the entire fixture, preventing the buildup of bacteria and odors. The internal flushing mechanism is designed for reliability and ease of access for any necessary repairs or adjustments. While specific details of internal component maintenance are not explicitly detailed in the provided excerpts, the general design philosophy of modern toilets includes accessible parts for plumbers or skilled DIYers. Regular checks of the water supply line and connections are recommended to prevent leaks. The durable wax ring and mounting hardware ensure a secure and watertight seal to the floor, minimizing the risk of leaks at the base. In case of any issues, the manual emphasizes contacting Swiss Madison customer service, indicating support for troubleshooting and parts replacement. The robust construction materials are chosen to withstand the rigors of daily use and resist common bathroom chemicals, contributing to the toilet's long-term durability and low maintenance requirements.
| Type | One-Piece Toilet |
|---|---|
| Material | Vitreous China |
| Water Consumption | 1.28 GPF |
| Color | White |
| Bowl Shape | Elongated |
| Gallons Per Flush | 1.28 |
| Mounting Type | Floor Mounted |
| Rough-in | 12 inches |
| Trapway Size | 2 inches |
| Rough-In Size | 12 inches |
| Seat Height | 16.5 inches |
| ADA Compliant | Yes |
| WaterSense Certified | Yes |