Do you have a question about the Swiss Madison Hugo SM-ST040 and is the answer not in the manual?
Verify minimum dynamic working water pressure is 0.09MPa or more (4 gal/min) for optimal flushing.
Measure wall to floor drain center (12" rough-in) and install angle valve at proper position.
Assemble mounting bracket with bolts, attach to flange plate, and secure with nuts.
Connect toilet's water inlet to angle valve using the matching hose and tighten.
Open angle valve counterclockwise, check for leaks at thread connection.
Place toilet, fitting sealing flange into the toilet drain outlet.
Insert screws through anchor into mounting bracket holes on both sides and tighten.
Install four 'AA' batteries into the box, plug into toilet's DC socket, and attach box.
Insert three 'AAA' batteries into the sensor and tighten screws.
Mark position, drill two 0.24" holes (2" apart, 1.18" depth), and lock holder in place.
Clean wall, adhere sensor holder vertically using double-sided sticker, then lock in place.
Remove batteries from both units, wait one minute, then install wall sensor batteries.
Clean toilet with a soft, damp cloth; avoid harsh chemicals. Off-seat flushing may activate.
Disconnect power/water, unscrew angle valve nut, remove, clean filter net, re-install.
Replace batteries when indicator flashes (wall sensor) or is red (toilet unit).
Pour approximately 2.1 gallons of water into the bowl to flush.
Unplug batteries, drain water by flushing and from pipe via hose connection.
Avoid throwing burning items, water contact, or improper positioning. Handle with care.
Covers defects in materials/craftsmanship within the first year of installation for original purchaser.
Void if recommendations ignored, product moved, modified, or subjected to misuse/damage.
Not liable for improper installation, local code non-compliance, or consequential damages.
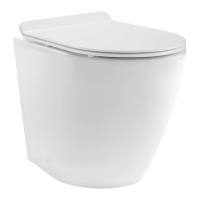
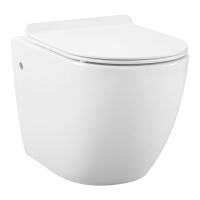
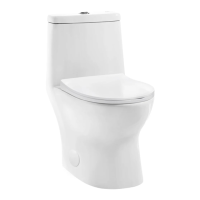
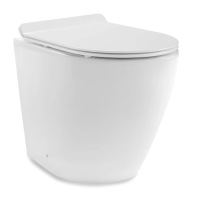
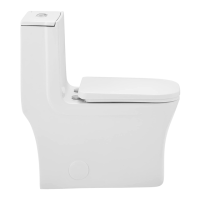
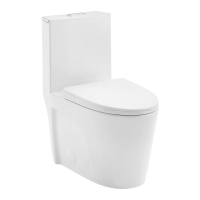
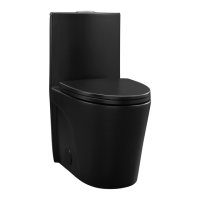
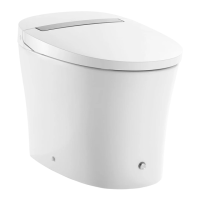
This document provides installation instructions and usage information for a Touchless Tankless Toilet, designed for modern bathrooms. The toilet incorporates advanced touchless technology for flushing, aiming to enhance hygiene and convenience. It is a one-piece ceramic toilet with a soft-close seat, integrating several innovative features to provide a seamless user experience.
The Touchless Tankless Toilet is a sophisticated plumbing fixture that offers multiple methods for flushing, all designed to be hands-free or require minimal physical interaction. Its primary function is to provide efficient waste removal with enhanced hygiene. The toilet operates on a DC:6V power supply, typically from batteries, which powers its touchless flushing mechanisms.
One of the key features is Automatic Flushing. This function allows the toilet to flush automatically as the user walks away from the bowl. The system is designed with intelligent sensing capabilities to differentiate between different usage patterns. For instance, if a user is seated for a short duration (between six seconds and one minute) and then leaves the seat for more than three seconds, the toilet will activate a half flush, conserving water. If the user is seated for a longer period (more than one minute) and then leaves the seat for more than three seconds, the toilet will perform a full flush. This intelligent flushing mechanism optimizes water usage based on actual need.
In addition to automatic flushing, the toilet offers several alternative touchless or low-contact flushing options. The Side Manual Flush allows for a full flush by simply pressing a "FLUSH" button located on the side of the toilet. This provides a traditional backup or alternative for users who prefer a manual option. The Foot-Touch Flushing feature offers another hands-free method, where a user can activate a flush by kicking a dedicated foot-touch button. This is particularly useful for maintaining hygiene by avoiding hand contact. Furthermore, the toilet includes a Wave-to-Flush Function, which allows users to initiate a flush by waving their hand in front of a wall-mounted sensor from a distance of approximately one inch. This provides an additional layer of convenience and hygiene, making it easy to flush without touching any part of the toilet.
The toilet's design also emphasizes comfort and durability. It features a Soft-Close Seat, which prevents the seat from slamming shut, reducing noise and potential damage to the toilet and seat. This mechanism ensures a gentle and quiet closing action, contributing to a more pleasant bathroom environment.
The Touchless Tankless Toilet is designed for ease of use and aims to provide a hygienic and convenient experience for all users.
The Battery Indicator Light is a crucial feature that keeps users informed about the power status of the toilet. When the battery is low, and a user presses the flush button, this indicator light will flash, signaling that the batteries need to be replaced. This proactive notification helps prevent unexpected interruptions in the toilet's touchless functionality.
For installation, the process involves several steps to ensure proper setup and functionality. After checking water pressure and installing the angle valve, the mounting bracket is assembled and secured to the floor flange. The toilet is then connected to the water supply using a matching hose. Once the toilet is in place, the angle valve is turned on, and the toilet is secured to the mounting bracket. A thin bead of sealant is applied around the toilet base for a clean finish.
The battery installation is a critical step for enabling the touchless features. Four "AA" batteries are installed into the battery box, which is then plugged into the DC socket of the toilet and secured to the bottom of the toilet. When re-installing the battery box cover, users are advised to squeeze the side of the rubber plug to exhaust air and ensure proper sealing. A red indicator light will flash once the batteries are installed correctly.
The Wall Sensor Installation is also detailed, offering two methods: screw fixing for rough walls and adhesive fixing for smooth surfaces like tiles. For screw fixing, users mark and drill holes, insert expansion bolts, and then secure the sensor holder with screws. For adhesive fixing, the sensor holder is adhered to a clean, dry wall using a double-sided adhesive sticker. In both methods, the sensor is then aligned with the holder and rotated counterclockwise to lock it in place.
A crucial step is Matching Module Codes between the battery box and the wall sensor. This involves removing batteries from both units, waiting for one minute, and then reinstalling them. The battery box is connected to the toilet first, followed by the wall sensor batteries within three minutes. This sequence ensures that the codes are automatically matched, activating the sensor flushing. If the sensor module lights up but the toilet does not flush, users are instructed to reset the batteries and rematch the codes.
Maintaining the Touchless Tankless Toilet is straightforward, focusing on simple cleaning and battery replacement to ensure long-term functionality.
For Daily Usage Caution, it is recommended to clean the toilet using only a soft, damp cloth. Harsh chemicals should be avoided to prevent damage to the ceramic and other components. Users are also advised that off-seat flushing may activate during cleaning, which is a normal operation of the touchless system.
Cleaning the Filter is an important maintenance task if the water pressure is normal but the toilet is not flushing correctly. This involves disconnecting the battery and turning off the water supply at the angle valve. The angle valve nut is then unscrewed, and the filter net is removed for cleaning with a brush. After cleaning, the filter and angle valve nut are re-installed, and the angle valve is turned on, followed by connecting the power.
Low Battery Determination & Replacement is clearly outlined for both the wall sensor and the toilet's main battery box. For the wall sensor, if waving over it causes the indicator light to flash quickly five times, it indicates a low battery. Users need to unscrew the back cover, replace the batteries with new "AAA" batteries, and tighten the screws.
For the toilet's main battery box, a low battery is indicated if the battery indicator light on the side of the toilet turns red, and/or the wall sensor slowly flashes 12 times. To replace these batteries, the DC plug of the battery box is unplugged, and the battery box is removed from the bottom of the toilet. The cover is then removed, old batteries are replaced with new ones, and the cover is re-installed. Finally, the DC plug of the battery box is re-inserted into the DC socket of the toilet, and the battery box is stuck back into the bottom of the toilet.
The manual also provides Troubleshooting tips, such as how to flush without water supply (by pouring 2.1 gallons of water into the bowl) and what to do if the toilet is not in use for a long period (over three days). This includes unplugging and removing batteries, draining water from the toilet and pipes, and potentially adding antifreeze to the bowl to prevent freezing.
Warnings are also provided to ensure safe and proper use. These include not throwing burning items into the toilet, using only the provided battery devices, avoiding direct contact with water for electrical components, and not positioning the product on its side or upside down during electrical connections. Users are also warned against installing or using the product in wet or damp locations, and to allow condensation to evaporate if moving the product from a cold to a warm environment. Other warnings include avoiding heavy impact on ceramic, not embedding the toilet base in cement, not standing on the seat or lid, and not using harsh chemicals for cleaning. The soft-close seat should not be pressed heavily, and the toilet is not designed for flushing diapers or sanitary napkins. In case of malfunction, users are advised to stop using the product, unplug the battery box, turn off water supply, and contact customer service. The product should not be used in environments below 32°F, and basic safety precautions should be followed, especially when children are present. The product is not intended for children without adult supervision or for individuals with reduced physical, sensory, or mental capabilities. Measures to increase toilet temperature are recommended to prevent freezing damage.
| Bowl Shape | Elongated |
|---|---|
| Flush System | Dual Flush |
| Rough-In | 12 inches |
| Material | Ceramic |
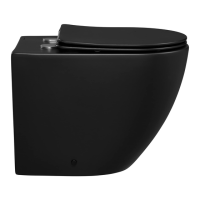
| Color | White |
| Flush Technology | Siphonic |
| Trapway Size | 2 inches |
| Seat Height | 16.5 inches |
| ADA Compliant | Yes |
| Type | One Piece |
| Warranty | 1 Year |
| Gallons Per Flush (GPF) | 1.28 / 0.8 |